
Animate your world with ThreeJS and TweenJS

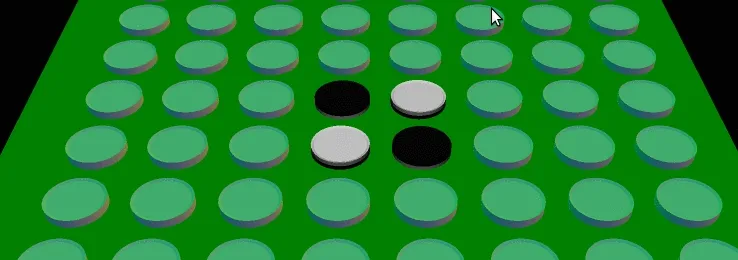
During one of our last hackdays at Marmelab, I discovered ThreeJS through a subject that has become one of my favorite since my integration period… The game of reversi.
I’ve developed a 3D scene offering a realistic and immersive experience of the reversi gameplay, complete with a board, disks, interactions. At some point, I wanted to add animations, and I had to make a choice. Let me explain the pros and cons of programmatic animation compared to manual ones.
ThreeJS, When 3D Meets 3W
As its name suggest, threeJS is a JavaScript library which brings 3D capabilities to the World Wide Web. It acts as a lightweight facade between your code and some great browser features such as WebGL, Canvas, CSS3D, and SVG.
ThreeJS lets you create geometries programmatically, or import them from JSON files. It is the same for animations. Let’s review the different possibilities to program animations.
Manual Mesh Animations, The Use Cases
In the traditionnal world of 3D, it’s a common thing to animate meshes directly in a 3D authoring tool, be it Blender, Maya, or any other blending tool.
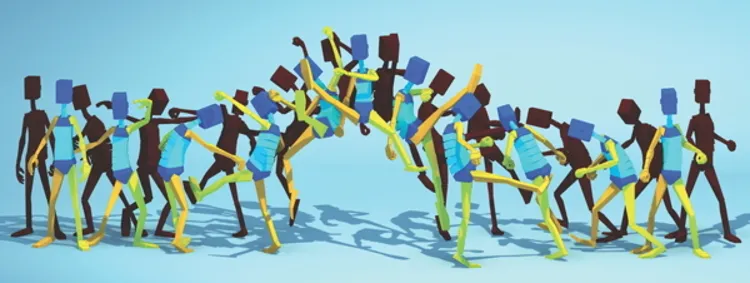
Source: 3dartistonline.com
Although these tools give you infinite possibilities because you can control all keyframes individually, they are also very complex to take over.
Moreover, since all vectors are stored for each frame of the animation, this results in heavy files, which take longer to import into projects.
Here are the pros and cons of the manual blending:
Pros
- Limitless
- Lets you preview in instant
- Lets you develop some new skills
Cons
- Exported files are heavy
- No control at runtime
Declarative Mesh Animations, The Simple Path?
ThreeJS is a fantastic tool that lets you create very complex environments. But in somes cases, animating objects from a blending tool can be overkill and time-consumming. This is especially the case when the goal is to add a simple translating, rotating or scaling animation to a mesh. That’s why I’ve looked for a simpler way to add flipping animation to my board disks.
TweenJS is a JavaScript tweening library published under MIT license, which is part of the createJS suite. It allows to create transitions both on object and CSS properties.
The way TweenJS works is very simple. For each “tick” (triggered update), TweenJS determines a new intermediate value, and assigns it to the wanted property. To achieve this task, TweenJS computes a simple “cross product” from different variables.
First, it takes the time elapsed since the animation “start” trigger. For this elapsed time, it defines a percentage which is used to compute the transitional value of the changed property between start and end.
Assume that you want to change the position of a cube on the “x” axis from 0 to 100 pixels in 10 seconds, and that the “tick” is triggered every 1 second. Therefore, the different computed values for the “x” axis will be subsequently 10px, 20px, 30px and so on.
Of course, this is just one example, in real life it is common to use a ticker which is triggered about every 16.66ms, be 1000/60 for 60fps with requestAnimationFrame.
Here is a small app to show you the concept in a more “comprehensive” way. In this example, you can traverse the time through a simple slider, have an overview of computed properties, and see the final rendering.
codepen.io might track you and we would rather have your consent before loading this.
Another advantage of declarative animations is the possiblity to chain them.
Indeed, each animation is a simple JS object which can be stored, muted and used consecutively or simultaneously to another one.
For example, you can wrap your animation objects into a Promise, and benefit from a full functional animation system.
import { Tween, Easing } from 'tween';
const getDiskFlip = disk => (    new Tween(disk.rotation)    .to({ x: -disk.rotation.x }, 400, Easing.Elastic.InOut)    .onStart(() => {        new Tween(disk.position).to({ z: [40, disk.position.z] }, 400).start();    }));
const flippedDisks = [...];
const diskFlips = flippedDisks.map((disk, index) => (    new Promise((resolve) => {        getDiskFlip(disk)            .delay(50 * index)            .onComplete(resolve)            .start();    })));
Promise.all(diskFlips).then(() => {    // Do what you want when all disk flips ends});
Here are the pros and cons of the declarative blending:
Pros
- Easy to use
- Very lightweight (compared to manual blending files)
- Combine multiple animations
Cons
- Very hard to make complex animations
Conclusion
My experience with ThreeJS was very interesting. Although difficult to dive in at first sight, it was very intuitive and productive after a while.
The possibilities that ThreeJS offer out of the box without any skills in 3D are very significant when we want to create some multi-dimensionnal projects in no time.
Associated to ThreeJS, TweenJS is enough to let me create pleasant motions to my projects. Considering that transitions and animations are no longer an option these days, that’s very important. In other cases, ThreeJS offers the possibility to import manual animations.
The opportunities are endless.. for the pleasure of your eyes, but for the developer experience too ;)
Authors
Full-stack web developer at marmelab, Julien loves to try and use new exotic programming languages. Proficient with Symfony, Node.js, and React, he manages to keep a quiet temper even when the web is on fire.