
Overriding the Create-React-App Webpack Configuration Without Ejecting

Create-React-App is a great tool to bootstrap React apps, but it offers only limited access to the configuration of the production build. While it uses Webpack under the hood, the WebPack configuration is not exposed to the user - unless you decide to eject. And ejecting is often a bad idea because it means that you will no longer benefit from the updates of Create-React-App.
Context: Disabling Component Name Mangling In Production
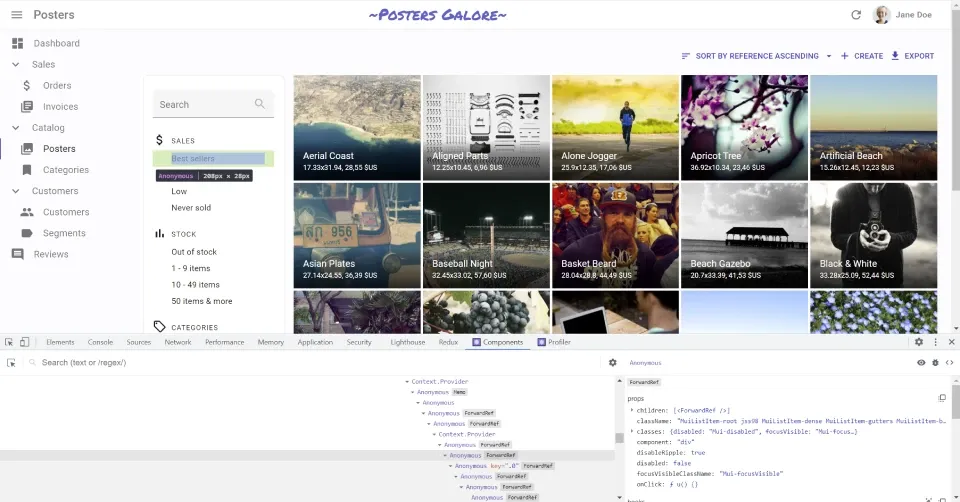
While working on the react-admin demos, I noticed that the React DevTools only showed every component as “Anonymous”. This is because the Webpack config configures the TerserPlugin to mangle component names in production. While it’s a good idea to minimize the bundle size, it is not a good idea in the context of demo apps designed to teach good programming practices.
If you have access to the Webpack configuration, disabling name mangling is just a matter of changing 2 lines of code:
// in webpack.config.js// ... some config ...new TerserPlugin({ terserOptions: { // ... some other config ... keep_classnames: true, keep_fnames: true, // ... some more config ... }, // ... even more config ...});(Thanks Kent C. Dodds for that trick by the way!)
But in create-react-app, we don’t have access to the WebPack configuration.
So… how can we change this configuration without ejecting create-react-app (or worse, forking react-script)?
Alternatives To Eject
There are a few solutions to avoid ejecting create-react-app:
- react-app-rewired: “Override create-react-app WebPack configs without ejecting”. The core maintainer has left, and the README displays a warning about possible breakage. We’ve used it on other projects without issue, but it’s probably time to look for an alternative.
- CRACO: “An easy and comprehensible configuration layer for create-react-app”. The long documentation and the need to install additional plugins made it look a bit too complex for my need.
- rewire: a Node.js monkey-patching library. It is more general-purpose than react-app-rewired and CRACO, but it allows minimal changes. That’s the solution I ended up choosing.
The idea of Rewire came to my knowledge via a StackOverflow answer about disabling minification in production for React apps.
Rewire in Practice
After adding the rewire package to my devDependencies in package.json, I created a build.js file to override the Webpack build:
// in ./build.jsconst rewire = require("rewire");const defaults = rewire("react-scripts/scripts/build.js");const config = defaults.__get__("config");
/** * Do not mangle component names in production, for a better learning experience * @link https://kentcdodds.com/blog/profile-a-react-app-for-performance#disable-function-name-mangling */config.optimization.minimizer[0].options.terserOptions.keep_classnames = true;config.optimization.minimizer[0].options.terserOptions.keep_fnames = true;
It took me some time to figure out which part of the config object to override. The default WebPack configuration can be found in the create-react-app repository, but I found it easier to dump the entire config to the console and search for the terserOptions with less.
Then, I replaced the build script in the package.json to use the new build.js instead of react-script’s build command:
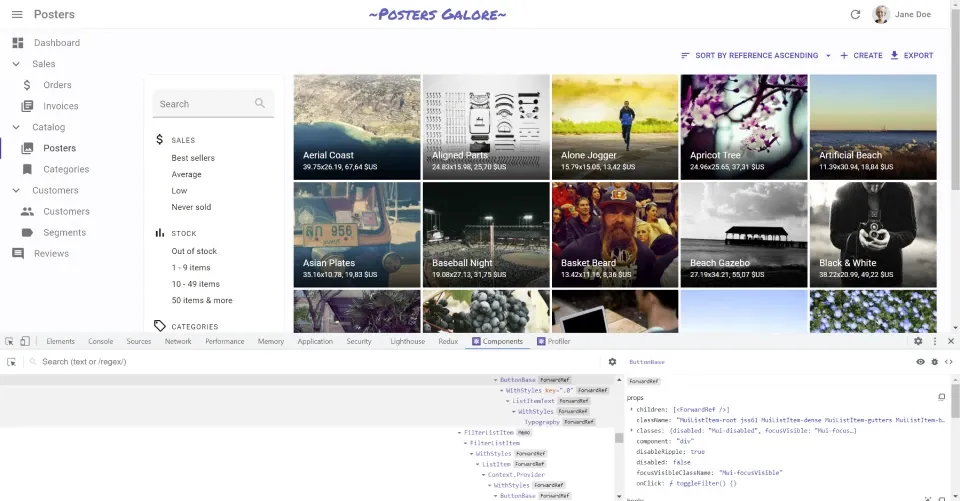
"scripts": { "start": "react-scripts start", "build": "react-scripts build", "build": "node ./build.js", "test": "react-scripts test", "eject": "react-scripts eject"},After that, I launched a new build with yarn build, and the newly built app now displayed component names in the React DevTools.
Bonus: Enabling Profiling in Production
As I knew how to tweak the Webpack configuration, I decided to add the ability to do profiling in production. The React Profiler is a great tool to profile React applications, but it’s only available in development when React enables additional features that slow down the application. Getting profiling data in production gives a more accurate picture of the performance of your app.
Once again, Kent C. Dodds came up with a solution that I just needed to add to my build.js:
// in ./build.js
/** * Do not disable component profiling in production, for a better learning experience * @link https://kentcdodds.com/blog/profile-a-react-app-for-performance#update-the-webpack-config-for-production-profiling */config.resolve.alias["react-dom$"] = "react-dom/profiling";config.resolve.alias["scheduler/tracing"] = "scheduler/tracing-profiling";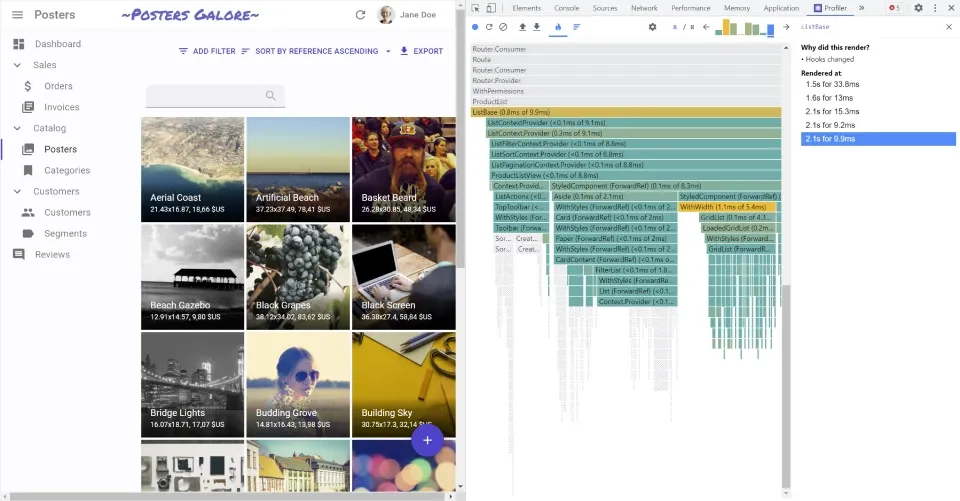
Conclusion
You can test these settings in the react-admin e-commerce demo at https://marmelab.com/react-admin-demo/. Open the DevTools, choose the “components” tab, and explore the React component hierarchy. It’s now much easier to reproduce a feature that you’ve seen in the demo - that, and looking at the source code to understand how it works.
YouTube might track you and we would rather have your consent before loading this video.
Authors
Marmelab founder and CEO, passionate about web technologies, agile, sustainability, leadership, and open-source. Lead developer of react-admin, founder of GreenFrame.io, and regular speaker at tech conferences.