Improving User Experience With A Mouse In A CLI Application

Keyboard only?
In a terminal, you only use your keyboard, so learn the shortcuts.
This sentence was pronounced by one of my teachers during my studies. And indeed since then, I use only my keyboard in a terminal to install packages or run various commands.
So when I was asked during my first week of integration at Marmelab to manage the mouse from a terminal, I wondered if it was possible?
The answer is yes, with the Blessed library and this can be done in just a few lines of code!
Context
Before going further, let me explain in a few lines the problem that confronted me to use the mouse in a terminal.
For my integration at Marmelab, I had to develop a board game called Kuba, with a CLI interface. If you are interested in the rules of the game you can read them here: https://regle.escaleajeux.fr/akiba_rg.pdf. For that exercise, the technology to use was imposed: Node.js.
The first interface of the game looked like this:
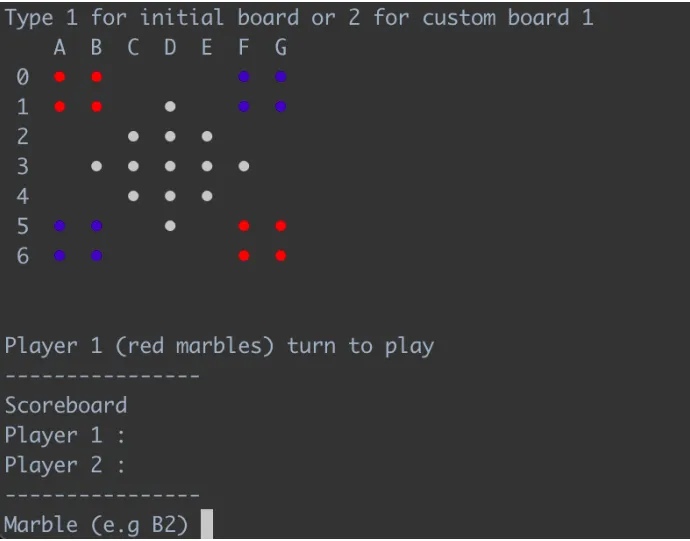
The game board and the marbles were rendered in the terminal using console.log. The color management was done in ANSI, and we asked the player the movement he wanted to make with the Readline Node.js module.
An error system allowed the player to know if their move was legal or not.
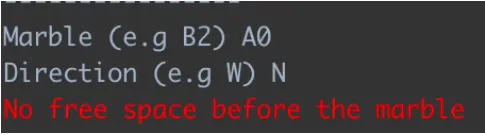
Here the player can’t move to the North, and our error system displays the reason to our player.
But we display the error only after he chooses his move. And our player needs to find his position by reading the board. It may seem simple at first, but imagine with a 30x30 board.
We could improve this user experience for sure. How can we do this? First, by improving the graphics of our application. And that’s what I did, by replacing console.log with blessed.
Blessed
Blessed is a curses-like library with a high level terminal interface API for Node.js.
https://github.com/chjj/blessed
This library can add text, graphics and interactivity to terminal applications. For the technical side, the principle is quite simple: We will create a global screen, in which we can create elements like boxes. These elements behave like DOM elements in a browser. Each of the blessed elements has methods, including mouse and keyboard events for example.
Let’s transform my application to use blessed.
First, I will initiate my screen:
let SCREEN: any;export const initScreenView = (): void => {    SCREEN = blessed.screen({        smartCSR: true,    });
    SCREEN.title = 'Kuba Konsole';    SCREEN.key(['escape', 'q', 'C-c'], function(ch: any, key: any) {        return process.exit(0);    });
    SCREEN.render();};
Rendering The Board
In the screen I just created, I will insert a layout and my game board. This board will be rendered according to the state of the game in the future:
export const renderScreenView = (gameState: GameState) => {    const layout = blessed.box({        top: 'center',        left: 'center',        width: 80,        height: 40,    });
    const board = blessed.box({        top: 'center',        left: 'center',        width: 57, //*8        height: 29, // *4        tags: true,        border: {            type: 'line',        },        style: {            border: {                fg: 'white',            },        },    });
    SCREEN.append(outerBoard);    layout.append(board);
    SCREEN.render();};
I have my first rendering! It’s the first time I draw something in a terminal without using a console.log!
You can notice that the design of blessed elements looks very similar to the CSS.
Rendering Marbles
Next step! I’ll add marbles to the board.
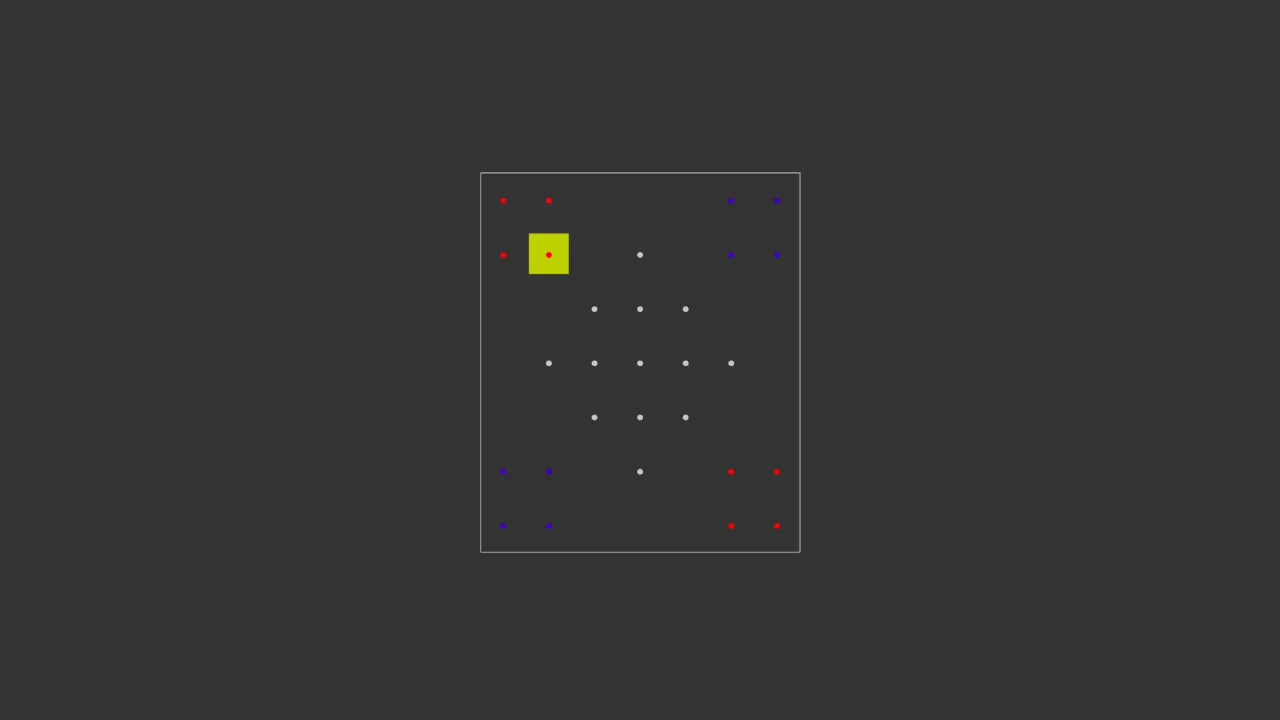
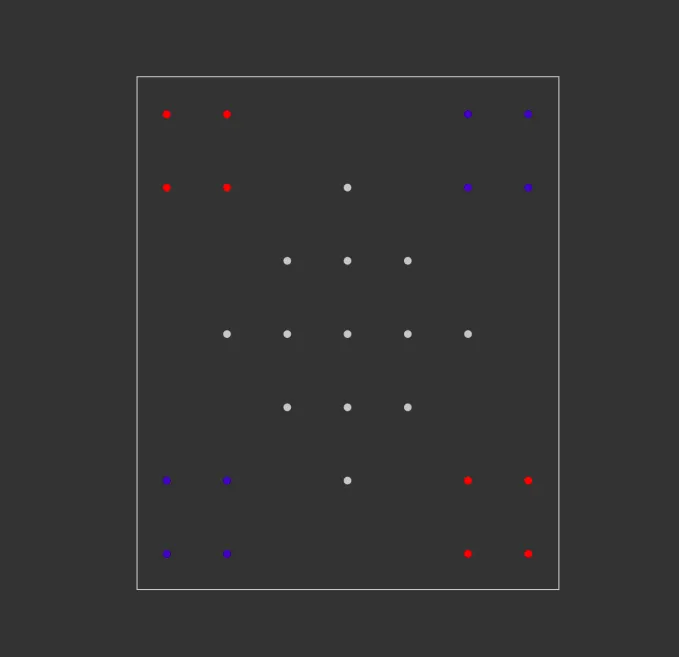
marbles.map((marble) => { const marbleBox = blessed.box({ top: marble.y * 4, left: marble.x * 8, width: 7, height: 3, content: marble.value === 0 ? "" : "{center}\n\u25CF{/center}", tags: true, style: { fg: MARBLE_INT_COLORS[marble.value], bg: gameState.marbleClicked === node ? "yellow" : "", }, }); board.append(marbleBox);});You can see here that I’m adding the marbleBox to the board object and not directly to the SCREEN. This is because the library contains a parent-child system and allows me to place the elements according to the parent.
I also set a different background if the marble is clicked.
Let’s take a look at the result :
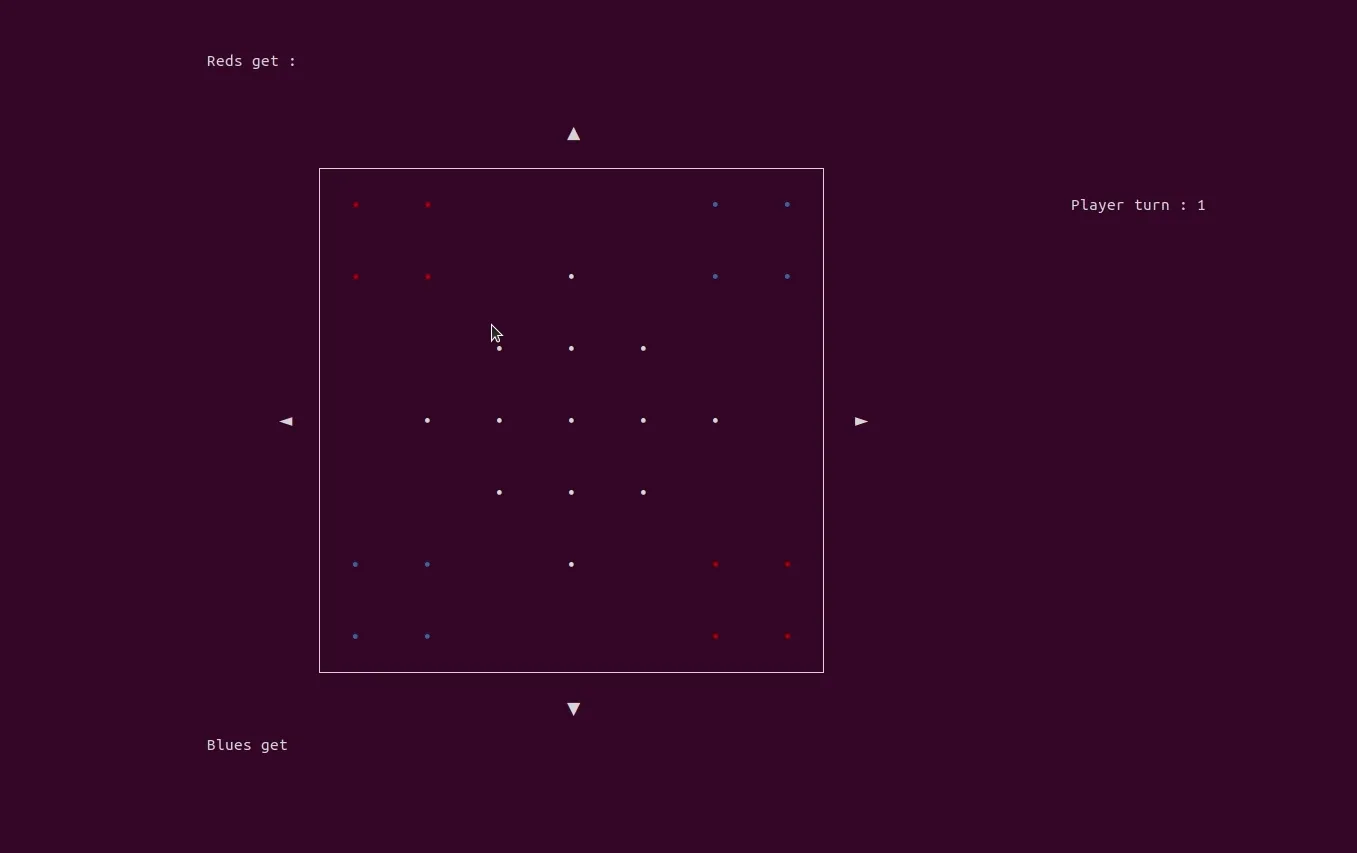
Adding Mouse Interactions
Now comes the interesting part. I want to be able to click on a marble from my terminal!
And it will only take me 4 lines!
marbleBox.on("click", function () { gameState.marbleClicked = node; renderScreenView(gameState);});Remember when I said that I’m going to render the board based on a game state? This is what it was for. When I click on a marble, I change the game state, and I return the board. And with the code from earlier:
bg: gameState.marbleClicked === node ? "yellow" : "",I get a nice result :

From there on, I continued to pimp my game, adding a point system, displaying the direction in which the player can move their marble etc…
Conclusion
With this system, we were able to improve the user experience by allowing our player to move their marbles with the mouse instead of calculating a movement from a coordinate and a direction. This way our player is less likely to make a move that is impossible for them.
Using this library was a very good experience, it was the first time I used it. It is quite easy to use even if the documentation could be better.
Discovering a new way to display elements in a terminal is a very good experience, it opens new possibilities for me.
I’m thinking of using it to make an improved tree command, with the possibility to click directly on the paths or move around with the directional arrows.
Authors
Full-stack web developer at marmelab, Anthony seeks to improve and learn every day. He likes basketball, motorsports and is a big Harry Potter fan