
Rive: Animate Web UIs with State Machines

Rive.app is an online tool that facilitates the creation of animations. What makes it special is that it uses state machines.
One Tool To Rule Them All
I came across Rive.app a few months ago and I was seduced by its simplicity of use and the possibility to use state machines to describe animation steps. I usually use Lottie (an open-source player for Adobe After Effects animations) but I find it a bit limited. And seeing that Rive.app allows me to manage state machines, I decided to give it a try.
Rive has just published an article explaining the differences between Lottie and Rive. The main points are the following:
- Rive allows managing machine-states
- Everything is centralized in a single file
- The file size is smaller
- The implementation in the code is simpler
Rive is both a standalone editor app and a set of player runtimes for most platforms (web, iOs, Android, React.js, Flutter, etc.). If you’re old enough, you can think of Rive as a successor to Flash.
Rive is a paid app (subscription-based) with a generous free tier.
From Design…
I’m not going to explain in detail how to create a design, there is already a tutorial on the Rive.app website that explains very well how to do it.
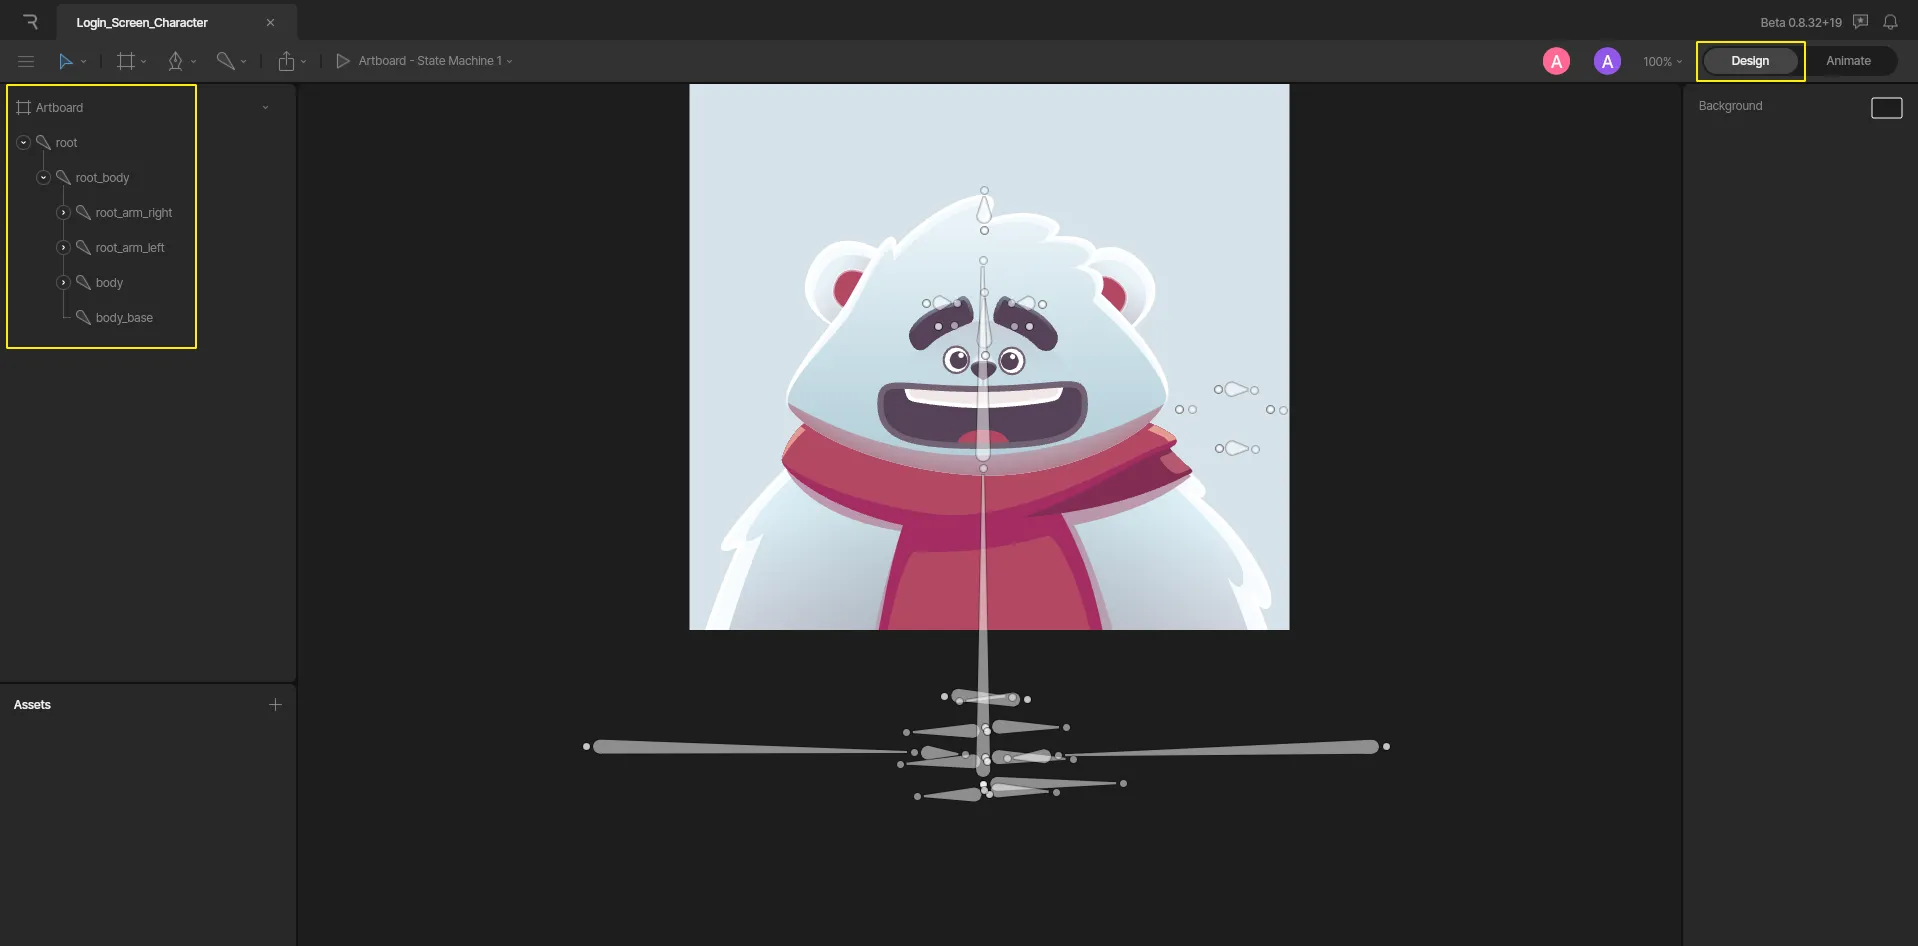
But to keep it simple. The interface is divided into two parts. The first one is the design creation part. You can add objects, shapes, images, animations, etc. By putting all this together, you can get some pretty cool results.
…To Animation
The second part of the interface focuses on animation. This is where the notions of motion design come in. This interface lets me move the elements of my design to different positions for each frame. I can also add transitions between frames. This will create an animation.
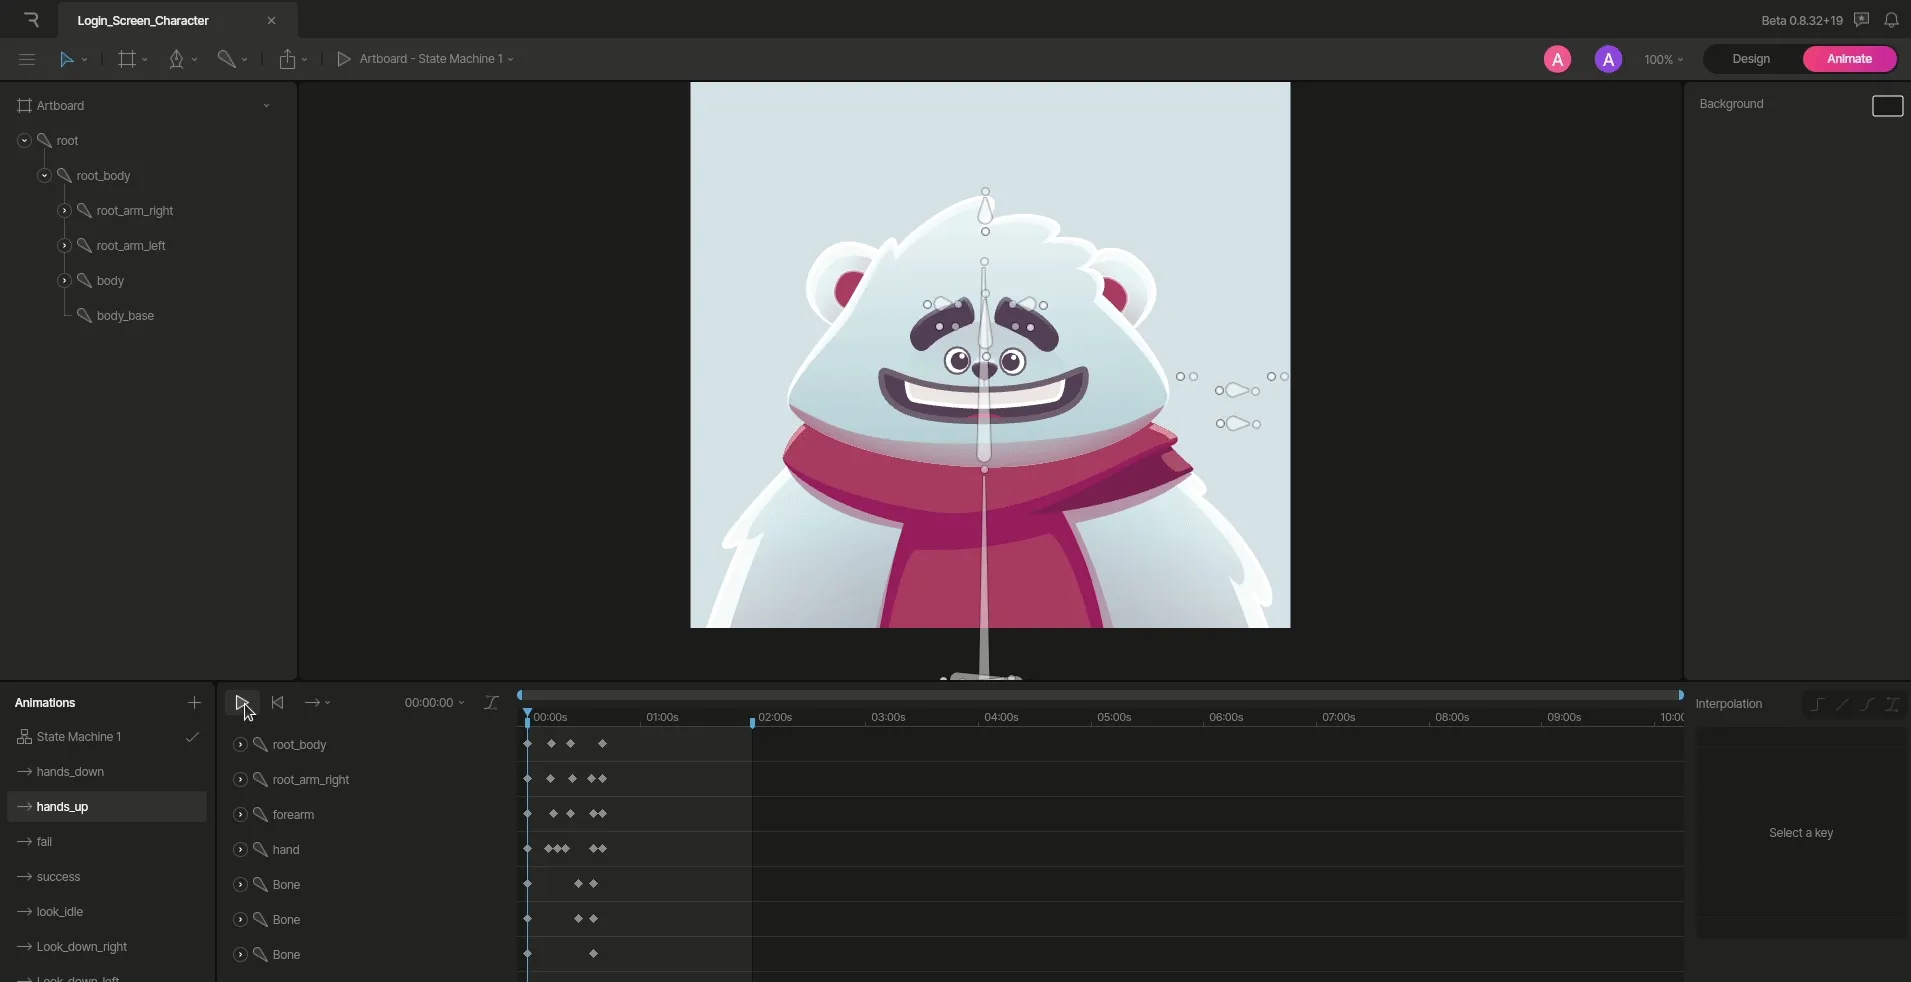
Once I have created several animations, I can orchestrate them via a state machine.
According to Rive, State machines are a visual way of linking animations together and defining the logic that governs transitions. They let motion designers organize complex animations and make them easy to understand and maintain.
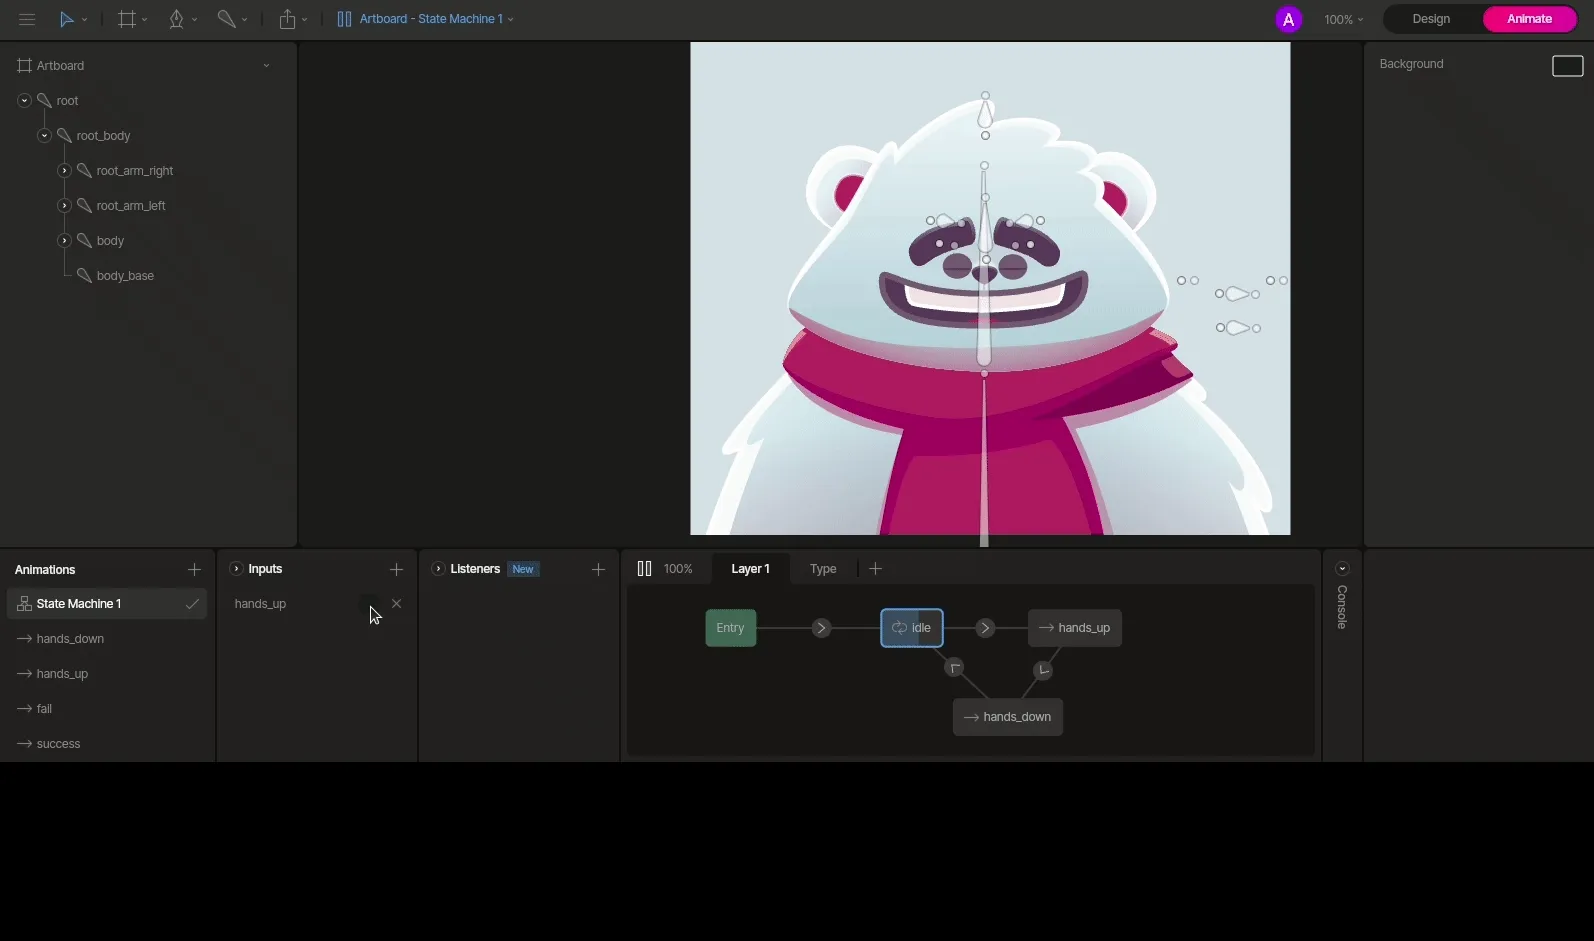
I’m going to create a state machine that will allow my character to raise his hands following a specific action.
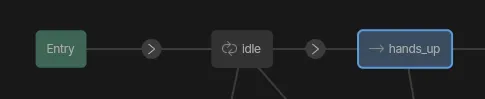
First, I’m adding an “Idle” state (which comes from my Idle animation) which will be the default state of my character. Then, I create a “Hand_up” state.
Before creating my transition between my two states, I create a boolean input. I name this input “hands_up”.
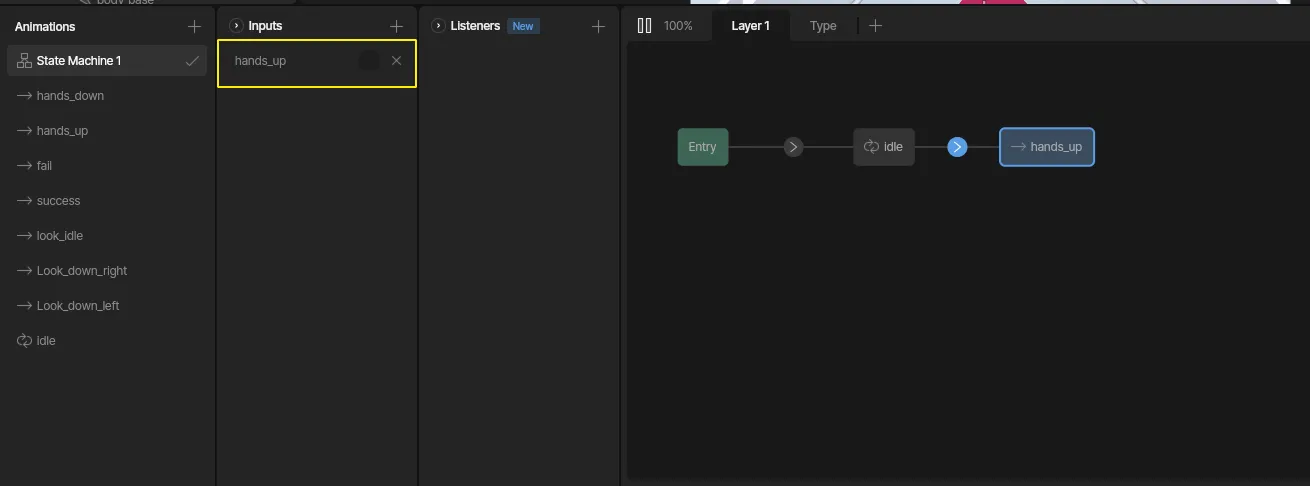
I can now create my transition. I will link my “hands_up” input to my “Hand_up” state. I will also set a condition for my input. If the value of my input is “true”, then I will transition to the “Hand_up” state.

So when I change my “hands_up” input to “true”, my character will raise his hands.
Other options are available, you can see them here : State Machine.
If like me, you don’t have motion design skills, you can always turn to the community. There are already a lot of people who have created animations and shared them on the Rive.app website. You can download these snippets and use them in your projects.
Playing Rive Animations In React
One of the strengths of Rive is to have developed SDKs for the most used languages. So there are SDKs for Flutter, React, Vue, etc. These libraries are open-source and you can consult them on GitHub. For our article, I will focus on the implementation with React (react-rive).
To install the Rive player for React, you just have to add the rive-react dependency to your project.
npm install rive-reactThe library will provide us with tools to display and animate the desired animation.
The useRive hook allows us to load the animation and instantiate it. It returns an object that contains the instance of the animation and the React component that allows displaying the animation.
const { rive: riveInstance, RiveComponent }: RiveState = useRive({ src: 'login-teddy.riv', // the animation file stateMachines: STATE_MACHINE_NAME, // the name of the state machine to be used autoplay: true, layout: new Layout({ fit: Fit.Cover, alignment: Alignment.Center, }), ...riveProps,});Animating With Code
As previously shown, my file contains a state machine, with a hands_up input. This allows my character to raise its hands when the input is true. So I can use the useStateMachineInput hook to get this input and use it in my component.
const isHandsUpInput: StateMachineInput | null = useStateMachineInput( riveInstance, STATE_MACHINE_NAME, 'hands_up',);So if I set the input to true when I write a password, for example, my animation will raise its hands to hide its eyes.
<input onFocus={() => (isHandsUpInput!.value = true)} onBlur={() => (isHandsUpInput!.value = false)}/>And so in a React component, it looks like this:
const LoginFormComponent = (riveProps: UseRiveParameters = {}) => {    const { rive: riveInstance, RiveComponent }: RiveState = useRive({        src: 'login-teddy.riv',        stateMachines: STATE_MACHINE_NAME,        autoplay: true,        layout: new Layout({            fit: Fit.Cover,            alignment: Alignment.Center,        }),        ...riveProps,    });
    const [passValue, setPassValue] = useState('');
    const isHandsUpInput: StateMachineInput | null = useStateMachineInput(        riveInstance,        STATE_MACHINE_NAME,        'hands_up',    );
    return (        <div className="login-form-component-root">            <div className="login-form-wrapper">                <div className="rive-wrapper">                    <RiveComponent className="rive-container" />                </div>                <div className="form-container">                    <form onSubmit={onSubmit}>                        <label>                            <input                                type="password"                                className="form-pass"                                name="password"                                placeholder="Password (shh.. it's 'password')"                                value={passValue}                                onFocus={() => (isHandsUpInput!.value = true)}                                onBlur={() => (isHandsUpInput!.value = false)}                                onChange={(e: ChangeEvent<HTMLInputElement>) =>                                    setPassValue(e.target.value)                                }                            />                        </label>                        <button className="login-btn">{loginButtonText}</button>                    </form>                </div>            </div>        </div>    );};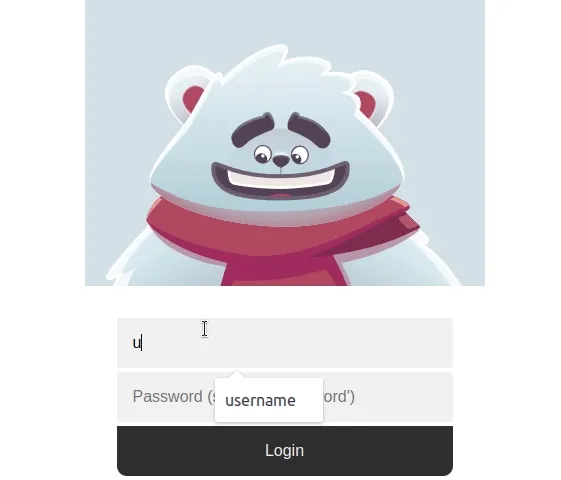
Conclusion
Rive.app is a powerful tool for developers looking to add animations to their projects. It is easy to learn but complicated to master. There are many possibilities and features. It is important to take the time to understand how the tool works before starting a project.
Developer skills are not enough to build beautiful animations: you also need skills in motion design and design. However, if you already have some skills in motion design, you can get started without too much difficulty.
The integration in the code is quite simple and the SDKs are well-documented. There is also a good community that shares animations and templates to help you get started.
Authors
Full-stack web developer at marmelab, Anthony seeks to improve and learn every day. He likes basketball, motorsports and is a big Harry Potter fan