Building A Graphical User Interface in the Terminal using Go

To onboard new developers, Marmelab asks each of them them to develop a multiplayer game during 5 weeks, with a different language and target device each week.
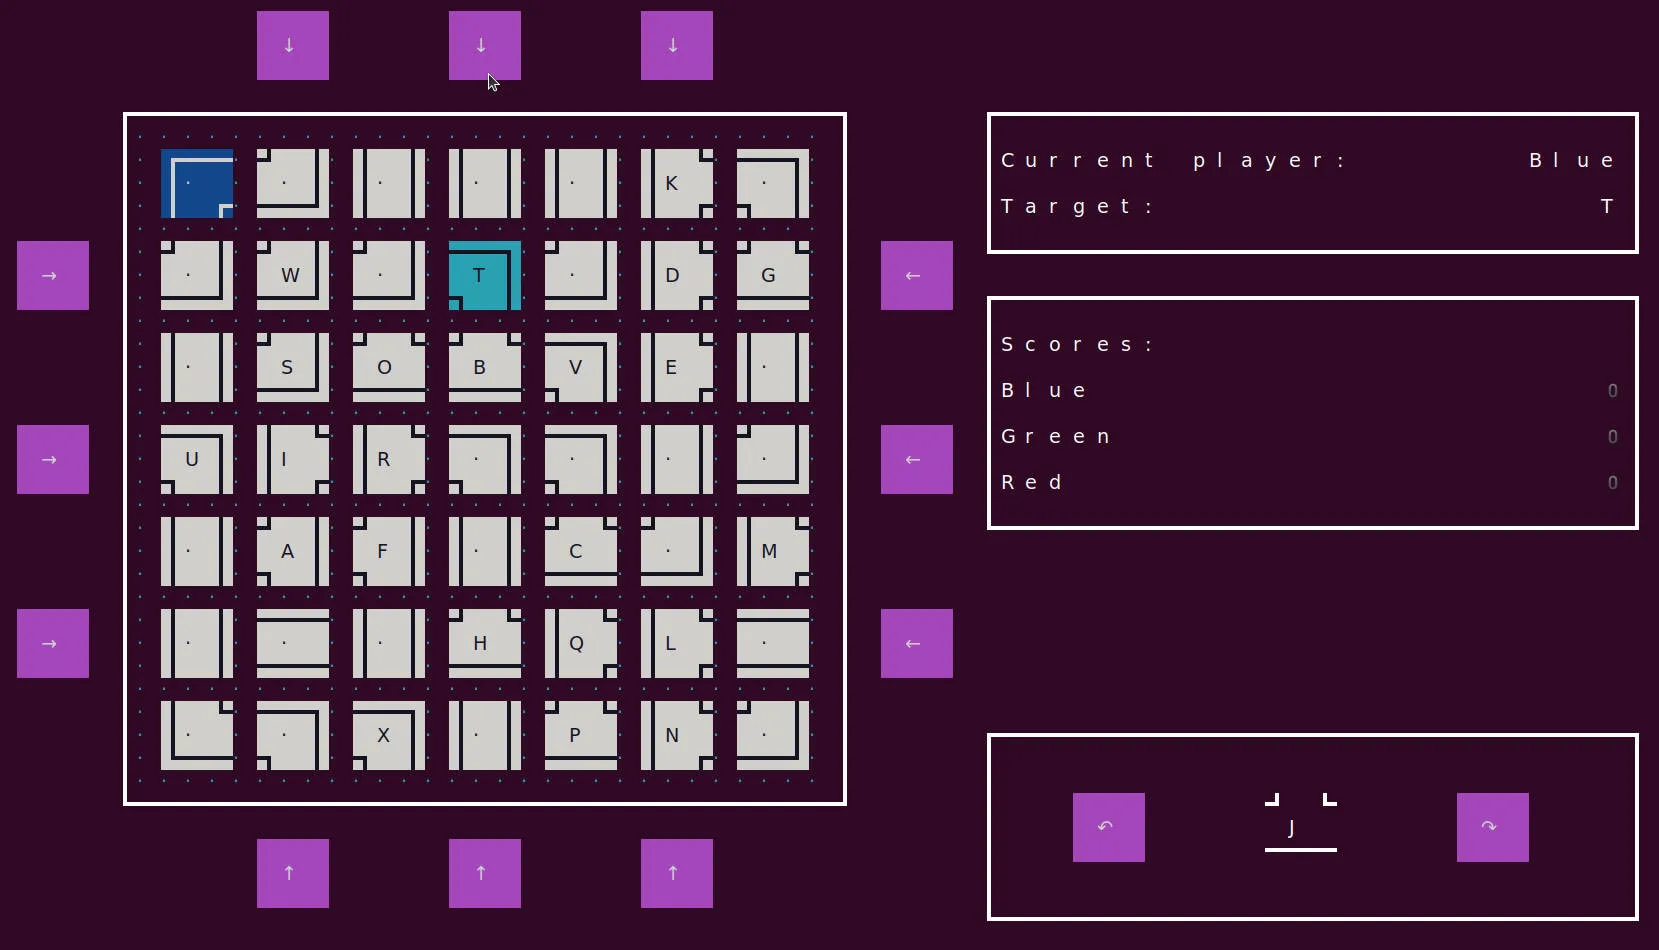
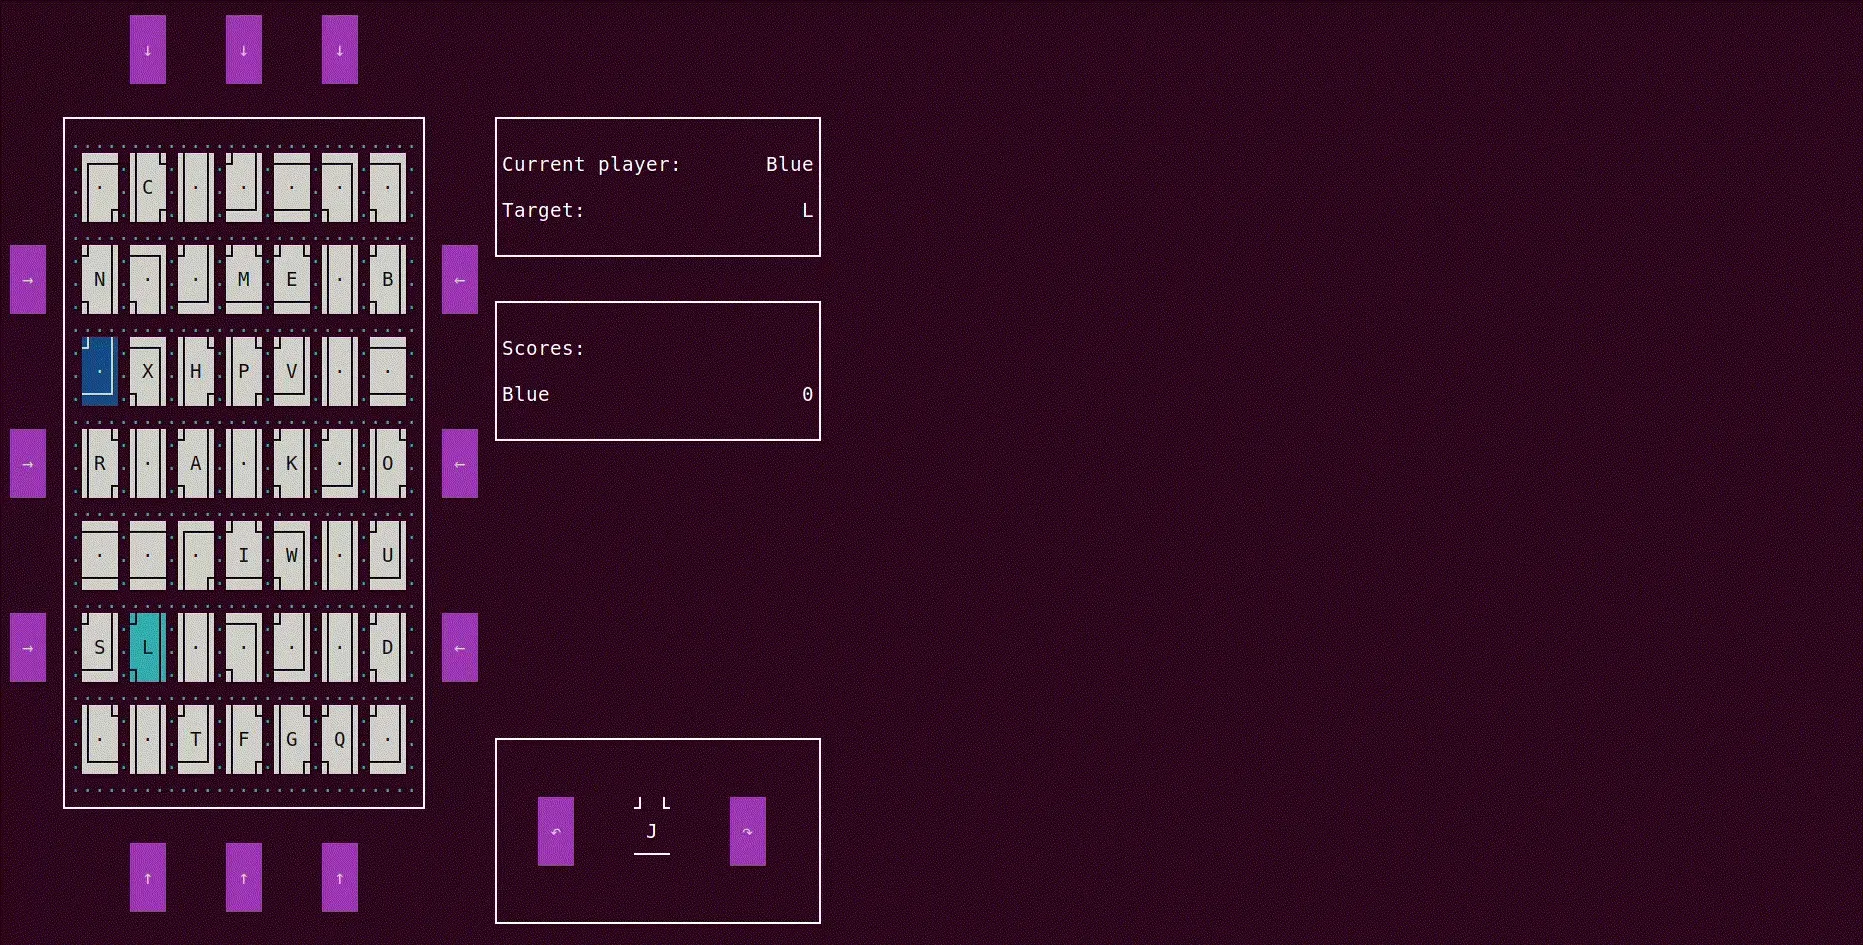
For my integration weeks, I was assigned the Labyrinth game. Cool, don’t you think? You can follow my efforts on the marmelab/labyrinth repository on GitHub.
The Challenge: A Graphical Command Line Interface
For the first week, I had to play with the console or, to be more precise, to provide a playable CLI version of the Labyrinth! I was asked to choose between Node, Go, and Rust to create the application, and I chose Go since I feel more comfortable with it.
Since playing with text inputs and arrows is not fun enough, I had to create a Graphical User Interface for the game. While I have written various command line applications in previous jobs, a Graphical User Interface in the console was something new for me.
After a quick look at the Awesome Go repository, I saw that the GOCUI library was covering all my needs for the UI: It provides listeners for many key combinations, as well as mouse clicks, which was something I was looking for.
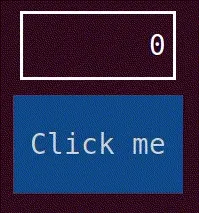
This blog post will explain how to build a simple GUI in Go that reacts to mouse clicks and repaints the application when the state changes, based on what I’ve learned during this week. We won’t cover the Labyrinth UI - that would be too long. Instead, we’ll develop a simple counter app that looks like this:
Creating The Main UI Loop
For those who are not familiar with how Graphical User Interfaces work internally, it usually involves a main loop that renders the application. This provides the ability to repaint the application when the state changes, but comes at a cost: you shall not block the loop with costly synchronous calls. Luckily for me, the abstraction provided by GOCUI made it easy to create the main loop and listen for Ctrl+C to exit the game.
package main
import (  "log"
  "github.com/awesome-gocui/gocui")
func quit(*gocui.Gui, *gocui.View) error {  return gocui.ErrQuit}
func main() {  // Initialize the GUI.  gui, err := gocui.NewGui(gocui.OutputNormal, true)  if err != nil {    log.Fatalf("Failed to initialize GUI: %v.", err)  }  defer gui.Close()
    // This key binding allows you to exit the application using `Ctrl+C`.  if err := gui.SetKeybinding("", gocui.KeyCtrlC, gocui.ModNone, quit); err != nil {    log.Fatalf("Failed to set exit key combination: %v.", err)  }
    // Start the application main loop.  if err := gui.MainLoop(); err != nil && err != gocui.ErrQuit {    log.Fatalf("Failed to start GUI main loop: %v.", err)  }}
Setting The Layout / Manager
The layout can be defined using a simple function that takes a single parameter: the GUI pointer (*gocui.Gui).
func layout(gui *gocui.Gui) error {
    // This is where we will add our views to our application.
  return nil}
func main() {  // ... GUI init
  gui.SetManagerFunc(layout)
  // ... Exit binding and main loop}
Adding The First View
First, we need to define our state object. In our case, we simply display the number of clicks on a button, which is an int variable that will be increased by each click.
var ( clickCount int = 0)Then, we can create a view using the SetView, which is represented as a box on our GUI. When a view is created for the first time, the function returns a gocui.ErrUnknownView error, that can be skipped. An interesting thing is that GOCUI views implement the io.Writer interface, making it easy to set the view text using the standard fmt package.
func layout(gui *gocui.Gui) error {  // Creating a view that displays user click count.  clickCountView, err := gui.SetView("click-count", 0, 0, 9, 2, 0)  if err != nil && err != gocui.ErrUnknownView {    return errors.Join(errors.New("failed to create click-count view"), err)  }
  // Update the click count on the UI.  clickCountView.Clear()  fmt.Fprintf(clickCountView, "%8d", clickCount)}
Handling Mouse Clicks
To increase our counter, we need to create a callback function that is called by some event listeners. GOCUI event listeners are of type func (gui *gocui.Gui, view *gocui.View) error. If a listener returns an error, it will be returned by the gui.MainLoop() function. The gui and view parameters allow to perform an update on the global user interface or in the calling view. For example, we can change the button background color whether the click count is odd or even:
func increaseClickCount(gui *gocui.Gui, view *gocui.View) error {  clickCount++
  if (clickCount & 1) == 0 {    view.BgColor = gocui.ColorBlue  } else {    view.BgColor = gocui.ColorGreen  }
  return nil}
We also need to enable mouse support on our application. This can be set quite easily with GOCUI by settings some flags to true on the *gocui.GUI object:
func main() {
  // ...
  gui.SetManagerFunc(layout)
  gui.Cursor = true  gui.Mouse = true
    // ...}
Then, we can add the button view using the SetView, and represent it as a filled box on our GUI. Just like the counter view, we can skip the gocui.ErrUnknownView error. We then set the button label using fmt.Fprint. Finally, we can add the mouse event listener to the button using gui.SetKeybinding and gocui.MouseLeft. To increase the counter, we use the increaseClickCount function that we defined earlier as the listener callback.
func layout(gui *gocui.Gui) error {
    // ...
    // We create the button view first.  button, err := gui.SetView("button", 0, 2, 11, 6, 0)  if err != nil {    if err != gocui.ErrUnknownView {      return errors.Join(errors.New("failed to initialize button"), err)    }
    button.Frame = false    button.BgColor = gocui.ColorBlue    button.FgColor = gocui.ColorWhite    fmt.Fprint(button, "\n Click me")
    if err := gui.SetKeybinding("button", gocui.MouseLeft, gocui.ModNone, increaseClickCount); err != nil {      return errors.Join(errors.New("failed to initialize button click listener"), err)    }  }}
Conclusion
While we built a counter application that supports mouse clicks using GOCUI, we did not went deep into the possibilities of this library. If you are interested in going deeper, you can find an a more complex example with a labyrinth application in this public repository or directly in the GOCUI repository.
I would definitely recommend the GOCUI library to build Graphical User Interfaces in the CLI if you are using the Go programming language, as it provides an easy-to-use API to define views, and it supports both mouse and keyboard listeners. Furthermore, the examples directory provides a lot of useful information about the API and how to build complex applications. My only shortcoming regarding the library is that it has not been maintend for the past year, yet, it is fully functional at least on common Linux OSes.
Authors
Full-stack web developer at marmelab, Jonathan likes to cook and do photography on his spare time.