Auth Provider Setup
Web applications often need to limit access to specific pages or resources to authenticated users (“Authentication”) and ensure that users can only execute actions they are permitted to (“Authorization”).
Ra-core supports both authentication and authorization, allowing you to secure your admin app with your preferred authentication strategy. Since there are many strategies (OAuth, MFA, passwordless, magic link, etc.), ra-core delegates this logic to an authProvider.
Enabling Authentication
Section titled “Enabling Authentication”By default, ra-core apps do not require authentication. To restrict access to the admin, pass an authProvider to the <CoreAdmin> component.
// in src/App.jsimport authProvider from './authProvider';
const App = () => (    <CoreAdmin authProvider={authProvider}>        ...    </CoreAdmin>);
An authProvider is an object that handles authentication and authorization logic, similar to a dataProvider. It exposes methods that ra-core calls when needed, and you can also call these methods manually through specialized hooks.
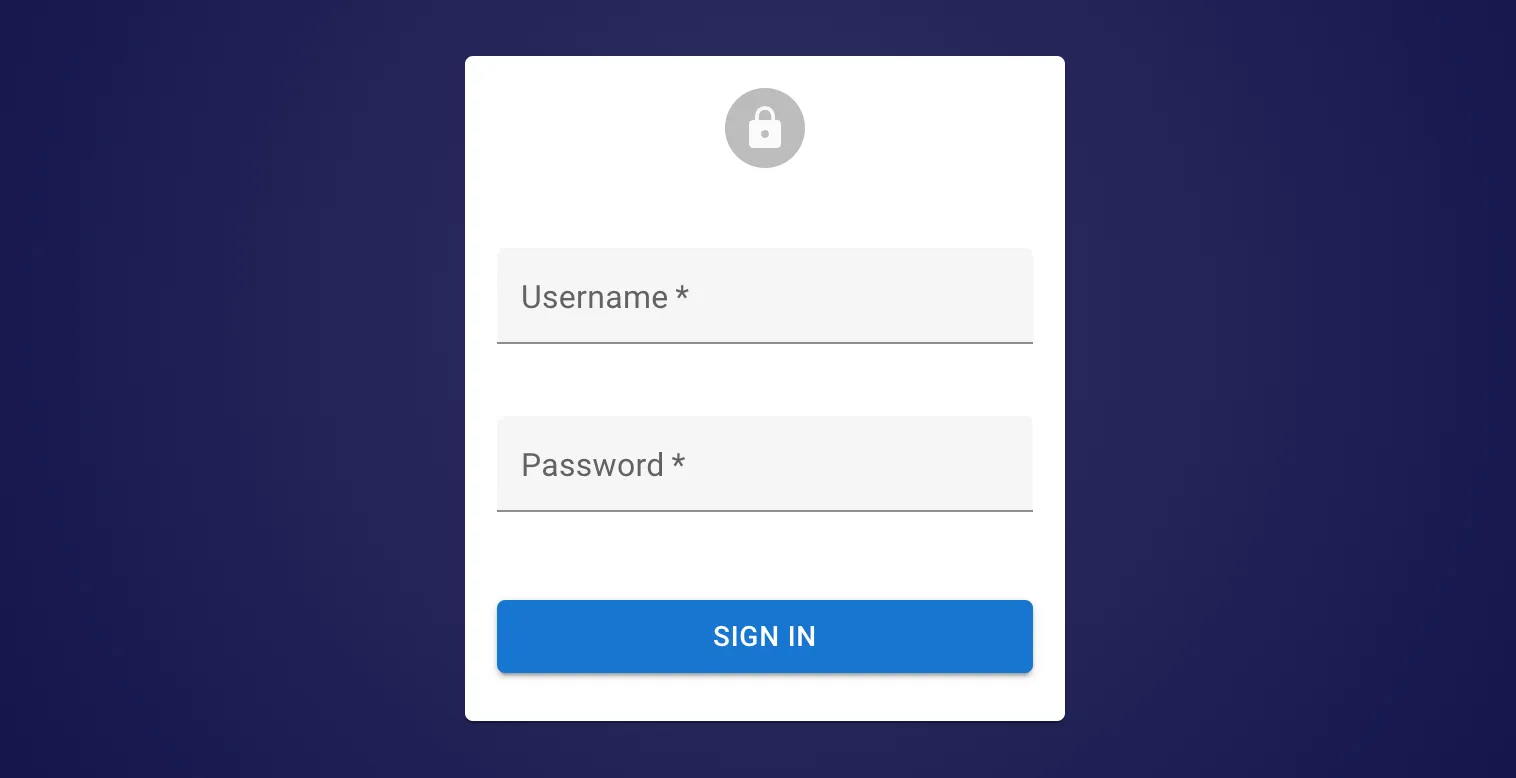
Once an admin has an authProvider, ra-core will restrict CRUD pages (the list, edit, create, and show components of your Resources) to authenticated users and redirect anonymous users to the /login page, displaying a login form for a username and password.
Ra-core offers several built-in authProvider implementations for popular authentication services like Google Identity, Microsoft Entra ID, AWS Cognito, Auth0, Keycloak, and others. Refer to the List of Available Auth Providers to find one that suits your requirements.
If you need to implement a custom authentication strategy, the Building Your Own Auth Provider offers a step-by-step guide. It boils down to implementing a few methods that ra-core calls when needed:
const authProvider = { // send username and password to the auth server and get back credentials async login(params) {/** ... **/}, // when the dataProvider returns an error, check if this is an authentication error async checkError(error) {/** ... **/}, // when the user navigates, make sure that their credentials are still valid async checkAuth(params) {/** ... **/}, // remove local credentials and notify the auth server that the user logged out async logout() {/** ... **/}, // get the user's profile async getIdentity() {/** ... **/}, // check whether users have the right to perform an action on a resource (optional) async canAccess() {/** ... **/},};Sending Credentials To The API
Section titled “Sending Credentials To The API”The authProvider handles authentication logic, but the dataProvider must include the user credentials in requests to the API.
As explained in the Data providers documentation, simpleRestProvider and jsonServerProvider accept an httpClient as a second parameter. Here, you can customize request headers, cookies, etc.
For instance, if the authProvider stores an authentication token in localStorage, you can tweak the dataProvider to pass this token as an Authorization header:
import { fetchUtils, CoreAdmin, Resource } from 'ra-core';import simpleRestProvider from 'ra-data-simple-rest';
const httpClient = (url, options = {}) => {    if (!options.headers) {        options.headers = new Headers({ Accept: 'application/json' });    }    const { token } = JSON.parse(localStorage.getItem('auth'));    options.headers.set('Authorization', `Bearer ${token}`);    return fetchUtils.fetchJson(url, options);};const dataProvider = simpleRestProvider('http://localhost:3000', httpClient);
const App = () => (    <CoreAdmin dataProvider={dataProvider} authProvider={authProvider}>        ...    </CoreAdmin>);
Now the admin is secured: Authenticated users pass their credentials to the API.
If you have a custom REST client, don’t forget to add credentials yourself.
Restricting Access To Custom Pages
Section titled “Restricting Access To Custom Pages”When you add custom pages, they are accessible to anonymous users by default. To make them accessible only to authenticated users, use the useAuthenticated hook in the custom page:
import { CoreAdmin, CustomRoutes, useAuthenticated } from 'ra-core';import { Route } from 'react-router-dom';
const RestrictedPage = () => {    const { isPending } = useAuthenticated(); // redirects to login if not authenticated    if (isPending) return <div>Checking auth...</div>;    return (        <div>            ...        </div>    )};
const AnonymousPage = () => (    <div>        ...    </div>);
const App = () => (    <CoreAdmin authProvider={authProvider}>        <CustomRoutes>            <Route path="/foo" element={<RestrictedPage />} />            <Route path="/anonymous" element={<AnonymousPage />} />        </CustomRoutes>    </CoreAdmin>);
Alternatively, use the <Authenticated> component to display its children only if the user is authenticated:
import { CoreAdmin, CustomRoutes, Authenticated } from 'ra-core';import { Route } from 'react-router-dom';
const RestrictedPage = () => (    <Authenticated>        <div>            ...        </div>    </Authenticated>);
const AnonymousPage = () => (    <div>        ...    </div>);
const App = () => (    <CoreAdmin authProvider={authProvider}>        <CustomRoutes>            <Route path="/restricted" element={<RestrictedPage/>} />            <Route path="/anonymous" element={<AnonymousPage />} />        </CustomRoutes>    </CoreAdmin>);
Disabling Anonymous Access
Section titled “Disabling Anonymous Access”Securing custom pages one by one can be tedious. If your app will never accept anonymous access, you can force the app to wait for authProvider.checkAuth() to resolve before rendering the page layout by setting the <CoreAdmin requireAuth> prop.
For example, the following app will require authentication to access all pages, including the /settings and /profile pages:
const App = () => ( <CoreAdmin dataProvider={dataProvider} authProvider={authProvider} requireAuth > <Resource name="posts" {...posts} /> <Resource name="comments" {...comments} /> <CustomRoutes> <Route path="/settings" element={<Settings />} /> <Route path="/profile" element={<Profile />} /> </CustomRoutes> </CoreAdmin>);requireAuth also hides the UI until the authentication check is complete, ensuring that no information (menu, resource names, etc.) is revealed to anonymous users.
requireAuth doesn’t prevent users from accessing <CustomRoutes noLayout>, as these routes are often used for public pages like the registration page or the password reset page.
const App = () => ( <CoreAdmin dataProvider={dataProvider} authProvider={authProvider} requireAuth > <CustomRoutes noLayout> {/* These routes are public */} <Route path="/register" element={<Register />} /> </CustomRoutes> <CustomRoutes> {/* These routes are private */} <Route path="/settings" element={<Settings />} /> <Route path="/profile" element={<Profile />} /> </CustomRoutes> </CoreAdmin>);Allowing Anonymous Access
Section titled “Allowing Anonymous Access”If you add an authProvider, ra-core restricts access to all pages declared in <Resource> components. To allow anonymous access to some of these pages, set the disableAuthentication prop in the page component.
For example, to let anonymous users access the post list view:
const PostList = () => (    <ListBase disableAuthentication>        // ...    </ListBase>);
const App = () => (    <CoreAdmin dataProvider={dataProvider} authProvider={authProvider}>        <Resource name="posts" list={PostList} />    </CoreAdmin>);
disableAuthentication is available on the following components and hooks:
<CreateBase>,<CreateController>anduseCreateController<EditBase>,<EditController>anduseEditController<ListBase>,<ListController>anduseListController<ShowBase>,<ShowController>anduseShowController
Adding A Login Page
Section titled “Adding A Login Page”You can add a login page by setting the <CoreAdmin loginPage> prop.
For headless applications, you should build custom login pages using the useLogin hook to handle the login form submission. Here’s an example:
// in src/MyLoginPage.jsimport { useState } from 'react';import { useLogin, useNotify } from 'ra-core';import { Notification } from './Notification';
const MyLoginPage = () => {    const [email, setEmail] = useState('');    const [password, setPassword] = useState('');    const login = useLogin();    const notify = useNotify();
    const handleSubmit = e => {        e.preventDefault();        login({ email, password }).catch(() =>            notify('Invalid email or password')        );    };
    return (        <form onSubmit={handleSubmit}>            <h1>Login</h1>            <div>                <label htmlFor="email">Email:</label>                <input                    id="email"                    name="email"                    type="email"                    value={email}                    onChange={e => setEmail(e.target.value)}                    autoComplete="email"                    required                />            </div>            <div>                <label htmlFor="password">Password:</label>                <input                    id="password"                    name="password"                    type="password"                    value={password}                    onChange={e => setPassword(e.target.value)}                    autoComplete="current-password"                    required                />            </div>            <button type="submit">Sign in</button>            <div>                <a href="/forgot-password">Forgot password?</a>            </div>            <Notification />        </form>    );};
export default MyLoginPage;
Then, pass this custom login page to your <CoreAdmin> component:
import { CoreAdmin } from 'ra-core';import MyLoginPage from './MyLoginPage';import authProvider from './authProvider';
const App = () => (    <CoreAdmin loginPage={MyLoginPage} authProvider={authProvider}>        ...    </CoreAdmin>);
Logging Out The User
Section titled “Logging Out The User”For headless applications, you can create custom logout functionality using the useLogout hook:
import { useLogout } from 'ra-core';
const MyLogoutButton = () => { const logout = useLogout(); const handleClick = () => logout(); return <button onClick={handleClick}>Logout</button>;};Tip: By default, ra-core redirects to /login after logout. This can be changed by passing a custom URL to the logout() function:
const handleClick = () => logout();const handleClick = () => logout('/custom-login');Using External Authentication Providers
Section titled “Using External Authentication Providers”Instead of the built-in Login page, you can use an external authentication provider, like Auth0, Cognito, or any other OAuth-based service. These services require a callback URL to redirect users after login.
Ra-core provides a default callback URL at /auth-callback. This route calls the authProvider.handleCallback method on mount, which means it’s up to the authProvider to use the received params for authenticating future API calls.
For example, here’s a simple authProvider for Auth0:
import { Auth0Client } from './Auth0Client';
export const authProvider = {    async login() { /* This function will not be called */ },    async checkAuth() {        const isAuthenticated = await Auth0Client.isAuthenticated();        if (isAuthenticated) {            return;        }        // not authenticated: redirect the user to the Auth0 service,        // where they will be redirected back to the app after login        Auth0Client.loginWithRedirect({            authorizationParams: {                redirect_uri: `${window.location.origin}/auth-callback`,            },        });    },    // A user logged successfully on the Auth0 service    // and was redirected back to the /auth-callback route on the app    async handleCallback() {        const query = window.location.search;        if (query.includes('code=') && query.includes('state=')) {            try {                // get an access token based on the query paramaters                await Auth0Client.handleRedirectCallback();                return;            } catch (error) {                console.log('error', error);                throw error;            }        }        throw new Error('Failed to handle login callback.');    },    async logout() {        const isAuthenticated = await client.isAuthenticated();            // need to check for this as ra-core calls logout in case checkAuth failed        if (isAuthenticated) {            return Auth0Client.logout({                returnTo: window.location.origin,            });        }    },    ...};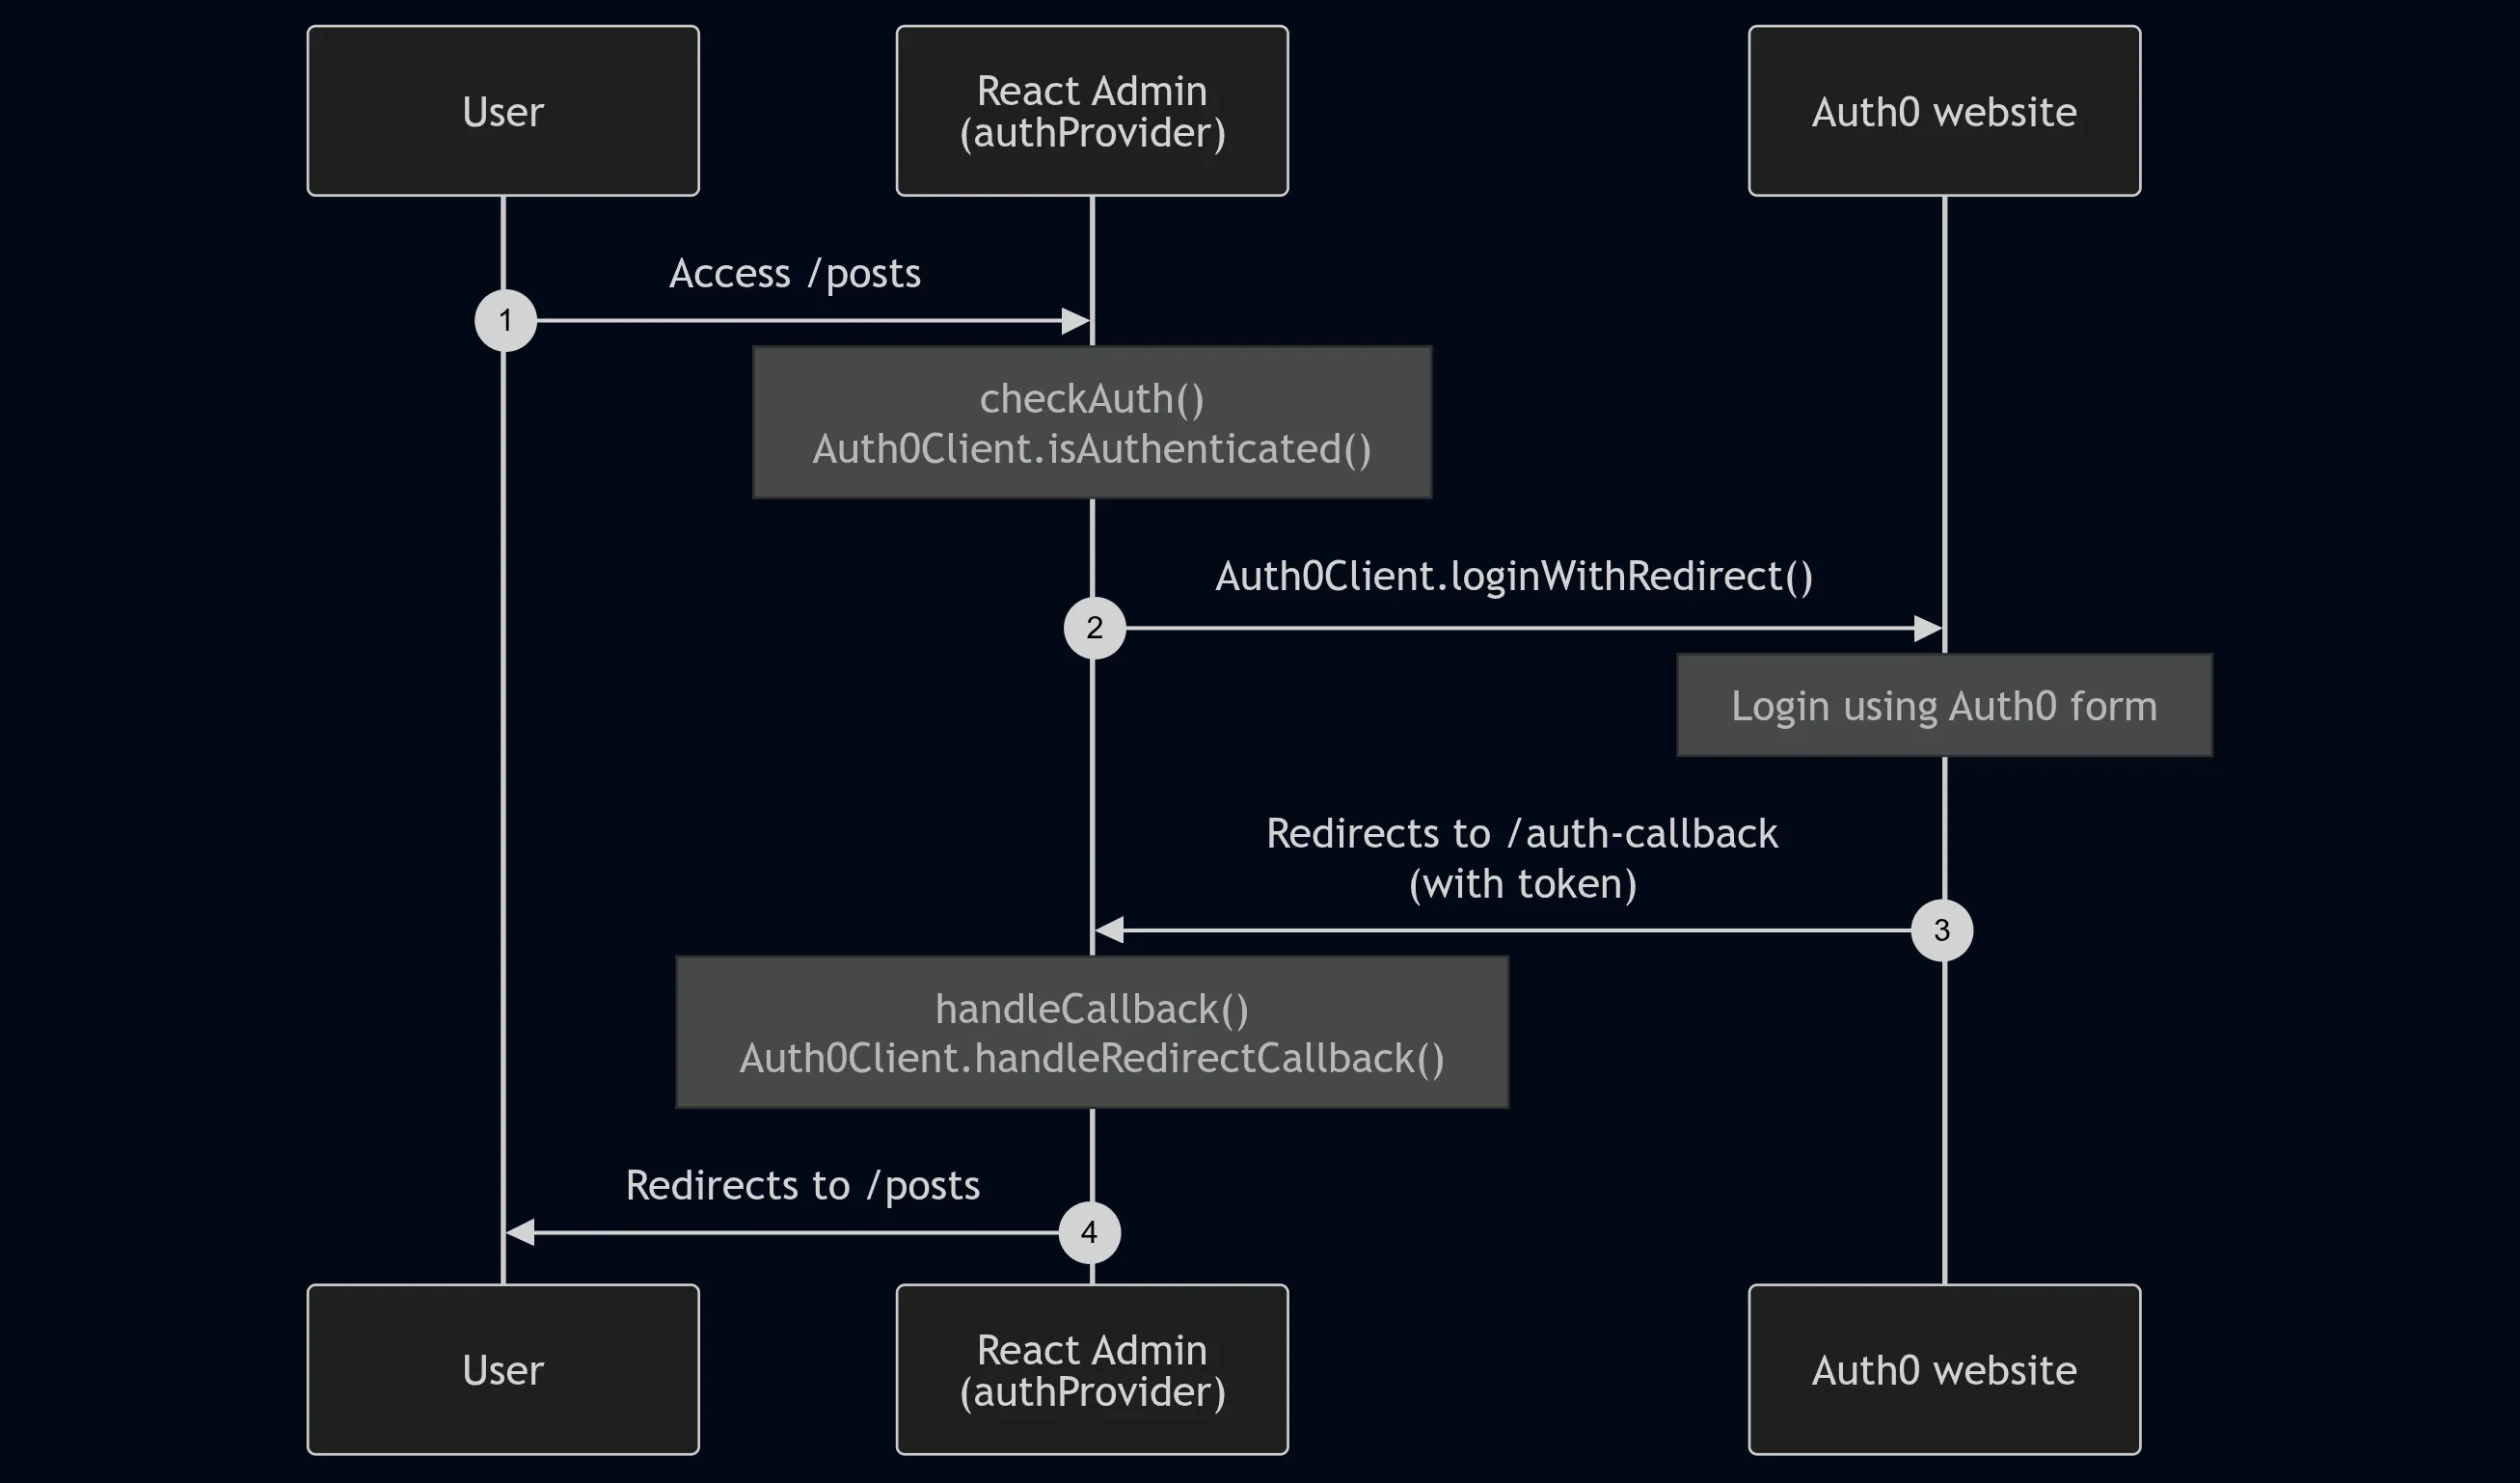
Tip: You can choose when to redirect users to the third-party authentication service, such as directly in the AuthProvider.checkAuth() method or when they click a button on a custom login page.
Handling Refresh Tokens
Section titled “Handling Refresh Tokens”Refresh tokens are crucial for maintaining secure sessions. To leverage them, decorate the dataProvider and the authProvider to refresh authentication tokens as needed.
You can use the addRefreshAuthToDataProvider and addRefreshAuthToAuthProvider functions for this purpose:
// in src/refreshAuth.jsimport { getAuthTokensFromLocalStorage } from './getAuthTokensFromLocalStorage';import { refreshAuthTokens } from './refreshAuthTokens';
export const refreshAuth = () => {    const { accessToken, refreshToken } = getAuthTokensFromLocalStorage();    if (accessToken.exp < Date.now().getTime() / 1000) {        // This function will fetch the new tokens from the authentication service and update them in localStorage        return refreshAuthTokens(refreshToken);    }    return Promise.resolve();}
// in src/authProvider.jsimport { addRefreshAuthToAuthProvider } from 'ra-core';import { refreshAuth } from './refreshAuth';const myAuthProvider = {    // ...AuthProvider methods};export const authProvider = addRefreshAuthToAuthProvider(myAuthProvider, refreshAuth);
// in src/dataProvider.jsimport { addRefreshAuthToDataProvider } from 'ra-core';import simpleRestProvider from 'ra-data-simple-rest';import { refreshAuth } from './refreshAuth';const baseDataProvider = simpleRestProvider('http://path.to.my.api/');export const dataProvider = addRefreshAuthToDataProvider(baseDataProvider, refreshAuth);
Authorization
Section titled “Authorization”Access control and permissions allow you to restrict certain pages and features to specific users. Ra-core provides powerful primitives for implementing authorization logic. For detailed guidance, check out the Authorization documentation.