
Admin-on-rest 1.3: Summer Changes

We’ve been busy during the summer. In addition to 3 bugfix releases (1.2.1, 1.2.2 and 1.2.3), admin-on-rest, the React admin GUI for REST APIs, just had a new minor version: 1.3.0 is here! Read on to discover the new features, and a big announcement.
Permissions handling
The aor-permissions package introduced custom components for showing or hiding parts of the admin depending on the user’s permissions. Keeping permissions out of the core helped us keep the core code lean, but imposed limitations to what the permissions package could achieve.
We’ve decided to integrate the aor-permissions features into the core, and deprecate the package. Now you can manage permissions directly from within admin-on-rest!
We’ve chosen to use the function-as-child pattern. The <Admin>, <Create>, <Edit>, <Show>, <List>, and <Filter> components can now accept a function as child component. Here is a glimpse of the new syntax:
// show or hide a resource based on the user permissions:<Admin restClient={restClient} authClient={authClient}>  {(permissions) => [    // Restrict access to the edit and remove views to admin only    <Resource      name="customers"      list={VisitorList}      edit={permissions === "admin" ? VisitorEdit : null}      remove={permissions === "admin" ? VisitorDelete : null}      icon={VisitorIcon}    />,    // Only include the categories resource for admin users    permissions === "admin" ? (      <Resource        name="categories"        list={CategoryList}        edit={CategoryEdit}        remove={Delete}        icon={CategoryIcon}      />    ) : null,  ]}</Admin>;
// Show or hide an input based on the user permissionsexport const UserCreate = ({ ...props }) => (  <Create {...props}>    {(permissions) => (      <SimpleForm>        <TextInput source="name" validate={[required]} />        {permissions === "admin" && (          <TextInput source="role" validate={[required]} />        )}      </SimpleForm>    )}  </Create>);
For your own pages, <WithPermission> lets you do the same in a seamless way. For instance, here is how to hide a menu item for non-admin users:
// in src/Menu.jsimport React from "react";import { MenuItemLink, WithPermission } from "admin-on-rest";
export default ({ resources, onMenuTap, logout }) => (  <div>    <MenuItemLink to="/posts" primaryText="Posts" onTouchTap={onMenuTap} />    <MenuItemLink      to="/comments"      primaryText="Comments"      onTouchTap={onMenuTap}    />    <WithPermission value="admin">      <MenuItemLink        to="/custom-route"        primaryText="Miscellaneous"        onTouchTap={onMenuTap}      />    </WithPermission>    {logout}  </div>);
To discover more about this feature, head to the new Authorization chapter in the documentation.
Using the authorization features is entirely optional. You can still use components as children of <Admin> and the other components if you don’t want to restrict access to some features based on the user credentials.
Layoutless Custom Routes
Admin-on-rest already supports custom routes. But what if you want to add routes that don’t reuse the existing layout (app bar and menu sidebar)? Simply pass the noLayout prop to the Route component, and you’re covered:
// in src/customRoutes.jsimport React from "react";import { Route } from "react-router-dom";import Foo from "./Foo";import Bar from "./Bar";import Baz from "./Baz";
export default [  <Route exact path="/foo" component={Foo} />,  <Route exact path="/bar" component={Bar} />,  <Route exact path="/baz" component={Baz} noLayout />,];
Refresh By Action
The logic triggered by the refresh button wasn’t reusable… until now. Starting with version 1.3, you can now dispatch a REFRESH_VIEW redux action to refresh the current view.
Just import the refreshView action creator, and connect it to the store using Redux connect, as follows:
import { connect } from 'react-redux';import { refreshView  } from 'admin-on-rest';
const MyCustomRefreshButton = ({ refreshView }) => (    <FlatButton label="refresh" onClick={refreshView});
export default connect(null, { refreshView })(MyCustomRefreshButton);
Custom Validator Messages
Existing validator functions now accept an additional parameter, which is the error message to display in case of failed validation. This makes it easy to customize the error messages:
export const UserCreate = (props) => ( <Create {...props}> <SimpleForm> <TextInput label="First Name" source="firstName" validate={[required, maxLength(15, "The name is too long")]} /> <TextInput label="Age" source="age" validate={[required, number, minValue(18, "Adults only")]} /> </SimpleForm> </Create>);Note that you can still use translation to update these messages for all validator instances.
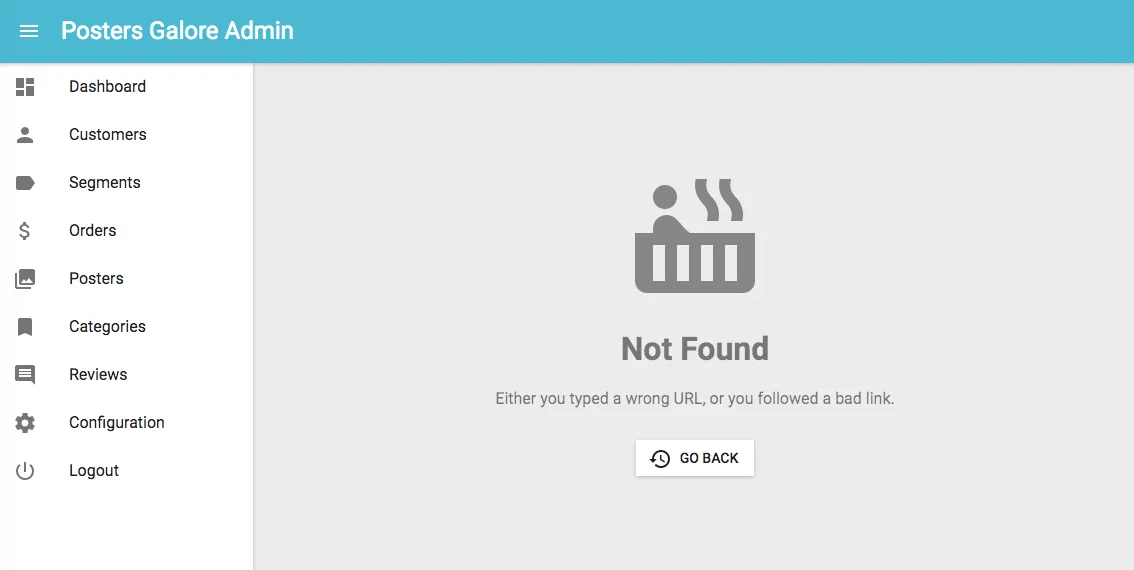
Not Found Page
Users sometimes manipulate the URL, or paste an URL from an email but forget part of it. With the new version, they’ll see an explicit “page not found” message, instead of an error banner. That makes a huge difference!
Nested Filter Object
You can already use dot notation (foo.bar) to link a field or an input to a nested source (e.g. { foo: { bar: 2 } }). From now on, it’s also possible on filters:
const MyFilter = (props) => ( <Filter {...props}> <TextInput source="foo.bar" label="Foo" /> </Filter>);What’s Next: A New Name!
There were other minor changes and bug fixes ; you can find the complete changelog on GitHub: admin-on-rest@1.3.0. Thanks a lot to all the contributors who made this release possible!
The next version of admin-on-rest will bring a big change: a new name! We’ve decided to rename admin-on-rest to “react-admin”, to de-emphasize the REST in the name. This is because we’ve seen that it’s possible to use aor with GraphQL, or any other RPC protocol. New name means BC break, but we’ll make it as painless as possible for existing apps.
In the meantime, if you like admin-on-rest, please speak about it at meetups, write blog posts, or hang out on StackOverflow to help newcomers!


Authors
Marmelab founder and CEO, passionate about web technologies, agile, sustainability, leadership, and open-source. Lead developer of react-admin, founder of GreenFrame.io, and regular speaker at tech conferences.