Building a Timeline With React, Storybook, Material-UI, and React-Admin

For a customer project, I had to add a timeline of recent user actions in a backend application powered by react-admin. React-admin doesn’t offer a Timeline component out of the box, so I had to implement it using pure React. In the process, I used a few coding tricks, so that makes a good tutorial.
User Story: A Timeline to Follow an Audit Trail
It all starts with a User Story for the Acme company, who is building a backend application to ease some of its business tasks. The customer requirements mention the end user problem that the story is supposed to solve, and that’s:
As a manager, I want to monitor the activity of my team, so that I can detect any misdoing
After discussing with the customer, we agree that the best solution would be to record most actions of the team members in an audit trail, and to display these actions to the manager in reverse chronological order (the latest actions first) in a timeline.
UX: Don’t Reinvent The Wheel
Normally, at that point, a UX expert should talk to the actual managers to design a perfect User Experience for the timeline. But fortunately, Jakob Nielsen, a famous UX practitioner, discovered a law that reduces UX work 90% of the time:
Users spend most of their time on other sites. This means that users prefer your site to work the same way as all the other sites they already know.
Jakob’s Law
If Acme has to design a timeline for its managers, it should look like other timelines that the managers may already use. And they do see a lot of those on Twitter, Facebook, and others.
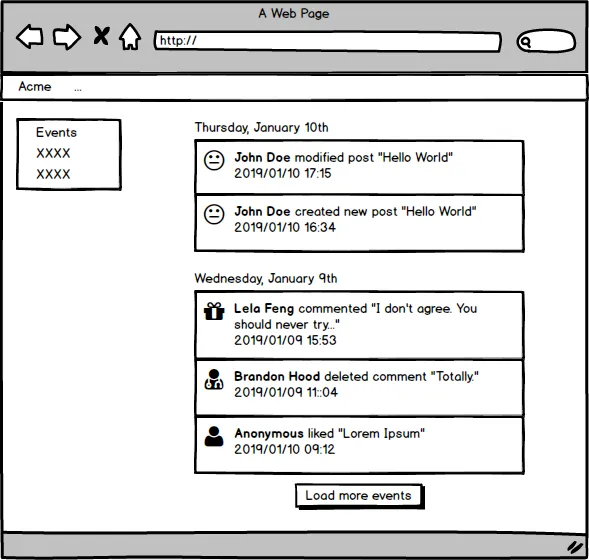
So no need to reinvent the wheel on the UX front: to design the Timeline UX, I blatantly copy the Facebook Feed page, adding just a touch of mine by grouping the events by day. Here is the resulting mockup:
Tip: Jakob’s Law, together with 18 other UX laws, appear in the excellent Laws of UX website. I highly recommend it to get a basic understanding of UX principles.
Writing Fake Data
In order to write a mockup, I had to create fake data. It allowed me to discover a few corner cases that the timeline should handle:
- Some events don’t have an author. In that case, the event author should be named “Anonymous”
- Some events can have a long label and may span across several lines. That also means that the title should use an ellipsis to avoid breaking the layout.
- The event label doesn’t seem to be easy to automate. For instance, the end user prefers to see “XXX commented” instead of “XXX added a comment”.
- The event day should use the user’s locale. Fortunately, modern browsers can do that on their own.
Generating fake data is always a very important part of the design phase. It helps me to detect corner cases and to draft the data structure that should be used during development.
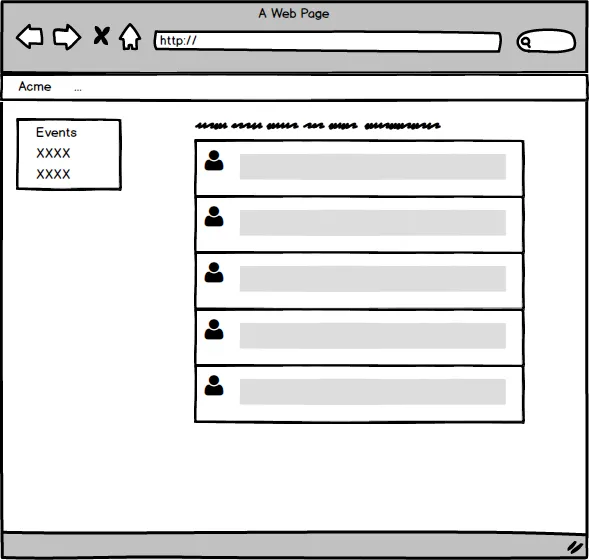
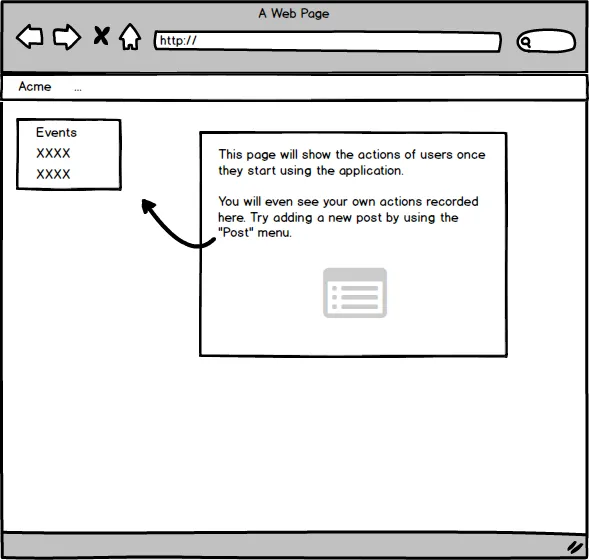
Designing Incomplete States
From a UX standpoint, the job is nearly done. I just have to design what the manager should see when the timeline doesn’t contain events, and that may happen in three cases:
- Loading: When the application has loaded and requested the events, but the server hasn’t answered yet. This is a transitional state but it may last a few seconds.
- Empty: When the server has answered with an empty list of events - probably at the early days of the manager’s team.
- Error: When the server timed out or responded with an error. Yes, that happens, too.
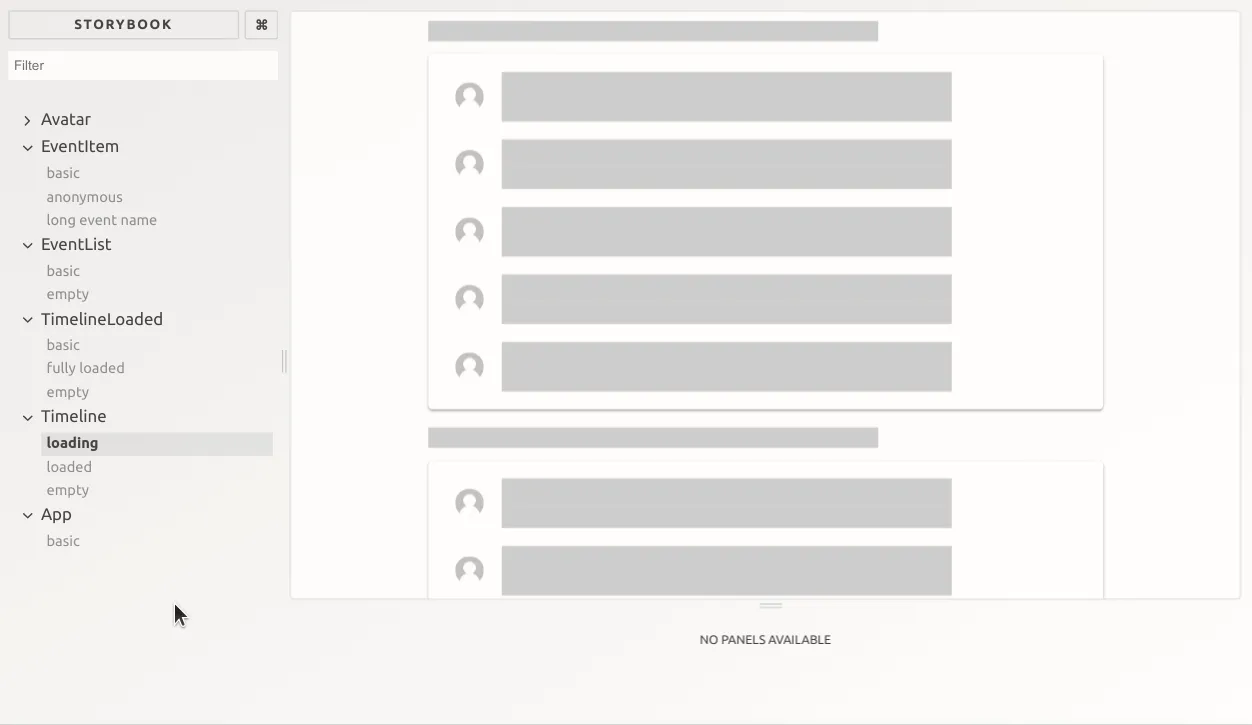
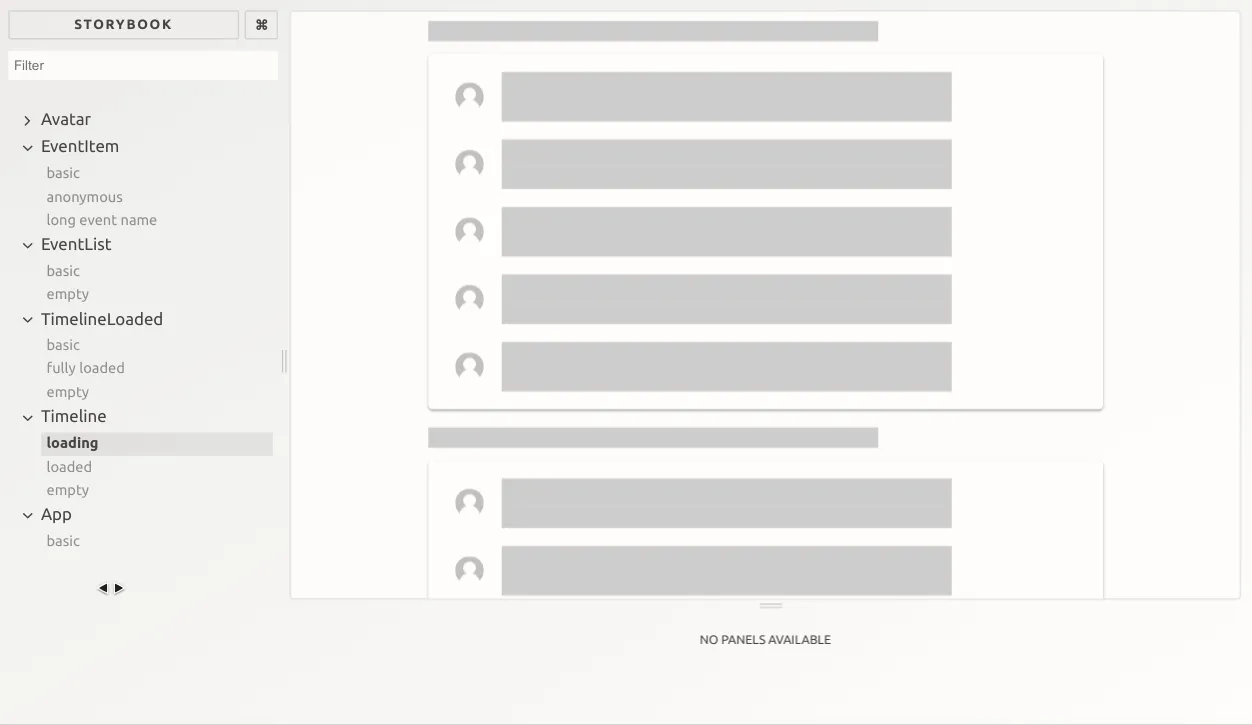
For the loading page, I use a “skeleton” screen:
And for the Empty page, an invite to start using the app:
For this particular application, errors are already handled globally (via a notification), so I don’t need to design an Error page.
As for the UI, the customer has already chosen Material Design, so I’ll just have to translate the mockups into some of the components showcased at material.io.
The Hard Part Is Naming Things
Based on the mockups, I could dive straight into code, but I like to take a moment and write things on a whiteboard first. That’s because it’s very easy to get lost in implementation details, and these details can lead to a bad code architecture. It’s better to start from the domain, to list responsibilities, and to decide which part of the code will be responsible for each one. Yep, that’s Domain Driven Design in practice.
So I draw boxes on the mockups to decompose the timeline into a tree structure of components, each with its own responsibility. I forbid myself to add a comment for each component to explain what it does. Instead, I spend as much time as needed to name the components explicitly, so that no further comment is necessary. That’s because of Karlton’s law:
There are only two hard things in Computer Science: cache invalidation and naming things.
Phil Karlton
So here we go:
TimelineTimelineLoadedEventListEventItemAvatar
TimelineLoadingTimelineEmpty
I test the names on another developer with the same domain knowledge to make sure that they all make sense, and carry the right meaning. Once the names are validated, I can start writing code.
Start By The Leafs
I have to develop 7 components. That’s a lot. Where should I start?
I usually start by the deepest components in the tree structure, those with no children. That’s for 4 reasons:
- Leaf components are often presentational only. So I can quickly iterate with the customer on the design even before I’ve started to think about plugging them with actual data.
- It’s easier to test. A leaf component has no dependency and requires a small amount of data to render.
- Leaf components are usually simpler (no need to think about fetching data, the “connected” components are higher in the chain), so I don’t risk being blocked right from the start
- I can design the shape of the data to be passed to the component with no assumption about the children
Overall, starting with the leaves helps to separate responsibilities/concerns in the right way
So let’s start by the Avatar component. It relies on material-ui’s Avatar, and uses the Gravatar service to display a user picture based on the user email. This is just a regular React.js component:
// in src/Avatar.jsimport React from "react";import MuiAvatar from "@material-ui/core/Avatar";import { withStyles } from "@material-ui/core/styles";import md5 from "blueimp-md5";
const styles = { avatar: { width: 25, height: 25, },};
const AvatarView = ({ user, classes }) => ( <MuiAvatar className={classes.avatar} src={ user ? `https://www.gravatar.com/avatar/${md5(user.email)}?d=retro` : `https://www.gravatar.com/avatar/?d=mp` } />);
const Avatar = withStyles(styles)(AvatarView);
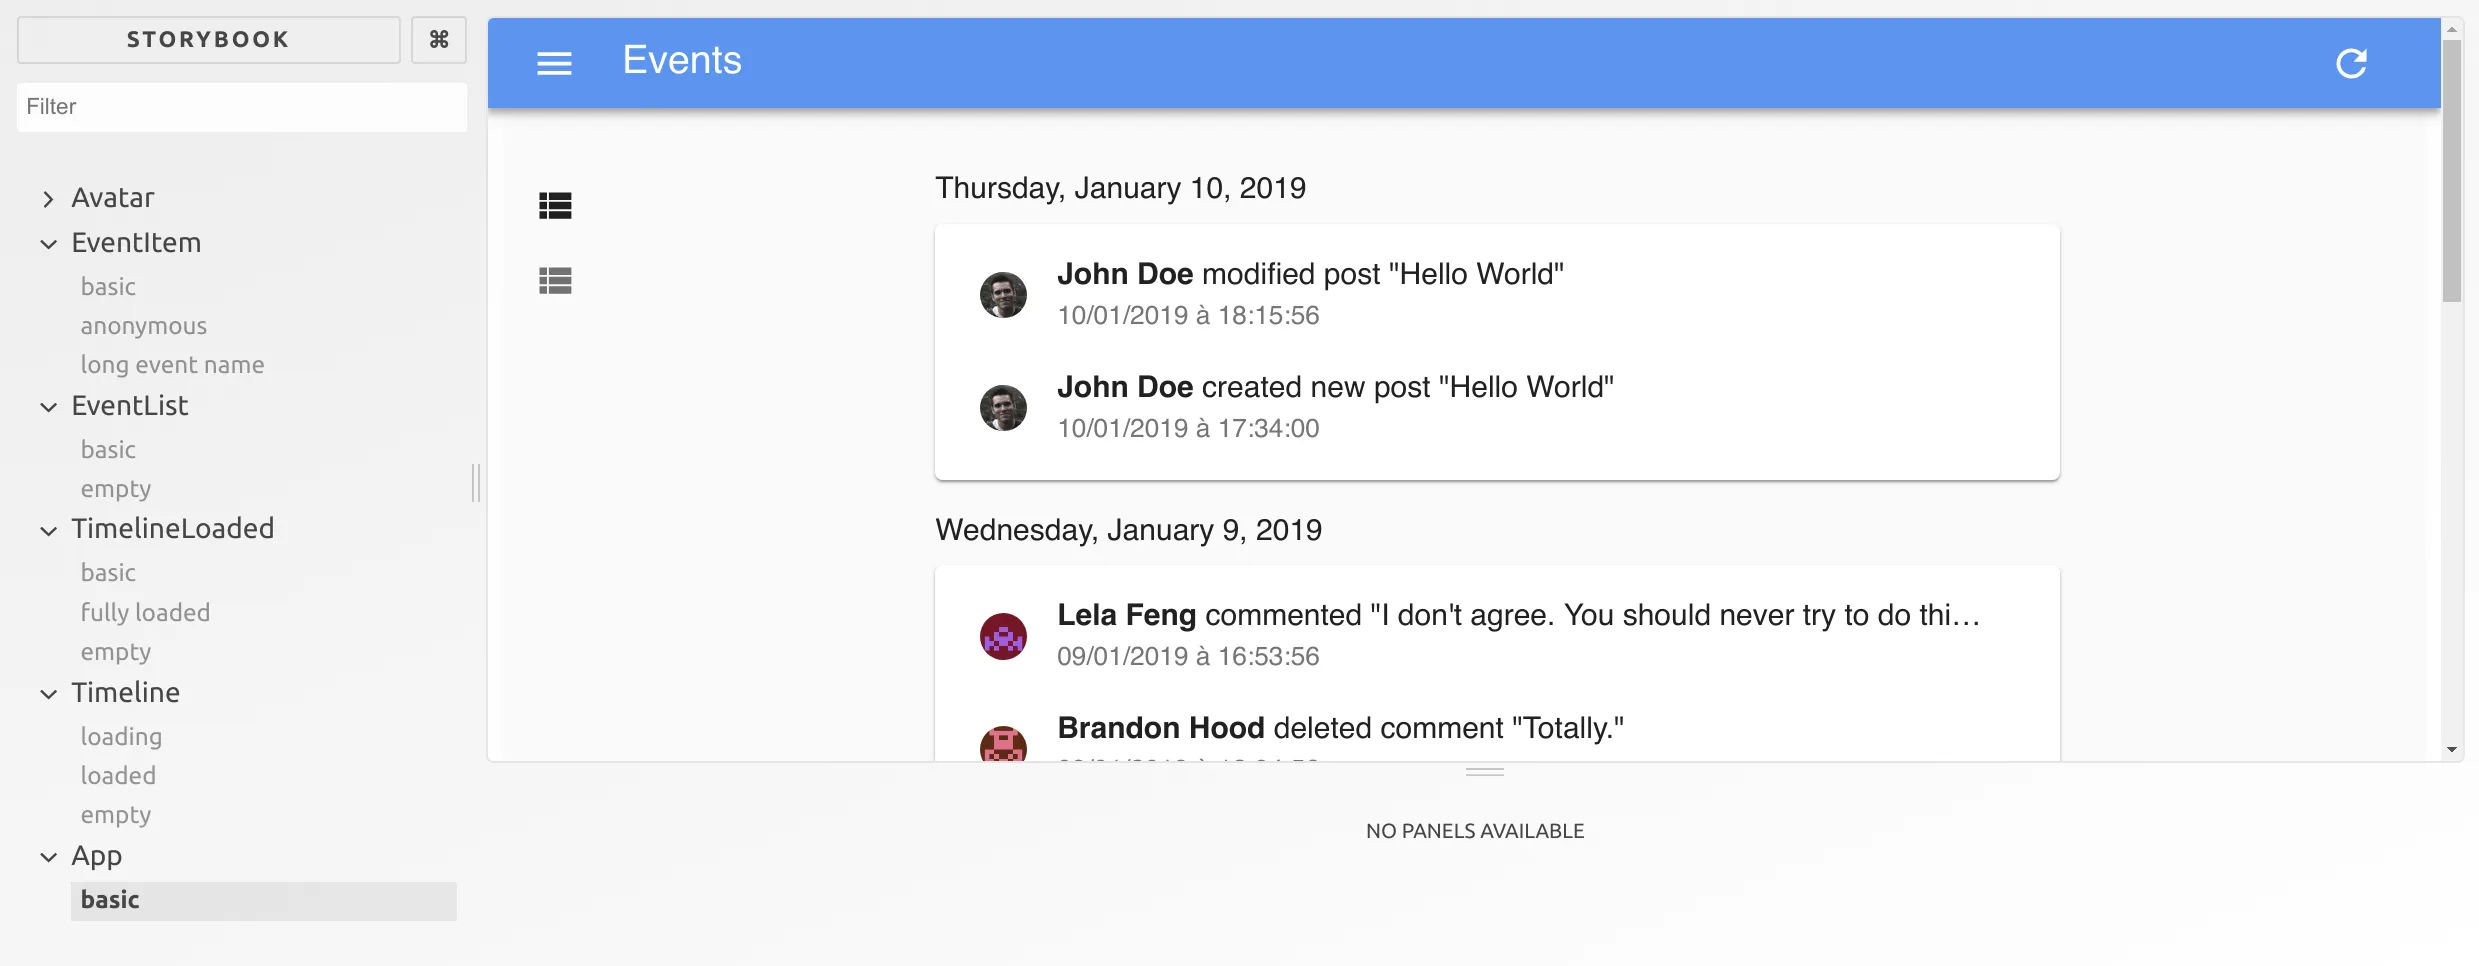
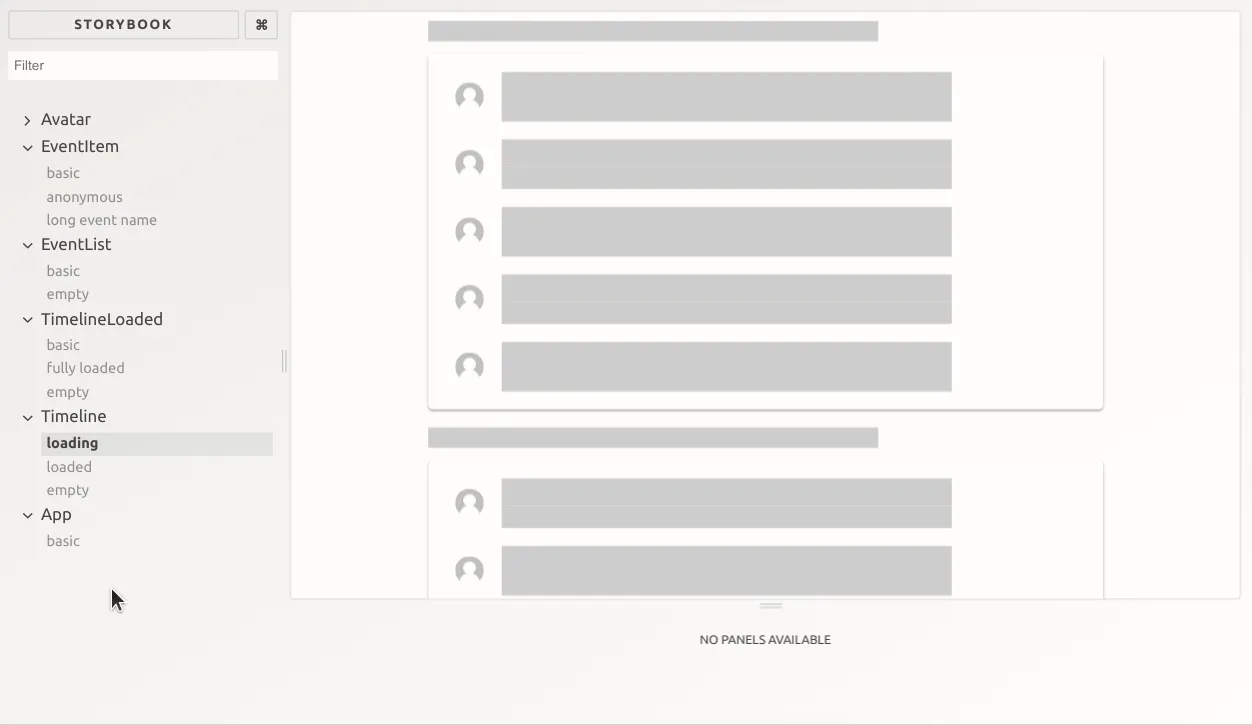
export default Avatar;Using Storybook to Develop In Isolation
Now, to render Avatar in isolation, I setup a Storybook and write a story:
// in src/Avatar.stories.jsimport React from "react";import { storiesOf } from "@storybook/react";import Avatar from "./Avatar";
const userWithAvatar = {  email: "jitewaboh@lagify.com",};
const userWithNoAvatar = {  email: "lelafeng@example.com",};
storiesOf("Avatar", module)  .add("basic", () => <Avatar user={userWithAvatar} />)  .add("using fallback", () => <Avatar user={userWithNoAvatar} />)  .add("anonymous", () => <Avatar />);
I can check that the Storybook displays an avatar, even when the user is undefined.
![]()
Avatar, check! The component contains no logic so I won’t bother writing a unit test for it.
Start With a Story
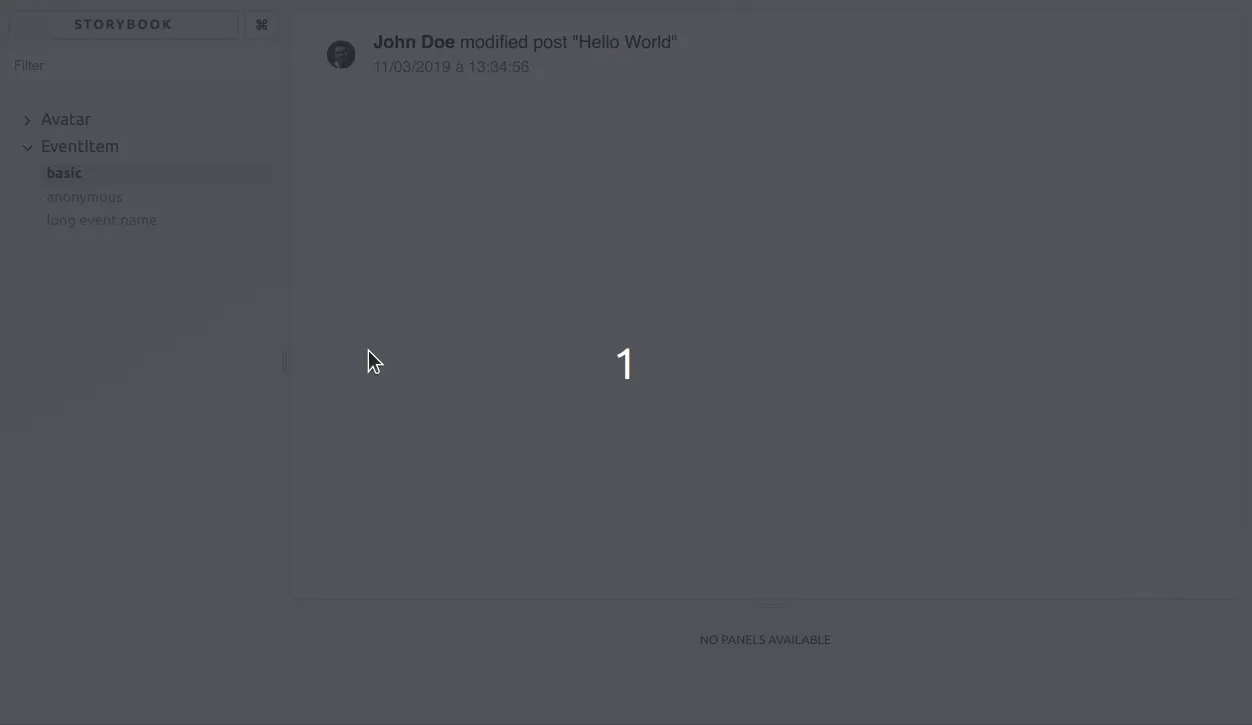
Now, let’s continue with the EventItem component. This time, I’ll write the story first. It forces me to think about the shape of data the component should expect. For now, let’s consider that the user data is included in the event:
// in src/EventItem.stories.jsimport React from "react";import { storiesOf } from "@storybook/react";import EventItem from "./EventItem";
const event = {  label: 'modified post "Hello World"',  createdAt: "2019-03-11T12:34:56.000Z",  author: {    name: "John Doe",    email: "jitewaboh@lagify.com",  },};
const anonymousEvent = {  label: 'liked "Lorem Ipsum"',  createdAt: "2019-03-11T12:34:56.000Z",};
const eventWithLongName = {  label:    "commented \"I don't agree. You should never try to do things this way, or you'll end up in a bad place.\"",  createdAt: "2019-03-11T12:34:56.000Z",  author: {    name: "Lela Feng",    email: "lelafeng@example.com",  },};
storiesOf("EventItem", module)  .add("basic", () => <EventItem event={event} />)  .add("anonymous", () => <EventItem event={anonymousEvent} />)  .add("long event name", () => <EventItem event={eventWithLongName} />);
Then it’s time to develop the EventItem itself. Nothing fancy here, just using standard material-ui code based on the ListItem component:
// in src/EventItem.jsimport React from "react";import ListItem from "@material-ui/core/ListItem";import ListItemText from "@material-ui/core/ListItemText";import ListItemAvatar from "@material-ui/core/ListItemAvatar";import { withStyles } from "@material-ui/core/styles";import Avatar from "./Avatar";
const styles = {  truncate: {    width: 500,    whiteSpace: "nowrap",    overflow: "hidden",    textOverflow: "ellipsis",  },};
const EventItemView = ({ event, classes }) => (  <ListItem>    <ListItemAvatar>      <Avatar user={event.author} />    </ListItemAvatar>    <ListItemText      primary={        <div className={classes.truncate}>          <strong>{event.author ? event.author.name : "Anonymous"}</strong>{" "}          {event.label}        </div>      }      secondary={new Date(event.createdAt).toLocaleString()}    />  </ListItem>);
const EventItem = withStyles(styles)(EventItemView);
export default EventItem;
The storybook helps me to validate the code.
Climbing the Component Tree
Now that EventItem is done, I can move up to the component tree and code the EventList component. I start by writing a story, and the test data:
// in src/EventList.stories.jsimport React from "react";import { storiesOf } from "@storybook/react";import EventList from "./EventList";
const events = [  {    id: 1234,    label: 'modified post "Hello World"',    createdAt: "2019-01-10T17:15:56.000Z",    author: {      name: "John Doe",      email: "jitewaboh@lagify.com",    },  },  {    id: 1233,    label: 'created new post "Hello World"',    createdAt: "2019-01-10T08:54:00.000Z",    author: {      name: "John Doe",      email: "jitewaboh@lagify.com",    },  },];
storiesOf("EventList", module)  .add("basic", () => <EventList events={events} />)  .add("empty", () => <EventList />);
I had to add an id field to each event because the list renders an array of EventItem component, and react expects a unique identifier for elements in a list. The list itself is straightforward:
// in src/EventList.jsimport React from "react";import Card from "@material-ui/core/Card";import List from "@material-ui/core/List";import { withStyles } from "@material-ui/core/styles";import EventItem from "./EventItem";
const styles = {  root: {    width: 600,  },};
const EventListView = ({ events = [], classes }) => (  <Card className={classes.root}>    <List>      {events.map((event) => (        <EventItem event={event} key={event.id} />      ))}    </List>  </Card>);
const EventList = withStyles(styles)(EventListView);
export default EventList;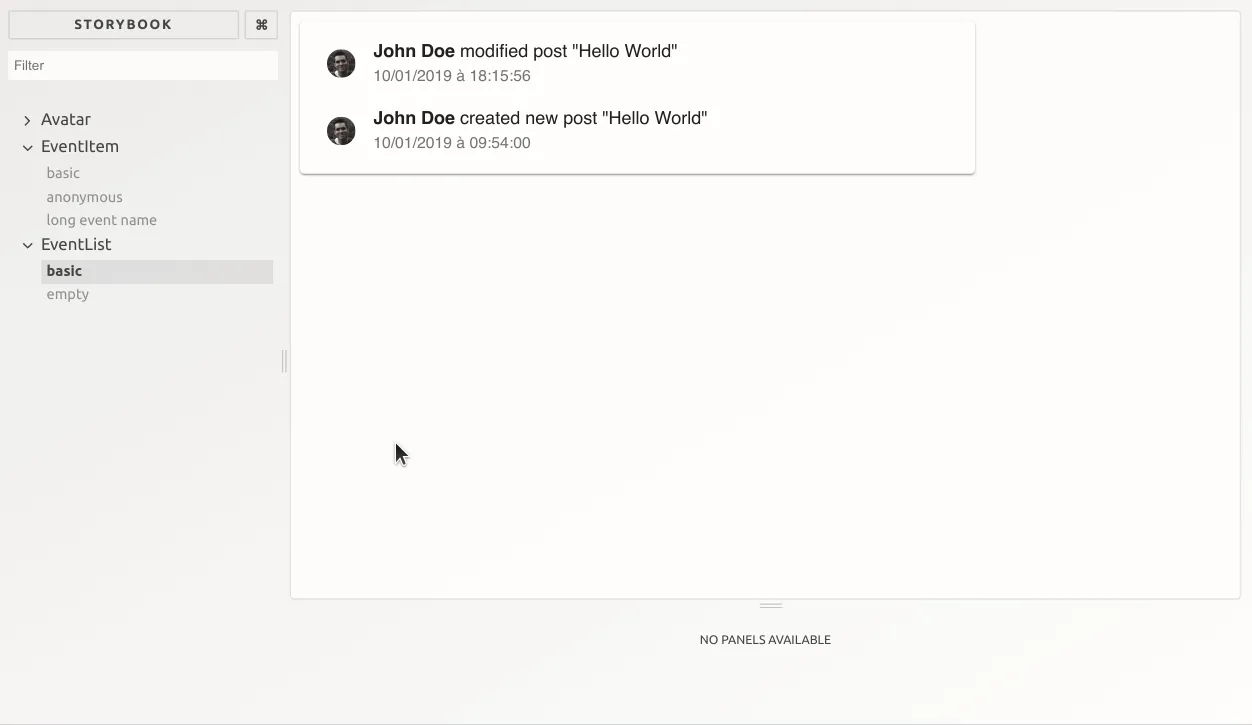
Extracting Logic to Non-Component Code
Still moving up in the component hierarchy, I’m now considering the <TimelineLoaded> component. It is supposed to show events grouped by day. I assume the server will just send an array of events, so it’s up to the client to aggregate them by day.
I could write that aggregation code in a component, but since it’s pure JS code, and because I want to test it in isolation, I decide to write it in a standalone file, as pure functions.
// in src/groupByDay.jsconst sortByDate = (a, b) => new Date(b).valueOf() - new Date(a).valueOf();
const getDayForEvent = (event) => {  const date = new Date(event.createdAt);  date.setMilliseconds(0);  date.setSeconds(0);  date.setMinutes(0);  date.setHours(0);  return date.toISOString();};
const groupByDay = (events) => {  const groups = events.reduce((days, event) => {    const day = getDayForEvent(event);    if (!days[day]) {      days[day] = [];    }    days[day] = days[day].concat(event);    return days;  }, {});  return {    days: Object.keys(groups).sort(sortByDate),    eventsByDay: groups,  };};
export default groupByDay;
Since it’s plain JavaScript, this code is easy to test with Jest - no need to boot enzyme or react-testing-library:
// in src/groupByDay.test.jsimport groupByDay from "./groupByDay";
describe("groupByDay", () => {  it("should aggregate events by day", () => {    const events = [      { createdAt: "2019-01-05T12:56:31.039Z", label: "foo1" },      { createdAt: "2019-01-05T09:12:43.456Z", label: "foo2" },      { createdAt: "2019-01-04T12:34:56.789Z", label: "foo3" },    ];    expect(groupByDay(events)).toEqual({      days: ["2019-01-04T23:00:00.000Z", "2019-01-03T23:00:00.000Z"],      eventsByDay: {        "2019-01-04T23:00:00.000Z": [          {            createdAt: "2019-01-05T12:56:31.039Z",            label: "foo1",          },          {            createdAt: "2019-01-05T09:12:43.456Z",            label: "foo2",          },        ],        "2019-01-03T23:00:00.000Z": [          {            createdAt: "2019-01-04T12:34:56.789Z",            label: "foo3",          },        ],      },    });  });});
This is the only unit test I’ll need to write.
Most of the components I write are purely presentational (and require no test), because I’m used to extracting everything that can be tested into standalone functions. That way, I avoid the pitfalls of unit testing React components.
Keeping Presentational Components Small
The TimelineLoaded component should display events grouped by day. As before, I start by writing a Story - actually, most of the work is writing the test data. Fortunately, I already imagined test data earlier for the mockups, so it’s just a matter of writing them in JSON.
// in src/TimelineLoaded.stories.jsimport React from "react";import { storiesOf } from "@storybook/react";import TimelineLoaded from "./TimelineLoaded";
const events = [  {    id: 1234,    label: 'modified post "Hello World"',    createdAt: "2019-01-10T17:15:56.000Z",    author: {      name: "John Doe",      email: "jitewaboh@lagify.com",    },  },  {    id: 1233,    label: 'created new post "Hello World"',    createdAt: "2019-01-10T16:34:00.000Z",    author: {      name: "John Doe",      email: "jitewaboh@lagify.com",    },  },  {    id: 1232,    label:      "commented \"I don't agree. You should never try to do things this way, or you'll end up in a bad place.\"",    createdAt: "2019-01-09T15:53:56.000Z",    author: {      name: "Lela Feng",      email: "lelafeng@example.com",    },  },  {    id: 1231,    label: 'deleted comment "Totally."',    createdAt: "2019-01-09T11:04:56.000Z",    author: {      name: "Brandon Hood",      email: "brandon@example.com",    },  },  {    id: 1230,    label: 'liked "Lorem Ipsum"',    createdAt: "2019-01-09T09:12:56.000Z",  },];
storiesOf("TimelineLoaded", module)  .add("basic", () => <TimelineLoaded events={events.slice(0, -1)} total={5} />)  .add("fully loaded", () => <TimelineLoaded events={events} />)  .add("empty", () => <TimelineLoaded />);
Once again, there is very little logic in the <TimelineLoaded> component below. There are only two conditions testing for limit cases (empty event list, which is not normal, and fully loaded event list, which is normal). The rest is presentational.
// in src/TimelineLoaded.jsimport React from "react";import Typography from "@material-ui/core/Typography";import Button from "@material-ui/core/Button";import { withStyles } from "@material-ui/core/styles";
import EventList from "./EventList";import groupByDay from "./groupByDay";
const styles = {  root: {    width: 600,    margin: "auto",  },  day: {    marginBottom: "1em",  },};
const getDayString = (date) =>  new Date(date).toLocaleDateString(undefined, {    weekday: "long",    year: "numeric",    month: "long",    day: "numeric",  });
const TimelineLoadedView = ({  events = [],  handleLoadMore,  total,  classes,}) => {  const { days, eventsByDay } = groupByDay(events);  if (days.length === 0) {    return (      <Typography color="error">        Error: This list should not be empty.      </Typography>    );  }  return (    <div className={classes.root}>      {days.map((day) => (        <div key={day} className={classes.day}>          <Typography variant="subheading" gutterBottom>            {getDayString(day)}          </Typography>          <EventList events={eventsByDay[day]} />        </div>      ))}      {events.length < total && (        <Button variant="contained" onClick={handleLoadMore}>          Load more events        </Button>      )}    </div>  );};
const TimelineLoaded = withStyles(styles)(TimelineLoadedView);
export default TimelineLoaded;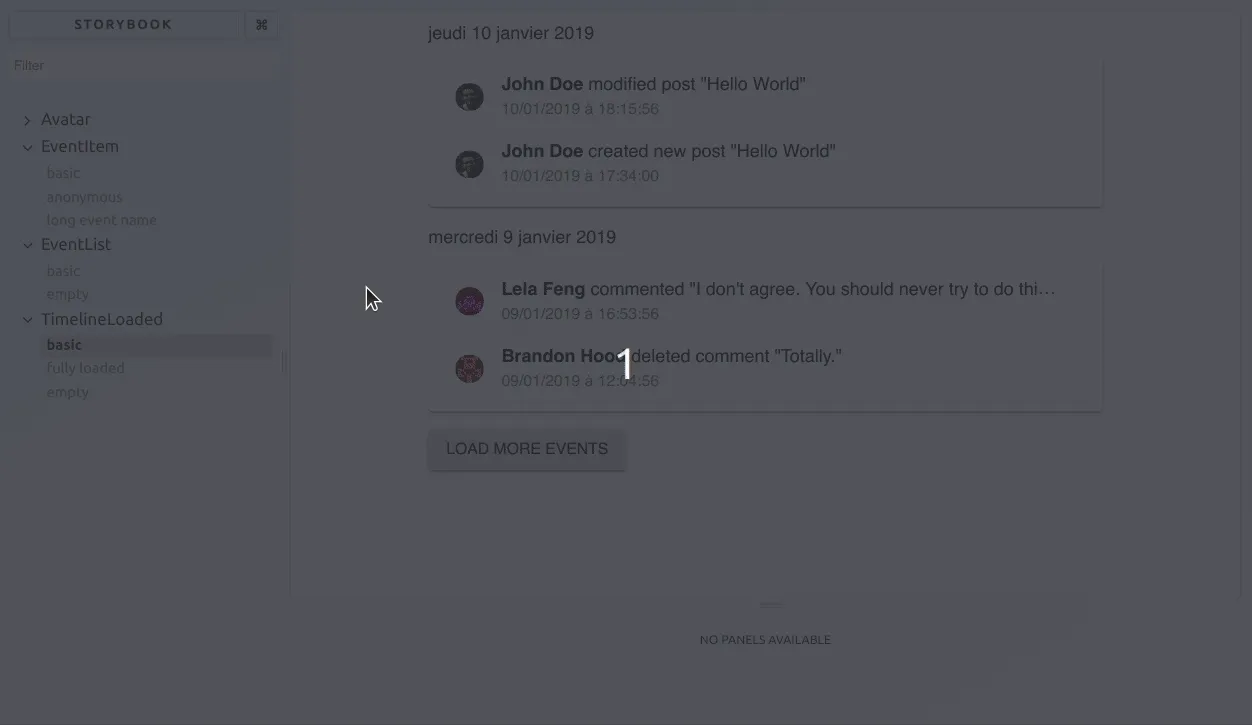
Keeping components small makes it easy to reason about code.
Note that I haven’t written a single line of code for fetching the events yet. And therefore, all the code above is pure react and material-ui. No Redux, no react-admin.
Managing UI State
Now it’s time to deal with the <Timeline> component. This component fetches the data, and decides to display either one of the three components below:
<TimelineLoading><TimelineLoaded><TimelineEmpty>
Tip: I haven’t included the code for <TimelineLoaded> and <TimelineEmpty> in this tutorial, but you can find them in the source, linked at the end of the tutorial.
My first reflex was to use react-admin’s <List> component, letting react-admin fetch the events. That way, I’d just have to decide which <TimelineXXX> component to render based on the data fetched by react-admin. That means I initially wrote the Timeline component as follows:
// in src/Timeline.jsimport React from "react";import { List } from "react-admin";
import TimelineLoaded from "./TimelineLoaded";import TimelineLoading from "./TimelineLoading";import TimelineEmpty from "./TimelineEmpty";
export const TimelineView = ({ ids, data, total, loadedOnce }) =>  !loadedOnce ? (    <TimelineLoading />  ) : ids.length > 0 ? (    <TimelineLoaded events={ids.map((id) => data[id])} total={total} />  ) : (    <TimelineEmpty />  );
const Timeline = (props) => (  <List {...props}>    <TimelineView />  </List>);
export default Timeline;
As a matter of fact, this script contains two components: a view (TimelineView) and a controller (Timeline).
The TimelineView component is independent of react-admin, so it’s easy to test with Storybook. I reused the fake timeline data from the TimelineLoaded story:
// in src/Timeline.stories.jsimport React from "react";import { storiesOf } from "@storybook/react";import { TimelineView } from "./Timeline";import { events } from "./TimelineLoaded.stories.js";
storiesOf("Timeline", module)  .add("loading", () => <TimelineView />)  .add("loaded", () => (    <TimelineView      ids={events.map((event) => event.id)}      data={events.reduce(        (data, event) => ({ ...data, [event.id]: event }),        {},      )}      total={10}      loadedOnce={true}    />  ))  .add("empty", () => <TimelineView ids={[]} data={{}} loadedOnce={true} />);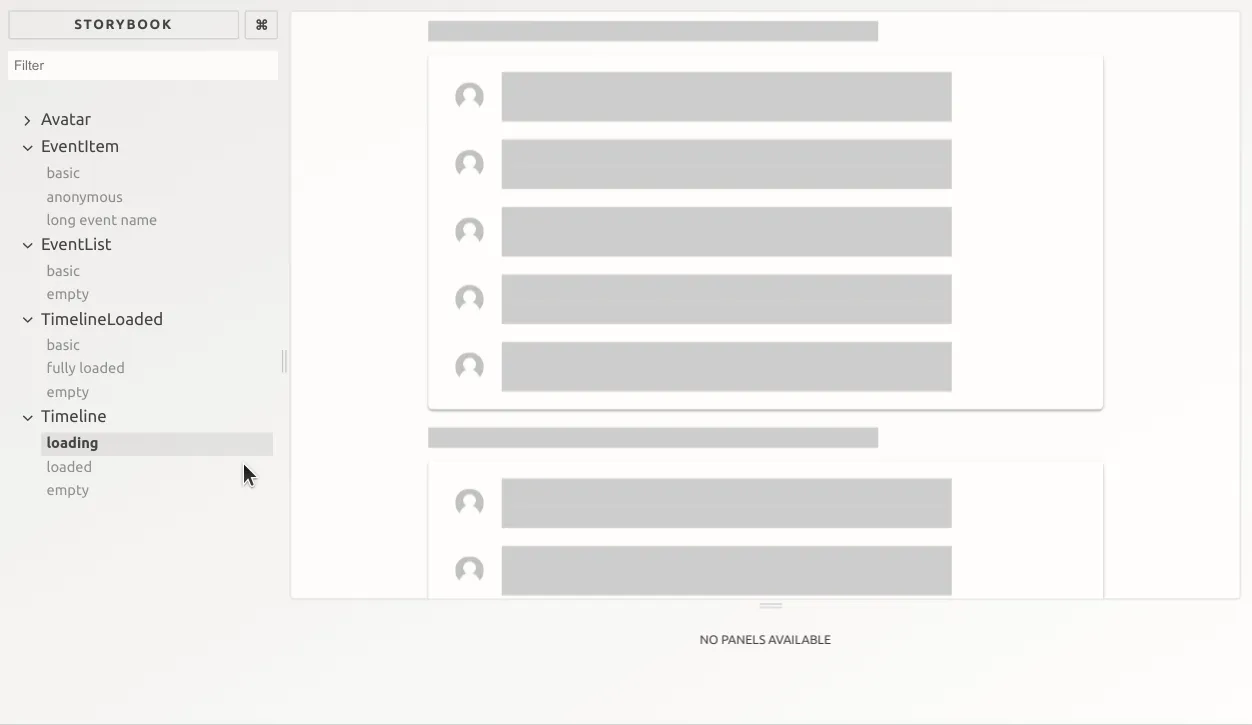
Integrating With React-Admin
In the Timeline component, react-admin’s <List> component fetches, computes and injects the ids, data, total, and loadedOnce props to its child.
To test Timeline, I have to use is as the list prop of the <Resource name="events" /> in react-admin:
// in src/App.jsimport React, { Component } from "react";import { Admin, Resource } from "react-admin";
import dataProvider from "./dataProvider";import Timeline from "./Timeline";
const App = () => (  <Admin dataProvider={dataProvider}>    <Resource name="events" list={Timeline} />  </Admin>);
export default App;
I can test it visually with Storybook:
// in src/App.stories.jsimport React from "react";import { storiesOf } from "@storybook/react";import App from "./App";
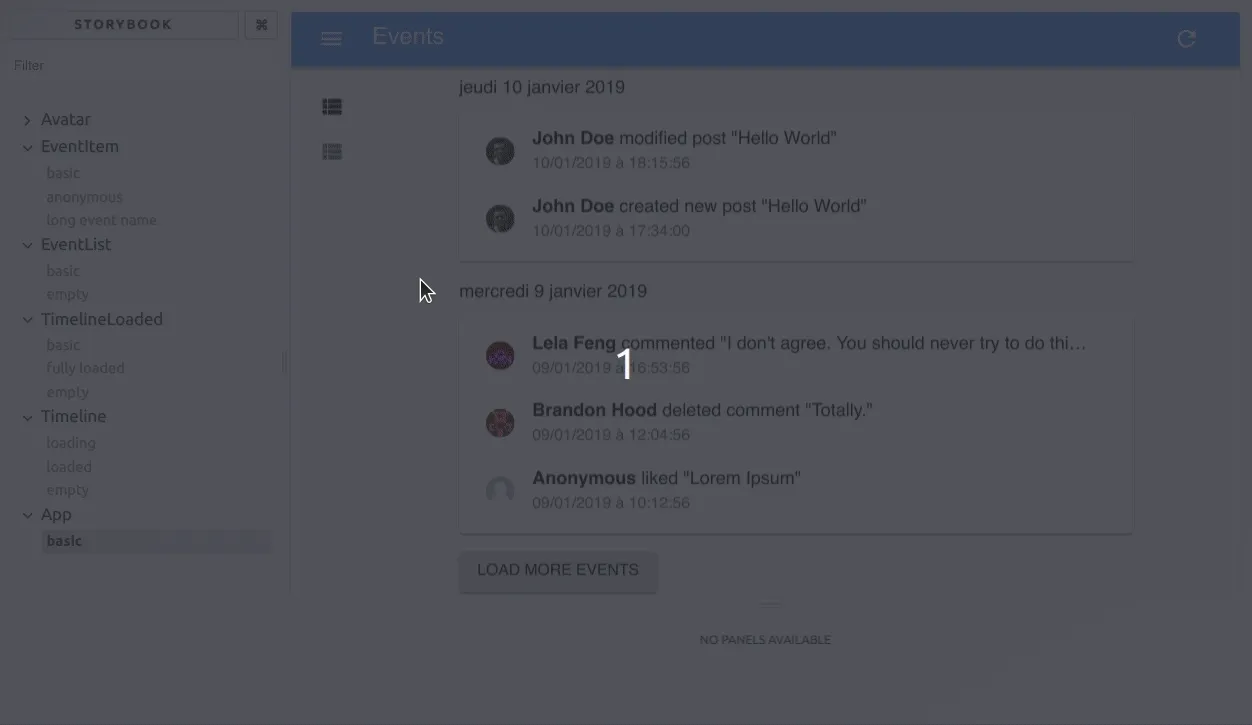
storiesOf("App", module).add("basic", () => <App />);That works fine: the <TimelineLoading> appears first (while the <List> is fetching the events from the dataProvider), then the events appear in the <TimelineLoaded>.
But there is UI a problem with this approach: react-admin’s <List> renders a material-ui <Paper>, so the <Timeline> shows a paper within a paper. Not satisfactory.
Using React-Admin ListController Component To Customize The List Layout
So I decided to go a bit deeper and to use the controller part of react-admin’s <List> but not the UI. In fact, react-admin does all the data fetching in a component called <ListController>, which delegates the rendering to its child (using the render props pattern). So I can overcome the “paper in paper” problem by writing the following code:
// in src/Timeline.jsimport React from "react";import { ListController } from "react-admin";
// ...
const Timeline = (props) => (  <ListController {...props}>    {(controllerProps) => <TimelineView {...controllerProps} />}  </ListController>);
That’s a bit too drastic because the <List> component used to take care of the page title. Using <ListController> only, the page title is empty. So I need one more change to make it work, and that’s using react-admin’s <Title> component:
// in src/Timeline.jsimport React from "react";import { ListController, Title } from "react-admin";
// ...
const Timeline = (props) => (  <ListController {...props}>    {(controllerProps) => (      <>        <Title title="Events" />        <TimelineView {...controllerProps} />      </>    )}  </ListController>);
Now the UI displays the timeline over a gray background instead of a paper. From a UI point of view, that’s a success!
Making the Pagination Work
The “Load more events” button has no effect for now. The <TimelineLoaded> component expects a handleLoadMore prop that I didn’t include yet. I could use the controllerProps that the <ListController> prepares - they include a page and a setPage prop.
But <ListController> replaces the current page by the next one, whereas in a timeline, when the user clicks on “Load more events”, they expect to see the new events appear in addition to the previous ones. I have to use a local state trick to keep relying on <ListController>. In the process, I’m obliged to turn <TimelineView> into a class component:
// in src/Timeline.jsimport React, { Component } from "react";import { ListController, Title } from "react-admin";
import TimelineLoaded from "./TimelineLoaded";import TimelineLoading from "./TimelineLoading";import TimelineEmpty from "./TimelineEmpty";
class TimelineView extends Component {  state = {    events: [],    latestId: null,  };
  static getDerivedStateFromProps(props, state) {    const { ids, data } = props;    const latestId = ids[ids.length - 1];    if (latestId !== state.latestId) {      const newEvents = ids.map((id) => data[id]);      return {        events: state.events.concat(newEvents),        latestId,      };    }
    return null;  }
  handleLoadMore = () => {    this.props.setPage(this.props.page + 1);  };
  render() {    const { events } = this.state;    const { total, loadedOnce } = this.props;    return !loadedOnce ? (      <TimelineLoading />    ) : events.length > 0 ? (      <TimelineLoaded        events={events}        total={total}        handleLoadMore={this.handleLoadMore}      />    ) : (      <TimelineEmpty />    );  }}
const Timeline = (props) => (  <ListController {...props}>    {(controllerProps) => (      <>        <Title title="Events" />        <TimelineView {...controllerProps} />      </>    )}  </ListController>);
export default Timeline;
The “Load more events” button now works, but with a caveat. If the user clicks on “Load more events”, the page increments from 1 to 2, and the events for page 2 appear below the initial events. But, if the user refreshes the list, only the events from page 2 are rendered on screen. Why is that?
<ListController> keeps track of the current page, so that next time the user reloads a list, they see the same page they had on screen before leaving the list. So after loading more events, the <ListController> loads page 2 by default. My trick doesn’t really work.
Using a Custom List Controller
In fact, <ListController> does a lot of things that I don’t need. It handles filters, custom sort order, and the query string. As it doesn’t handle pagination the way I need, perhaps I can replace ListController by a custom component of my own?
There are two things that <ListController> does that my new component must replicate:
- dispatch a Redux action (
crudGetList) to fetch the events - grab the
dataandidsfrom the state.
Well, it shouldn’t be too difficult to write, is it?
// in src/Timeline.jsimport React, { Component } from 'react';import { connect } from 'react-redux';import { Title, crudGetList } from 'react-admin';import TimelineLoaded from './TimelineLoaded';import TimelineLoading from './TimelineLoading';import TimelineEmpty from './TimelineEmpty';
export class Timeline extends Component {    page = 1;    constructor(props) {        super(props);        this.state = {            events: props.ids.map(id => props.data[id]),            latestId: props.ids[props.ids.length - 1],,        };    }
    updateData = () => {        this.props.crudGetList(            'events',            { page: this.page, perPage: 10 },            { field: 'id', order: 'DESC' }        );    };
    componentDidMount() {        this.updateData();    }
    componentDidUpdate(prevProps, prevState) {        if (this.props.ids !== prevProps.ids) {            const { ids, data } = this.props;            const latestId = ids[ids.length - 1];            if (latestId && latestId !== prevState.latestId) {                const newEvents = ids.map(id => data[id]);                this.setState(state => ({                    events: state.events.concat(newEvents),                    latestId,                }));            }        }    }
    handleLoadMore = () => {        this.page = this.page + 1;        this.updateData();    };
    render() {        const { events } = this.state;        const { total, loadedOnce } = this.props;        return (            <>                <Title title="Events" />                {!loadedOnce ? (                    <TimelineLoading />                ) : events.length === 0 ? (                    <TimelineEmpty />                ) : (                    <TimelineLoaded                        events={events}                        total={total}                        handleLoadMore={this.handleLoadMore}                    />                )}            </>        );    }}
Timeline.defaultProps = {    ids: [],    data: {},    crudGetList: () => null,};
const mapStateToProps = state => ({    ids: state.admin.resources.events.list.ids,    data: state.admin.resources.events.data,    total: state.admin.resources.events.list.total,    loadedOnce: state.admin.resources.events.list.loadedOnce,});
export default connect(    mapStateToProps,    { crudGetList })(Timeline);
And without changing the application code, it works:
import React, { Component } from "react";import { Admin, Resource } from "react-admin";
import dataProvider from "./dataProvider";import Timeline from "./Timeline";
const App = () => (  <Admin dataProvider={dataProvider}>    <Resource name="events" list={Timeline} />  </Admin>);
export default App;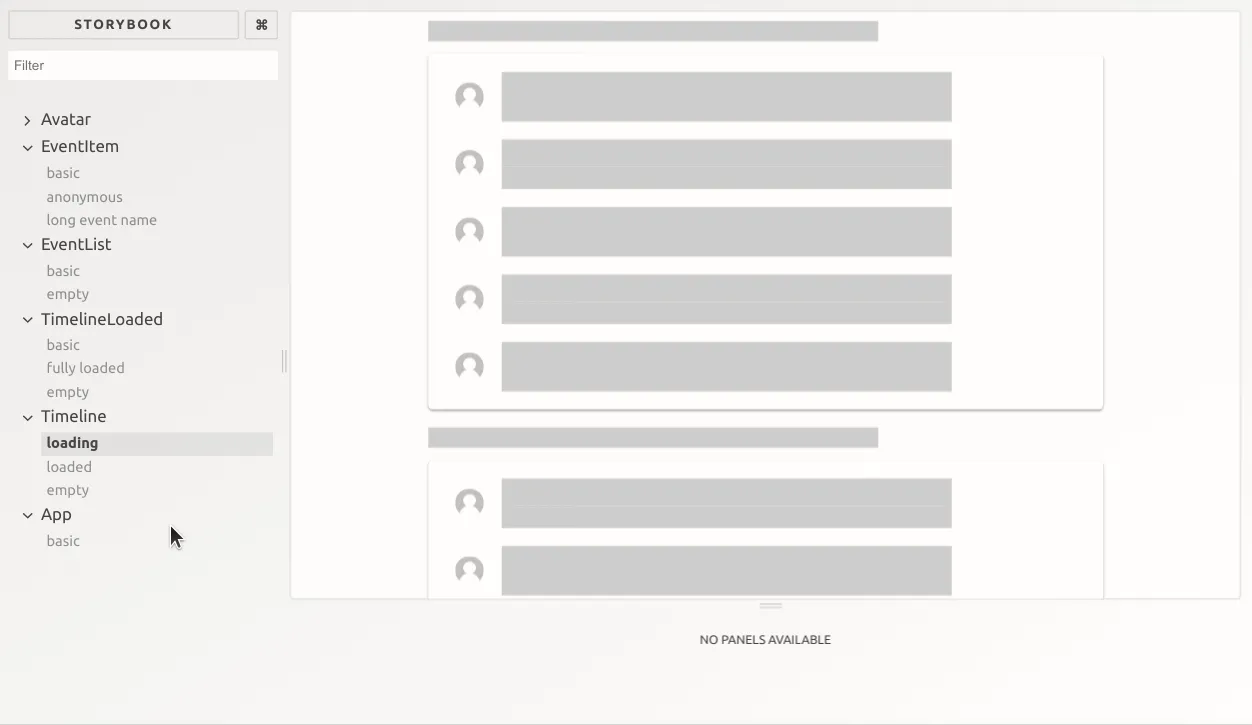
Acute observers may notice a little problem, though. When a user clicks on “Load More”, then browses to another page, then browses back to the Timeline, they briefly see the events of page 2 before seeing the events of page 1. This is because when the Timeline mounts, it grabs the list of events from the Redux store. The last time the Timeline was mounted, it was for page 2. Therefore, the events from page 2 appear while page 1 is being fetched.
To fix this problem, I simply reset the list of events in the store when the Timeline unmounts:
export class Timeline extends Component { // ... componentWillUnmount() { this.page = 1; this.updateData(); }}Now the User Experience is flawless.
This version of the <Timeline> is clearer because it only uses Redux. It also shows that it’s possible to replace a component as central as <List> with a component of your own. React-admin was in fact designed to allow an easy replacement of any of its components. React-admin tries to do one thing right and to let you use your own components when a use case requires something more specific.
This component also uses very little of react-admin - in fact, just the Redux store and one action creator. but these are the core of react-admin, the skeleton if you prefer. In many cases, when I want to build something specific with react-admin, I end up using only that core. Knowing react-admin core will set you free to do whatever you want.
Using Internationalisation
I was a bit too optimistic when creating the fake events. I thought that the server could return event labels, as follows:
const events = [ { id: 1234, label: 'modified post "Hello World"', createdAt: '2019-01-10T17:15:56.000Z', author: { name: 'John Doe', email: 'jitewaboh@lagify.com', }, }, { id: 1233, label: 'created new post "Hello World"', createdAt: '2019-01-10T16:34:00.000Z', author: { name: 'John Doe', email: 'jitewaboh@lagify.com', }, }, ...];But the customer wants the application to be usable in several languages, and to handle i18n logic on the frontend side. That means that the API must return events in a language agnostic way, and they actually look like the following:
const events = [ { id: 1234, object: 'post', objectName: 'Hello World', type: 'modify', createdAt: '2019-01-10T17:15:56.000Z', author: { name: 'John Doe', email: 'jitewaboh@lagify.com', }, }, { id: 1233, object: 'post', objectName: 'Hello World', type: 'create', createdAt: '2019-01-10T16:34:00.000Z', author: { name: 'John Doe', email: 'jitewaboh@lagify.com', }, }, ...];So the EventItem can no longer use the event.label data. I chose to use the react-admin translation system to turn the structured event data into a localized string. The idea is to generate a translation key for an event, e.g. event.post.modify, or event.post.create, and to turn this identifier into a language-specific string in the locale dictionaries.
import React from 'react';import ListItem from '@material-ui/core/ListItem';import ListItemText from '@material-ui/core/ListItemText';import ListItemAvatar from '@material-ui/core/ListItemAvatar';import { withStyles } from '@material-ui/core/styles';import { translate } from 'react-admin';import Avatar from './Avatar';
// ...
const EventItemView = ({ event, classes }) => (const EventItemView = ({ event, translate, classes }) => (    <ListItem>        <ListItemAvatar>            <Avatar user={event.author} />        </ListItemAvatar>        <ListItemText            primary={                <div className={classes.truncate}>                    <strong>                        {event.author ? event.author.name : 'Anonymous'}                    </strong>{' '}                   {event.label}                   {translate(`event.${event.object}.${event.type}`, {                       name: event.objectName,                   })}                </div>            }            secondary={new Date(event.createdAt).toLocaleString()}        />    </ListItem>);
const EventItem = withStyles(styles)(EventItemView);const EventItem = translate(withStyles(styles)(EventItemView));
export default EventItem;
I add the translation in the react-admin dictionary files:
// in src/i18n/en.jsimport englishMessages from "ra-language-english";
export default {  ...englishMessages,  event: {    post: {      create: 'created a new post "%{name}"',      modify: 'modified post "%{name}"',    },  },};
Variable substitution in translation strings allows the translation to look natural.
Conclusion
It took me about three hours to code the Timeline and plug it to react-admin. You can find the final code on GitHub, in the marmelab/timeline-react-admin repository. I was really happy with how little react-admin code I had to write - in fact, most of my code is pure React. I used Redux in the Timeline component and react-admin’s i18n utility in EventItem.
React-admin never got in the way: when I understood that the <List> component didn’t fit with the user story, I replaced it in no time.
The only difficulty was to properly assign responsibilities to each component, and handle Timeline state based on the data.
I hope this tutorial helps you design your own custom list components, and provide a better user experience than react-admin’s default <Datagrid> component.

Authors
Marmelab founder and CEO, passionate about web technologies, agile, sustainability, leadership, and open-source. Lead developer of react-admin, founder of GreenFrame.io, and regular speaker at tech conferences.