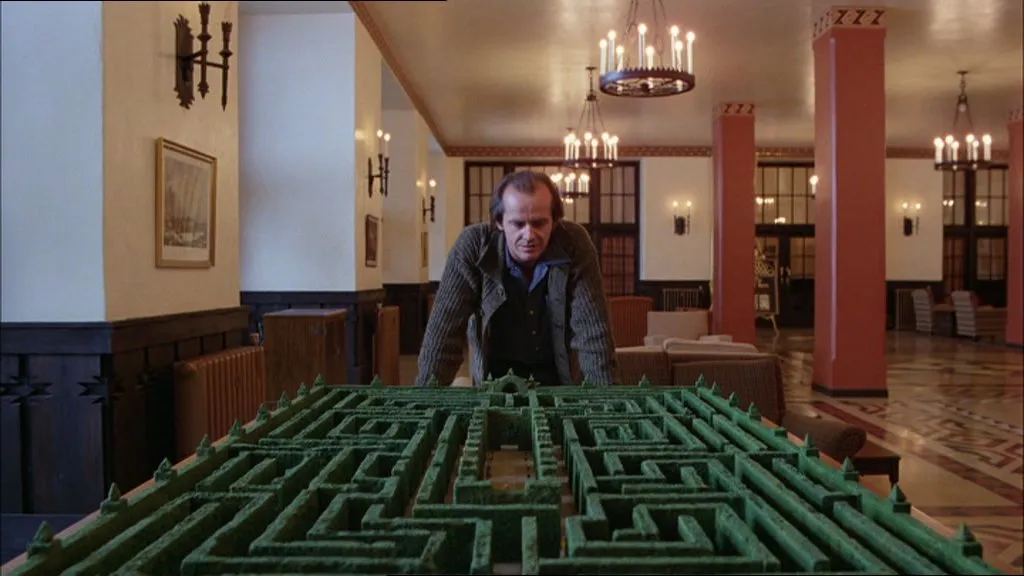
Into The Labyrinth With x3dom

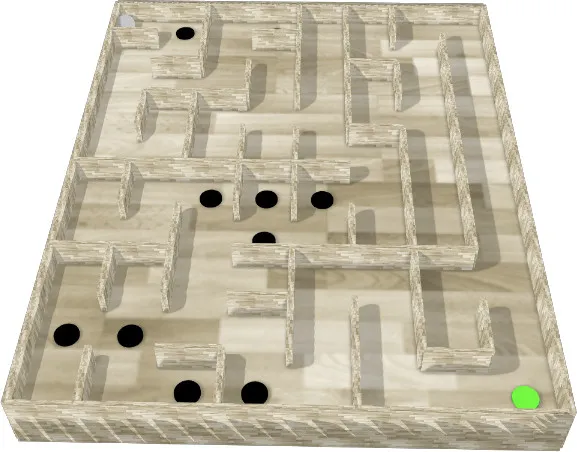
Today I will talk about x3dom, pronounced Xfreedom. It’s a new set of HTML elements to render 3D scenes declaratively. To explore X3Dom, I’ll take my marble maze project (a 2d labyrinth where you can move the ball by tilting your device) and render it in 3D.
What Is X3Dom?
x3dom is a recommended standard still in discussion. It allows drawing 3d in the browser using tags. Think svg, but in 3 dimensions. What’s great about x3dom is it’s declarative.
For example, to display an interactive cube that you can rotate with the mouse, you just need the following code:
<x3d width="500px" height="400px"> <scene> <shape> <appearance> <material diffuseColor="1 0 0"></material> </appearance> <box></box> </shape> </scene></x3d>Here is the same with webGl. That’s 234 hard to read lines of code, with matrix manipulation, ArrayBuffer, a mathematic formula to rotate the cube, and more…
The x3dom specification is far from complete. But yet there is already an open source project to try it now. Add the following <script> tag to your HTML, and it will automatically process any x3dom tags.
<script type="text/javascript" src="https://www.x3dom.org/download/x3dom.js"></script>X3Dom and React
My Marble Maze project was done with React. Is it possible to render x3dom elements in React? React can render any element, but restricts the lowercase elements to the HTML specification. So React does not recognize the x3dom tags and fills the console with warnings. To silence these warnings, I needed to use the is prop. Basically, it tells React that an element does exist:
<x3d is="x3d">
Additionally, the x3dom library parses the page for any <x3d> root element on load. To mount a <x3d> element later, I had to tell x3dom to reload:
window.x3dom.reload()
Note that once the <x3d> root is detected, it’s possible to change its children, and the change will be automatically taken into account. I only needed to reload when adding a <x3d> root.
Rendering a Maze
My marble maze implementation generates random mazes using the generate-maze npm package. It uses eller’s algorithm.
The maze structure is a 2d matrix of the following object:
{ x: 4, // Horizontal position, integer y: 7, // Vertical position, integer top: false, // is top wall blocked, boolean left: false, // is left wall blocked, boolean bottom: true, // is bottom wall blocked, boolean right: true, // is right wall blocked, boolean}In the previous implementation, I used a simple div for each object. And I used the style border to display walls based on the top, bottom, left, and right boolean.
{ maze.map((row) => row.map(({ x, y, top, left, bottom, right }) => { return ( <div key={`${x}-${y}`} style={{ position: "absolute", top: y * cellSize, left: x * cellSize, width: cellSize, height: cellSize, borderTop: top ? "2px black solid" : "none", borderLeft: left ? "2px black solid" : "none", borderBottom: bottom ? "2px black solid" : "none", borderRight: right ? "2px black solid" : "none", boxSizing: "border-box", }} /> ); }), );}Maze Walls
I chose to render a <box> for each wall. I created a Box React component for that purpose:
import React from "react";
const Box = ({ x, y, texture, width, height, depth }) => { return ( <transform is="transform" translation={`${x} ${y}`}> <shape is="shape"> <appearance is="appearance"> <imageTexture scale="false" is="imageTexture" url={texture} /> </appearance> <box is="box" size={`${width},${height},${depth}`}></box> </shape> </transform> );};<transform>allows placing the shape. You can translate, rotate, and scale the children of the<transform>tag. Here I need to translate.<shape>allows to group a geometry (like box, sphere, cylinder etc…) with its appearance (material or texture).<appearance>holds the texture of the box.<imageTexture>allows loading the image to use as the texture for the box.<box>defines the box geometry. I specify thesizehere.
To place the wall, I iterated on the maze array, and placed different boxes based on the direction booleans.
<group is="group"> {maze.map((row) => row.map(({ x, y, top, left, bottom, right }) => { return ( <> {top && ( <Box x={x + 0.5} y={-y} width={1} height={0.1} depth={1} texture={wood} /> )} {bottom && ( <Box x={x + 0.5} y={-y - 1} width={1} height={0.1} depth={1} texture={wood} /> )} {left && ( <Box x={x} y={-y - 0.5} width={0.1} height={1} depth={1} texture={wood} /> )} {right && ( <Box x={x + 1} y={-y - 0.5} width={0.1} height={1} depth={1} texture={wood} /> )} </> ); }), )}</group>Maze Ground
I also needed to render the ground. I used a <plane> instead of a <box>, but the principle is the same.
import React from "react";
const Ground = ({ x = 0, y = 0, z = 0, width, height, texture }) => {  return (    <transform is="transform" translation={`${x},${y},${z}`}>      <shape is="shape">        <appearance is="appearance">          <imageTexture is="imageTexture" url={texture} />        </appearance>        <plane is="plane" lit size={`${width},${height}`}></plane>      </shape>    </transform>  );};
Marble Madness
Same for the marble, for which I used a <sphere>.
import React from "react";
const Marble = ({ x = 0, y = 0, z = 0, radius, texture }) => {  return (    <transform is="transform" translation={`${x},${y},${z}`}>      <shape is="shape">        <appearance is="appearance">          <imageTexture is="imageTexture" url={texture} />        </appearance>        <sphere is="sphere" lit solid radius={radius}></sphere>      </shape>    </transform>  );};
Rendering A Hole In 3D
For the hole, I did not find a way to drill holes into the plane. Instead, I rendered a small cylinder on top of the plane for each hole. Here is the cylinder component:
import React from "react";
const Cylinder = ({  x = 0,  y = 0,  z = 0,  rotation,  radius,  height,  diffuseColor,}) => {  return (    <transform      is="transform"      translation={`${x},${y},${z}`}      rotation={rotation}    >      <shape is="shape">        <appearance is="appearance">          <material is="material" diffuseColor={diffuseColor}></material>        </appearance>        <cylinder is="cylinder" radius={radius} solid height={height} lit />      </shape>    </transform>  );};
By default, the cylinder appeared perpendicular to the plane. So I needed to rotate it by 90° on the X-axis for it to become parallel. From the x3dom documentation, rotation transformations work as follows:
Name Type Default Value Descriptionrotation SFRotation 0,0,1,0 The rotation field specifies a rotation of the coordinate system.Not really helpful is it? Ok so there are four digits, but what do they represent? Angle for x, y, z-axis? What about the fourth value? What is the unit, degree, or radian?
To be honest, I struggled to find the answer, and this the edutechwiki.unige.ch site saved me. The answer is actually pretty clever.
The format is x y z angle, where angle is the rotation in radian. And x y and z can be 0 or 1 and indicates the rotation axis.
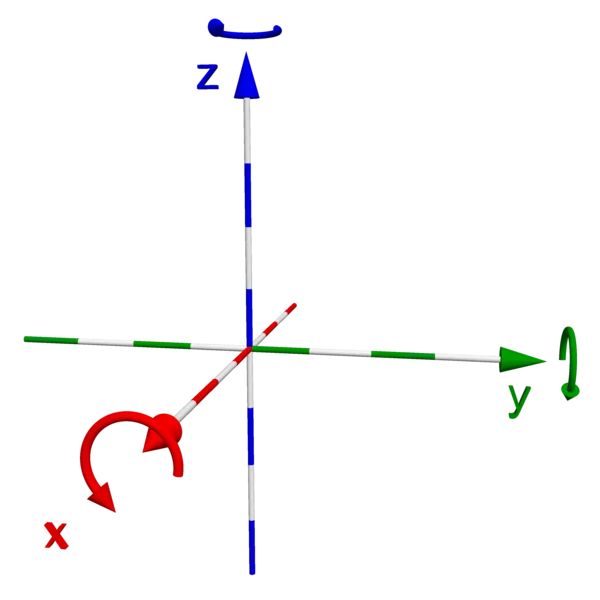
So to rotate by 90° on the x-axis I did 1 0 0 Math.PI/2.
And that’s all there is to do to render the maze.
Watch What Happens
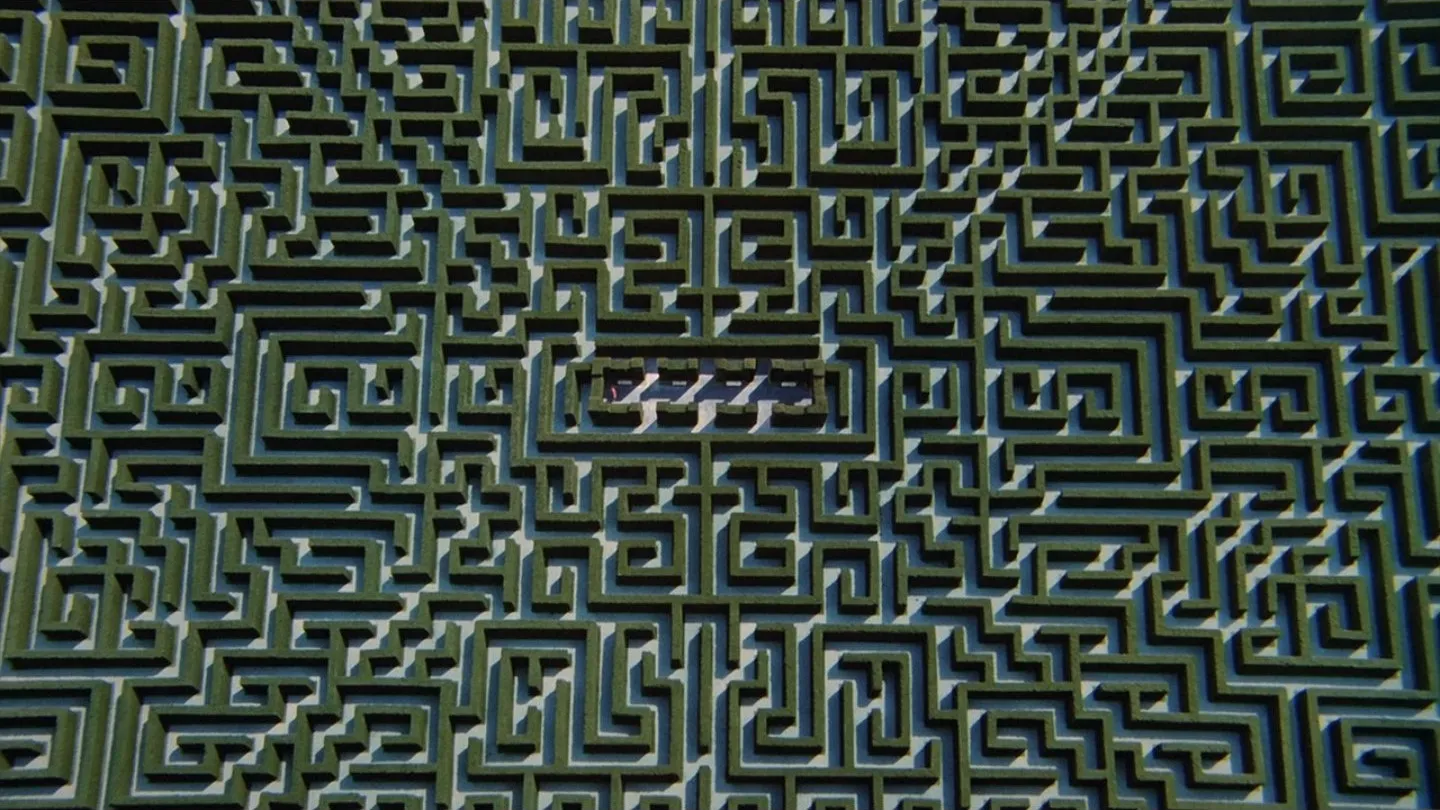
To admire the labyrinth in all its 3d glory, I needed to determine a point of view with the <viewpoint> tag.
<viewpoint> allows defining from which point I view the scene. By default, the origin coordinates of the scene are (0,0,0), which corresponds to the center of the screen.
To render the labyrinth, I chose to have the origin correspond to the top left corner of the labyrinth. This way, I had the same origin as in the 2d version. So now I needed to move the viewpoint to the center of the labyrinth, and up the z-axis a little.
To use <viewpoint>:
<viewpoint is="viewpoint" centerOfRotation={`${width / 200},${-height / 200},0`} isActive position={`${width / 200},${-height / 200},13`}></viewpoint>isActiveallows specifying that this viewpoint is currently usedcenterOfRotationsets the coordinates of the point the view will rotate around - here, the center of the labyrinthpositionallows placing the coordinate of the user view - here, above the center of the labyrinth
By default, the scene in x3dom is interactive and allows the user to rotate, translate, and zoom into it. The default interactivity mode is examine, and other modes are walk, fly, helicopter, look at, turn table, and game. Each interactivity mode has its own controls, see the navigation documentation if you are interested.
In my case, I did not want any interaction. To change the type, I added the navigationInfo tag.
<navigationInfo is="navigationInfo" type="none"></navigationInfo>Where type is the mode we want. Since I wanted a fixed view on the labyrinth, I chose none.
Here Comes The Sun
By default, the scene is uniformly lit, with no shadow. There are several ways to add a source of light:
- pointlight emits light equally in all directions. Like a sun.
- spotlight emits light in a direction and constrains the light at a specific angle. Like a torchlight.
- directionallight emits light in a given direction without any attenuation.
After trying different tags and values, I ended up using a directional light.
<directionallight is="directionlight" id="directional" direction="0.5 0.5 -1" on="TRUE" intensity="1.0" shadowintensity="0.4" shadowcascades="1" shadowfiltersize="16" shadowmapsize="512" color="1,1,1" znear="-1" zfar="-1" shadowsplitfactor="1" shadowsplitoffset="0.1"></directionallight>Rotating the Labyrinth
After rendering a full labyrinth in 3d, I looked for a way to tilt it along with the phone inclination.
The <transform> tag applies the transformation to the <group> tag, too. So I needed to apply an x and y rotation based on the x and y acceleration from the devicemotion event (see my previous article for details). An arbitrary acceleration/100 gives a good result.
I also set the center of the transformation to be the center of the labyrinth.
<transform is="transform" rotation={`0 1 0 ${xAcceleration / 100}`} center={`${width / 200},${-height / 200},0`}> <transform is="transform" rotation={`1 0 0 ${yAcceleration / 100}`} center={`${width / 200},${-height / 200},0`} > <group is="group"> { // the rest of the labyrinth } </group> </tansform><transform>Here I needed two <transform> tags to apply the x and y rotation.
Conclusion
I was surprised to be able to render the full wooden labyrinth in 3D in under a day - and in less than 200 lines of code. I loved the declarative approach of x3dom. It really makes 3D rendering much simpler in my opinion: describe what you want and let the browser do the rendering job. It’s the same approach as react-three-fiber, which uses threejs under the hood. I can’t wait for x3dom to become an actual standard.
The complete code to display the labyrinth game in 3d is available on GitHub. Feel free to test it, and please give me your feedback!
Authors
Full-stack web developer at marmelab, loves functional programming and JavaScript.