
Installing React-Admin In A Remix App


There’s no doubt about it, Remix is an awesome framework, allowing to serve React apps in a very efficient way in just a few minutes. That is why we wanted to see what it would take to include a react-admin app in Remix. For this example, we will use Supabase (which is another great piece of software) as the data backend.
This blog post will focus on showing how to add a simple React-Admin app and hook it to Supabase. Other aspects such as handling authentication won’t be covered here, although they may well have their own dedicated article in the future.
Resulting code
This article will go through each step needed to add React-Admin into a Remix app with Supabase from scratch, giving explanations and documenting some gotchas.
The resulting code can be found in the marmelab/remix-supabase-react-admin repository.
If you wish to learn more about how we did it, you’ve come to the right place. Let’s get to it!
Creating A New Remix Project
Let’s start by creating a new Remix project. For this we can run the following command:
npx create-remix@latestThis script will ask you for more details about your project. You can use the following options:
- The name you want to give to your project, e.g.
remix-supabase-react-admin - “Just the basics”
- “Remix App Server”
- “TypeScript”
- “Don’t run npm install”
All our examples are based on yarn and TypeScript, but you can of course use npm and JavaScript.
Now let’s go inside the newly created directory, and install React-Admin:
cd remix-supabase-react-adminyarn add react-adminThe project structure should look something like this:
Adding React-Admin To Remix
Now, we’re going to add a Remix Route for our admin. However, we won’t be adding a Remix Route for each page, as react-admin already handles routing. We do want to leverage the Remix Router though, based on react-router. Fortunately, React Admin v4 detects when it is included inside a React Router instance and doesn’t create another router.
So we create an admin directory in the app/routes directory already provided by Remix. Inside it, we create a file named $.tsx.
The $ name means it is a splat route, a route that should catch all sub-routes (for instance, it will catch /admin/products/1).
We add the following content to render the <Admin> component provided by React-Admin:
// In app/routes/admin/$.tsximport { Admin } from "react-admin";
const AdminPage = () => <Admin basename="/admin" />;
export default AdminPage;
Note the use of basename="/admin", which is necessary for react-admin to resolve its internal routes correctly.
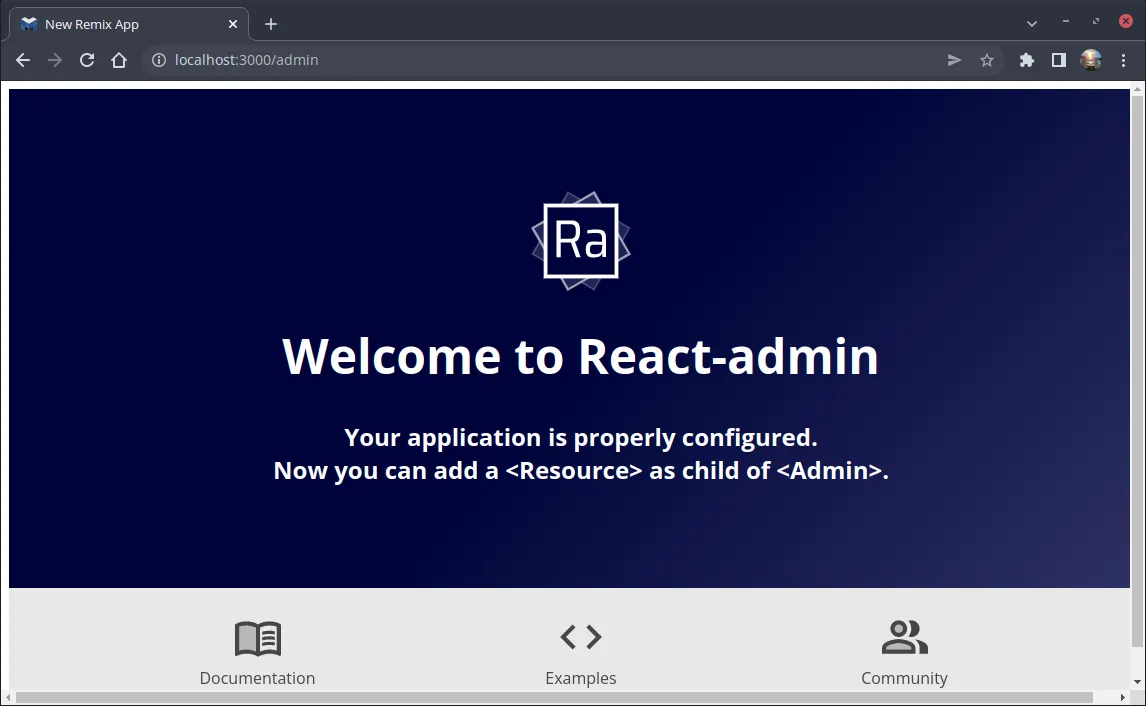
And that’s it! We can already test it by running yarn dev and opening the admin URL: http://localhost:3000/admin.
Adding Supabase
First of all, we will need a Supabase instance to connect to. We can create one for free directly on the Supabase website.
Once this is done, we can use the app manager to add the following tables:
productswith fields:id,name,categoryIdcategorieswith fields:id,name
We can already populate these tables with some data if requested. This will help make sure the data is retrieved successfully when testing our React-Admin pages.
Now, we need to install the Supabase client library:
yarn add @supabase/supabase-jsWe also need a data provider for React Admin. As Supabase provides a PostgREST endpoint, we’ll use ra-data-postgrest:
yarn add @promitheus/ra-data-postgrestThe PostgREST endpoint URL is the Supabase instance URL at the path /rest/v1 (https://YOUR_INSTANCE.supabase.co/rest/v1 for instance). Naturally, this endpoint is protected, and it needs the public anonymous key or the service role key to access it. We could simply add it in React-Admin and configure ra-data-postgrest to use it, but we don’t want the Supabase key to be embedded in the frontend code or in the network exchanges.
Instead, we add a Remix Route that acts as a proxy, leveraging the splat route mechanism again, in app/routes/admin/api.
First, we need to make the Supabase variables available to Remix. As it supports dotenv by default in development mode, we can just create a .env file:
# In `.env`SUPABASE_URL="https://MY_INSTANCE.supabase.co"SUPABASE_SERVICE_ROLE="MY_SERVICE_ROLE_KEY"Note that we use the service role key here and not the anonymous role, to allow write operations without dealing with authorization. Of course we shouldn’t be doing this in production. For the scope of this article, we will make do with this, but we already have plans to explore Supabase authorization in a future article.
Then, we create a new file at location app/routes/admin/api/$.tsx. Inside this file, we add a Remix Route that provides a loader function. This is the function that Remix calls for GET requests. The API loader should convert the requested URL into a Supabase PostgREST URL, and call the PostREST endpoint.
// In app/routes/admin/api/$.tsximport type { LoaderFunction } from "@remix-run/node";
export const loader: LoaderFunction = ({ request }) => {  const apiUrl = getSupabaseUrlFromRequestUrl(request.url);
  return fetch(apiUrl, {    headers: {      apiKey: `${process.env.SUPABASE_SERVICE_ROLE}`,      Authorization: `Bearer ${process.env.SUPABASE_SERVICE_ROLE}`,    },  });};
const ADMIN_PREFIX = "/admin/api";
const getSupabaseUrlFromRequestUrl = (url: string) => {  const startOfRequest = url.indexOf(ADMIN_PREFIX);  const query = url.substring(startOfRequest + ADMIN_PREFIX.length);  return `${process.env.SUPABASE_URL}/rest/v1${query}`;};
Now that we can forward GET requests to Supabase, we can declare our two Resources in React Admin, and configure the dataProvider with this new endpoint:
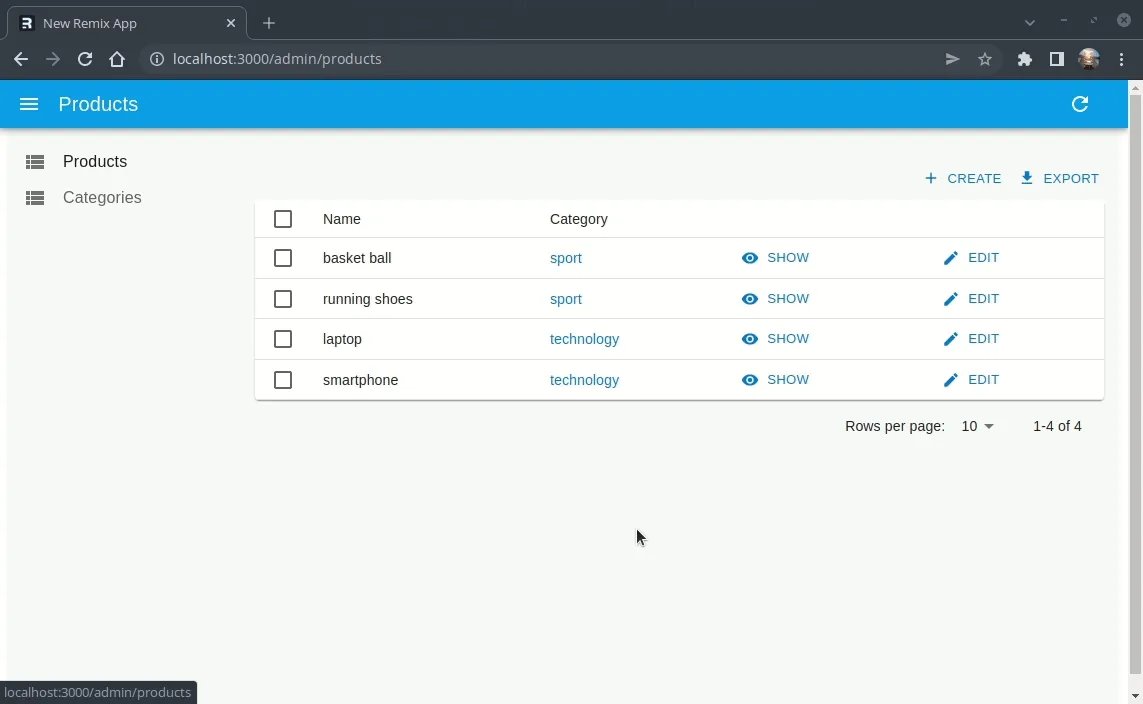
// In app/routes/admin/$.tsximport {  Admin,  Datagrid,  List,  ReferenceField,  Resource,  TextField,} from "react-admin";import postgrestRestProvider from "@promitheus/ra-data-postgrest";
const dataProvider = postgrestRestProvider("http://localhost:3000/admin/api");
const AdminPage = () => (  <Admin basename="/admin" dataProvider={dataProvider}>    <Resource name="products" list={<ProductList />} />    <Resource name="categories" list={<CategoryList />} />  </Admin>);
const ProductList = () => (  <List>    <Datagrid>      <TextField source="name" />      <ReferenceField reference="categories" source="categoryId">        <TextField source="name" />      </ReferenceField>    </Datagrid>  </List>);
const CategoryList = () => (  <List>    <Datagrid>      <TextField source="name" />    </Datagrid>  </List>);
export default AdminPage;
And voilà! We are done! Remix renders the first page server-side, and then the app behaves as a Single-Page-App upon navigation. Remix brings us the best of both worlds: fast startup, and fast navigation.
Now, are we?
Supporting getOne Calls
There is actually an issue that we can’t see yet, as we didn’t add an Edit view nor a Show view. Let’s add a Show view to see it:
// In app/routes/admin/$.tsximport {  Admin,  Datagrid,  List,  ReferenceField,  Resource,  TextField,  Show,  SimpleShowLayout,  ShowButton} from "react-admin";import postgrestRestProvider from "@promitheus/ra-data-postgrest";
const dataProvider = postgrestRestProvider("http://localhost:3000/admin/api");
const AdminPage = () => (  <Admin basename="/admin" dataProvider={dataProvider}>    <Resource        name="products"        list={<ProductList />}        show={<ProductShow />}    />    <Resource name="categories" list={<CategoryList />} />  </Admin>);
const ProductList = () => (    <List>        <Datagrid>        <TextField source="name" />        <ReferenceField reference="categories" source="categoryId">            <TextField source="name" />        </ReferenceField>        <ShowButton />        </Datagrid>    </List>);
const ProductShow = () => (    <Show>        <SimpleShowLayout>        <TextField source="name" />        <ReferenceField reference="categories" source="categoryId">            <TextField source="name" />        </ReferenceField>        </SimpleShowLayout>    </Show>);
const CategoryList = () => (    <List>        <Datagrid>        <TextField source="name" />        </Datagrid>    </List>);
export default AdminPage;
Here is what happens:

The product data is missing, and our Show view is empty. Why is that? It’s actually because of how PostgREST works by default.
Indeed, it returns an array of records even though we’re only interested in a single record. To circumvent that, ra-data-postgrest actually adds some HTTP headers telling postgREST to return a single record. However, we currently don’t let those headers through our API route. Let’s fix that:
// In app/routes/admin/api/$.tsximport type { LoaderFunction } from '@remix-run/node';
export const loader: LoaderFunction = ({ request }) => {    const apiUrl = getSupabaseUrlFromRequestUrl(request.url);
    return fetch(apiUrl, {        headers: {            prefer: request.headers.get('prefer') ?? '',            accept: request.headers.get('accept') ?? 'application/json',            apiKey: `${process.env.SUPABASE_SERVICE_ROLE}`,            Authorization: `Bearer ${process.env.SUPABASE_SERVICE_ROLE}`,        }    })}
const ADMIN_PREFIX = '/admin/api';
const getSupabaseUrlFromRequestUrl = (url: string) => {    const startOfRequest = url.indexOf(ADMIN_PREFIX);    const query = url.substring(startOfRequest + ADMIN_PREFIX.length);    return `${process.env.SUPABASE_URL}/rest/v1${query}`;}
And now it works!

Supporting Data Mutations
Now that we are able to fetch data, let’s add the mutation part. In Remix, mutations are handled by an action function. This function receives the same parameters as the loader function, and in our case, it will work almost the same way.
The only difference is that we’ll also need to pass the request’s method and body.
// In app/routes/admin/api/$.tsximport type { LoaderFunction } from '@remix-run/node';import type { ActionFunction, LoaderFunction } from '@remix-run/node';
export const loader: LoaderFunction = ({ request }) => {    const apiUrl = getSupabaseUrlFromRequestUrl(request.url);
    return fetch(apiUrl, {        headers: {            prefer: request.headers.get('prefer') ?? '',            accept: request.headers.get('accept') ?? 'application/json',            'apiKey': `${process.env.SUPABASE_SERVICE_ROLE}`,            'Authorization': `Bearer ${process.env.SUPABASE_SERVICE_ROLE}`,        }    });}
export const action: ActionFunction = ({ request }) => {    const apiUrl = getSupabaseUrlFromRequestUrl(request.url);
    return fetch(apiUrl, {        method: request.method,        body: request.body,        headers: {            prefer: request.headers.get('prefer') ?? '',            accept: request.headers.get('accept') ?? 'application/json',            'apiKey': `${process.env.SUPABASE_SERVICE_ROLE}`,            'Authorization': `Bearer ${process.env.SUPABASE_SERVICE_ROLE}`,        }    });}
const ADMIN_PREFIX = '/admin/api';
const getSupabaseUrlFromRequestUrl = (url: string) => {    const startOfRequest = url.indexOf(ADMIN_PREFIX);    const query = url.substring(startOfRequest + ADMIN_PREFIX.length);    return `${process.env.SUPABASE_URL}/rest/v1${query}`;}
We can now add a Create and an Edit page for each of our Resources:
// In app/routes/admin/$.tsximport {  Admin,  AutocompleteInput,  Create,  Datagrid,  Edit,  List,  ReferenceField,  ReferenceInput,  Resource,  Show,  ShowButton,  SimpleForm,  SimpleShowLayout,  TextField,  TextInput,} from "react-admin";import postgrestRestProvider from "@promitheus/ra-data-postgrest";
const dataProvider = postgrestRestProvider("http://localhost:3000/admin/api");
const AdminPage = () => (    <Admin basename="/admin" dataProvider={dataProvider}>        <Resource            name="products"            list={<ProductList />}            show={<ProductShow />}            edit={<ProductEdit />}            create={<ProductCreate />}        />        <Resource            name="categories"            list={<CategoryList />}            create={<CategoryCreate />}            edit={<CategoryEdit />}        />    </Admin>);
const ProductList = () => (    <List>        <Datagrid>        <TextField source="name" />        <ReferenceField reference="categories" source="categoryId">            <TextField source="name" />        </ReferenceField>        <ShowButton />        <EditButton />        </Datagrid>    </List>);
const ProductCreate = () => (  <Create>    <SimpleForm>      <TextInput source="name" />      <ReferenceInput reference="categories" source="categoryId">        <AutocompleteInput          source="name"          filterToQuery={(query) => ({ "name@ilike": query })}        />      </ReferenceInput>    </SimpleForm>  </Create>);
const ProductEdit = () => (  <Edit>    <SimpleForm>      <TextInput source="name" />      <ReferenceInput reference="categories" source="categoryId">        <AutocompleteInput          source="name"          filterToQuery={(query) => ({ "name@ilike": query })}        />      </ReferenceInput>    </SimpleForm>  </Edit>);
const CategoryList = () => (    <List>        <Datagrid>        <TextField source="name" />        <EditButton />        </Datagrid>    </List>);
const CategoryCreate = () => (  <Create>    <SimpleForm>      <TextInput source="name" />    </SimpleForm>  </Create>);
const CategoryEdit = () => (  <Edit>    <SimpleForm>      <TextInput source="name" />    </SimpleForm>  </Edit>);
export default AdminPage;
You may have spotted a small gotcha related to postgREST here. We had to provide the filterToQuery prop to the AutocompleteInput used to select a product category. Indeed, ra-data-postgrest does not support the default q filter, so we used the filterToQuery prop to convert the query into something it understands. Here, we used name@ilike as the filter key to force a case insensitive search on the name field.
And that’s it, we now have a full-blown API!
Conclusion
Remix and React-Admin integrate perfectly, leveraging the power of splat routes and the basename prop of React-Admin. Using Supabase as our database was not much more difficult, once we figured out the headers we needed to pass.
One other great thing that comes with Supabase, is the many options it offers to handle user authentication and access control. Therefore, you might be wondering how you can use this in your authProvider, and how to handle permissions with Supabase. Good news, we are already working on these questions, and they will be the subject of a future article!

Authors
Full-stack web developer at marmelab, Gildas has a strong appetite for emerging technologies. If you want an informed opinion on a new library, ask him, he's probably used it on a real project already.
Full-stack web developer at marmelab, JB is a Software Engineer with a strong Java experience. He plays the piano and runs fast, and not only because he has long fingers and tall legs.