Getting Started
Welcome to ra-core, the headless single-page application framework for React that helps you build admins panels, internal tools, dashboards, ERPs, and B2B Apps, on top of any REST or GraphQL API.
What is ra-core?
Section titled “What is ra-core?”Ra-core provides hooks and components to manage the data fetching, data edition, navigation, security, and internationalization logic that you’ve probably already implemented several times and that form the base of any single-page application. It glues together powerful React libraries like TanStack Query, react-hook-form, and react-router.
Ra-core has a strong emphasis on relational APIs, and lets you aggregate data from several sources directly in the frontend without the need for complex backend logic.
Ra-core is headless, so it gives you the freedom to build your admin interface with Shadcn UI, Material UI, Ant Design, Chakra UI, Daisy UI, or any custom UI components.
You can use ra-core to:
- Create your own admin app with your preferred design system
- Build your own admin framework by adding your own UI layer on top of ra-core’s business logic
Who Uses ra-core?
Section titled “Who Uses ra-core?”Ra-core is the base of two popular admin frameworks:
- React-Admin: The complete Material UI implementation
- Shadcn Admin Kit: A modern implementation using Shadcn UI
These frameworks themselves are used by thousands of developers worldwide.
if you want to see demos of ra-core in action, check out the following resources:
- Atomic CRM, a complete CRM built on top of Supabase
- E-commerce backend, a demo built with Shadcn UI and ra-core
- HelpDesk ticketing App, a demo built with Material UI
- Writer’s Delight, a note-taking app with AI capabilities
- Navidrome, a Spotify clone
- Kanban, a Kanban board application
Why Choose ra-core?
Section titled “Why Choose ra-core?”Ra-core accelerates admin application development by providing:
- UI Kit Agnostic: Use any UI library or build your own components
- Backend Agnostic: Works with REST, GraphQL, RPC, SOAP, or any API
- Rapid CRUD Development: Build complete CRUD interfaces in minutes
- Relationship Handling: Effortlessly manage complex data relationships
- Advanced Forms: Built-in form state management and validation
- Performance Optimizations: Optimistic updates, intelligent caching, and React Query integration
- Undoable Mutations: Let users undo destructive actions
- Access Control: Built-in authentication and authorization
- User Preferences: Persistent storage for user settings
- Internationalization: Multi-language support out of the box
- Type Safety: Full TypeScript support
- Long-term Sustainability: Mature, well-maintained framework
For a complete feature overview, see our Features Guide.
Installation
Section titled “Installation”Install ra-core using npm or yarn:
npm install ra-core# oryarn add ra-coreQuick Start Example
Section titled “Quick Start Example”Here’s a minimal admin app using ra-core with native HTML5 components:
First, install the JSON Server data provider for the example:
npm install ra-data-json-server# oryarn add ra-data-json-serverThen create your app:
// in src/App.tsximport React from 'react';import { CoreAdmin, Resource, ListBase, useListContext, ReferenceFieldBase, useRecordContext} from 'ra-core';import jsonServerProvider from 'ra-data-json-server';
// Simple TextField component to display user namesconst UserNameField = () => { const record = useRecordContext(); return <span>{record?.name}</span>;};
// Simple HTML-based List componentconst PostList = () => ( <ListBase> <PostListView /> </ListBase>);
const PostListView = () => { const { data, isLoading } = useListContext();
if (isLoading || !data) return <div>Loading...</div>;
return ( <div style={{ padding: '20px', fontFamily: 'Arial, sans-serif' }}> <h1 style={{ marginBottom: '20px' }}>Posts</h1> <table style={{ width: '100%', borderCollapse: 'collapse', border: '1px solid #ccc', borderRadius: '8px', overflow: 'hidden' }}> <thead style={{ backgroundColor: 'rgba(0, 0, 0, 0.05)' }}> <tr> <th style={{ padding: '12px', textAlign: 'left', borderBottom: '2px solid #ccc', fontWeight: 'bold' }}>ID</th> <th style={{ padding: '12px', textAlign: 'left', borderBottom: '2px solid #ccc', fontWeight: 'bold' }}>Title</th> <th style={{ padding: '12px', textAlign: 'left', borderBottom: '2px solid #ccc', fontWeight: 'bold' }}>Author</th> </tr> </thead> <tbody> {data.map(record => ( <tr key={record.id}> <td style={{ padding: '8px 16px', borderBottom: '1px solid #ddd' }}> {record.id} </td> <td style={{ padding: '8px 16px', borderBottom: '1px solid #ddd' }}> {record.title} </td> <td style={{ padding: '8px 16px', borderBottom: '1px solid #ddd' }}> <ReferenceFieldBase source="userId" reference="users" record={record} > <UserNameField /> </ReferenceFieldBase> </td> </tr> ))} </tbody> </table> </div> );};
const dataProvider = jsonServerProvider('https://jsonplaceholder.typicode.com');
const App = () => ( <CoreAdmin dataProvider={dataProvider}> <Resource name="posts" list={PostList} /> </CoreAdmin>);
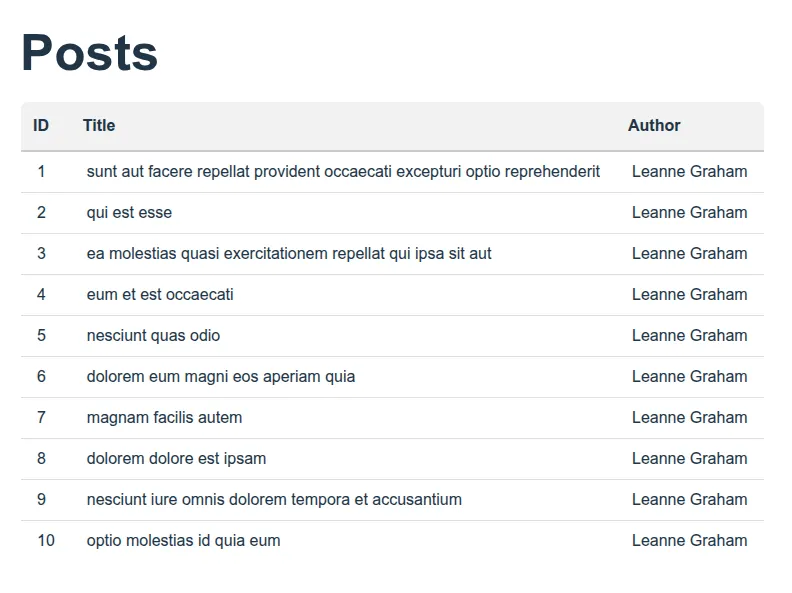
export default App;Here is the result you should get:
Building Your UI Layer
Section titled “Building Your UI Layer”Ra-core provides the foundation; you build the interface. Here’s a suggested development path:
Essential Components (Start Here)
Section titled “Essential Components (Start Here)”-
Admin Component: Extend
CoreAdminwith your branding, global settings, and custom providers. Configure your data provider, auth provider, i18n provider, and global theme settings. -
Layout: Create a layout component with navigation, header, and user menu. Your layout wraps all pages and typically includes a sidebar, top bar, breadcrumbs, and main content area. See the Layout documentation for implementation patterns.
-
Navigation: Build a sidebar or menu using
useResourceDefinitionsto list available resources anduseHasDashboardto conditionally show a dashboard link. Create navigation items with proper routing and active states. -
List View: Create list pages with titles and action buttons (like Create). Use
ListBaseas your foundation and build custom headers with search, filters, and bulk actions. See the List Introduction for step-by-step guidance. -
Data Table: Build table components with filtering, sorting, and pagination. Leverage
useListContextto access data and state. Implement column sorting, row selection, and responsive design. Consider creating reusable table components for different data types. -
Show View: Design detail pages with navigation buttons using
ShowBase. Create layouts that display record details clearly, with navigation to edit mode and related resources. Add action buttons for common operations. -
Field Components: Create display components like
TextField,DateField,NumberFieldusinguseFieldValue. Build specialized fields for different data types including email, URL, image, and rich text content. See the Fields documentation for comprehensive examples. -
Relational Fields: Build
ReferenceField,ReferenceArrayField,ReferenceManyFieldusing their Base counterparts:ReferenceFieldBase,ReferenceArrayFieldBase, andReferenceManyFieldBase. These handle complex relationships and foreign key displays. -
Edit & Create Views: Design form pages with navigation and actions using
EditBaseandCreateBase. Implement form layouts, validation feedback, and success/error handling. See the Forms Guide for comprehensive form building strategies. -
Input Components: Create form inputs like
TextInput,DateInput,SelectInputandAutocompleteInputusinguseInput. Build specialized inputs for different data types including rich text editors, file uploads, and date pickers. See the Inputs documentation for implementation patterns. -
Relational Inputs: Build
ReferenceInput,ReferenceArrayInputusing their Base components:ReferenceInputBaseandReferenceArrayInputBase. These provide autocomplete functionality and relationship management in forms.
Advanced Features (Go Further)
Section titled “Advanced Features (Go Further)”-
Action Buttons: Create
SaveButtonandDeleteButtoncomponents with loading states and custom side effects. Implement optimistic updates, confirmation dialogs, and custom success/error handlers. UseuseCreate,useUpdate, anduseDeletehooks for data mutations. -
Bulk Actions: Add toolbar for bulk operations on list selections. Implement batch delete, export, and custom bulk operations using
useListContextfor selection state anduseUpdateManyfor batch operations. -
Notifications: Implement toast notifications for errors and undo functionality using
useNotificationContextanduseTakeUndoableMutation. Create notification components that support different types (success, error, warning) and undoable actions. -
Authentication: Design a login page and protected routes using the Authentication system. Implement login forms, password reset, and protected page components using
useLogin,useLogout, andAuthenticated. -
Theme Switching: Add dark/light mode toggles using
useStorefor persistence. Create theme provider components and implement CSS variable switching or styled-components themes. -
Internationalization: Create language switcher components using
useLocaleStateanduseTranslate. Implement translation loading, locale switching, and RTL support. See the Translation Guide for complete i18n implementation. -
Error Handling: Customize the error page. Implement global error boundaries and API error handling with user-friendly messages and recovery actions.
-
Advanced Layouts: Build tabbed forms, filter panels, breadcrumbs, and responsive designs. Create specialized layouts for different screen sizes, implement advanced form patterns like wizard flows, and enhance navigation with breadcrumbs.
Documentation Structure
Section titled “Documentation Structure”This documentation is organized to help you build effectively:
- Guides & Concepts: Core concepts like architecture, data fetching, and security
- App Configuration: Setting up CoreAdmin, resources, and routing
- Data Fetching: Working with APIs, data providers, and queries
- Security: Authentication, authorization, and access control
- List Pages: Building list views, filtering, and pagination
- Creation & Edition: Forms, validation, and input components
- Show Pages: Detail views and field components
- Fields: Display components for different data types
- Inputs: Form input components and validation
- Internationalization: Multi-language support and localization
- Common Components: Shared utilities and patterns
Next Steps
Section titled “Next Steps”Ready to dive deeper? Start with the General Concepts to understand ra-core’s fundamental architecture, then explore the specific areas that match your development needs.
Happy building! 🚀