
Dive Into GraphQL Part IV: Building a GraphQL-powered mobile application With React


After explaining how to develop a robust GraphQL server in practice with the third post in the Dive Into GraphQL Series, it’s time to deal with the client side.
How to develop a Twitter-like single page app on top of a GraphQL API? Actually, it’s easier than doing the same with a REST API. But since GraphQL opens new possibilities (caching, optimistic UI, batch queries), this post is longer than what you could expect - it will take one hour of your time.
I gathered there all the lessons learned by the marmelab developers when developing real life GraphQL clients, and our impressions on the developer experience. By the end of this tutorial, you’ll be able to write a production-grade web app powered by GraphQL, and you’ll know if you like it!
Here is what I’ll be talking about:
- The Target
- Creating the UI
- Choosing a GraphQL Client
- Loading Data With GraphQL
- Checking GraphQL Syntax While Coding
- The Apollo Client Developer Tools
- Binding Variables To GraphQL Queries
- Merging Queries
- Adding Client-Side Cache
- Calling Mutations
- Reacting To Mutations
- Updating The UI In An Optimistic Way
- Plugging In All Together
- Handling Server Errors
- Using a Custom Redux Store To Show Notifications
- Including Authentication Credentials
- Loading Paginated Data
- Refactoring Query Variables
- Separating Views and Data Dependencies
- Unit Testing The GraphQL Logic
- Storing GraphQL Queries In Separate Files
- Using Directives For Dynamic Queries
- Offline Usage
- Server Side Rendering
- Real Time Updates And Subscriptions
- A Word About Relay Modern
The Target
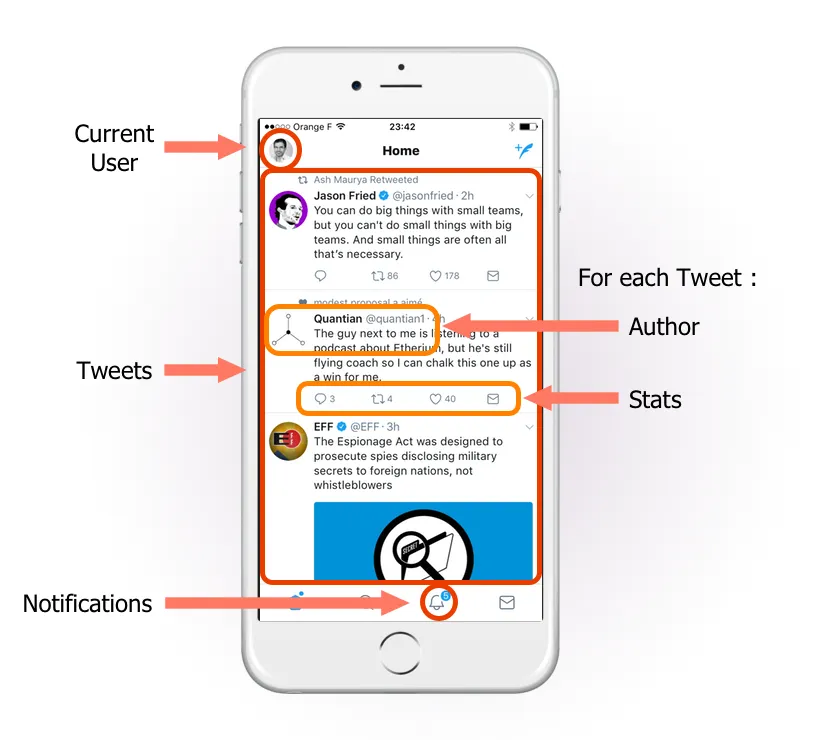
Building up on the Twitter example, I’ll reuse the GraphQL server developed in the previous post. My objective is to develop a mobile web app looking very much like the Twitter application itself:
I’ll use ES6 and React.js, the tools we use for all our frontend apps at marmelab.
Note: Most of this tutorial is also relevant if you use React Native.
As a starting point, I’ll use the empty shell created by the create-react-app command, which configures webpack and Babel, adds DevTools support, and hot module reloading.
yarn create react-app clientcd clientnpm start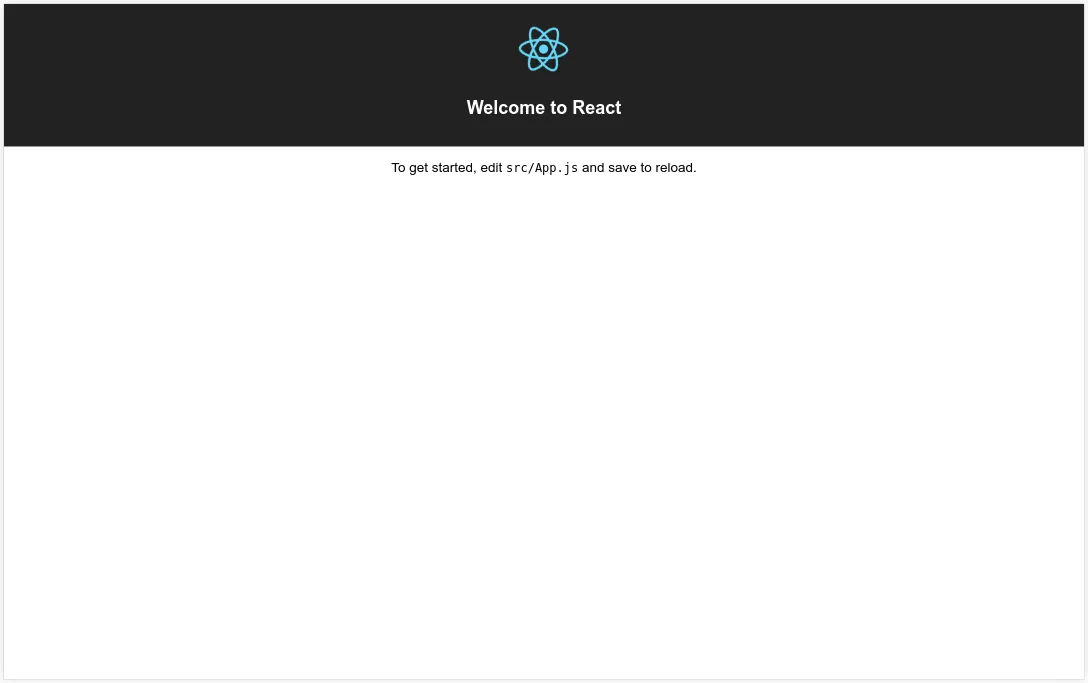
My browser shows the familiar React app placeholder, which I’m going to transform into Twitter. Ready?
Creating The UI
Based on the mockup, I divide the home page by zones and responsibilities. This defines the tree structure of components I need to develop. To display the list of tweets, I must therefore create:
- a
<Header>component showing the current user avatar, a title and a New tweet button, - a
<Tweet>component showing the tweet author, body and stats, and - an
<App>component for the list of tweets.
I chose Material-UI in its upcoming 1.0 version to quickly implement the UI. Material UI builds up on the Material Design concepts, and provides a library of ready-to-use React components.
yarn add material-ui@next material-ui-iconsHere is the Header component, showing the current user avatar. Nothing particular here, it’s a simple React component:
// in Header.jsimport React from "react";import {  AppBar,  Avatar,  IconButton,  ModeEditIcon,  Toolbar,  Typography,} from "material-ui";
const Header = ({ currentUser }) => (  <AppBar position="static" color="default">    <Toolbar>      {currentUser && (        <Avatar alt={currentUser.full_name} src={currentUser.avatar_url} />      )}      <Typography type="title" color="inherit">        Home      </Typography>      <IconButton>        <ModeEditIcon />      </IconButton>    </Toolbar>  </AppBar>);
export default Header;Note: I omitted propTypes and style related code in those excerpts for brevity. Refer to the tutorial companion repository marmelab/GraphQL-example to see the complete code.
The Tweet component is a bit longer, but still very simple:
// in Tweet.jsimport React from "react";import { Avatar, Card, CardContent, Typography } from "material-ui";import CachedIcon from "material-ui-icons/Cached";import FavoriteBorderIcon from "material-ui-icons/FavoriteBorder";import ChatBubbleOutlineIcon from "material-ui-icons/ChatBubbleOutline";import distanceInWordsToNow from "date-fns/distance_in_words_to_now";
const Tweet = ({ tweet }) => (  <Card>    <CardContent>      <Avatar alt={tweet.Author.full_name} src={tweet.Author.avatar_url} />      <div>        <span>{tweet.Author.full_name}</span>        <span>{tweet.Author.username}</span>        <span> - </span>        <span>{distanceInWordsToNow(tweet.date)}</span>        <Typography component="p">{tweet.body}</Typography>        <div>          <div>            <ChatBubbleOutlineIcon />            {tweet.Stats.responses}          </div>          <div>            <CachedIcon />            {tweet.Stats.retweets}          </div>          <div>            <FavoriteBorderIcon />            {tweet.Stats.likes}          </div>        </div>      </div>    </CardContent>  </Card>);
export default Tweet;
You may have noticed the distanceInWordsToNow() function. It comes from the date-fns package, a fantastic library for manipulating dates in a functional way. It’s more modular than moment.js, and immutable by default - which plays well with React.
Finally, I implemented the list of tweets in the App component:
// in App.jsimport React from 'react';
import Header from './Header';import Tweet from './Tweet';
const App = ({ currentUser, tweets } }) =>(    <div>        <Header currentUser={currentUser} />        {tweets.map(tweet =>            <Tweet key={tweet.id} tweet={tweet} />        )}    </div>);
App.defaultProps = {    currentUser: { id: 'user1', username: 'johndoe', full_name: 'John Doe', avatar_url: 'https://material-ui-1dab0.firebaseapp.com/build/fa158bc2d4774f4ae14cbbec7730af23.jpg' },    tweets: [        {            id: 'tweet1',            body: 'Lorem Ipsum',            date: new Date(),            Author: { id: 'author1', username: 'johndoe', full_name: 'John Doe', avatar_url: 'https://material-ui-1dab0.firebaseapp.com/build/fa158bc2d4774f4ae14cbbec7730af23.jpg' },            Stats: { views: 98, likes: 42, retweets: 218, responses: 7 },        },        {            id: 'tweet2',            body: 'Sic dolor amet',            date: new Date(),            Author: { id: 'author2', username: 'janedoe', full_name: 'Jane Doe', avatar_url: 'https://material-ui-1dab0.firebaseapp.com/build/b16427bb030d63fd8e52ea84defda1d1.jpg' },            Stats: { views: 98, likes: 42, retweets: 218, responses: 7 },        },    ]}
export default App;
I use the defaultProps to populate the components with mock data while building the user interface. That way, I can adjust the components style without waiting for the server. When it’s time to plug the components with a GraphQL data provider, I’ll remove these default props.

Now that the UI is ready, it’s time to plug the app to the GraphQL server.
Choosing a GraphQL Client
In order to communicate with the GraphQL server, I can use either one of the three following solutions:
fetch, or any other HTTP client library such asaxios. Samer Buna wrote a nice article about this option, I invite you to read You don’t need a fancy framework to use GraphQL with React.- The Apollo client, developed by the Meteor team. It’s open-source and very active.
- The Relay Modern client, developed by Facebook. It’s also open-source and very active.
Using fetch means that I would have to write a lot of boilerplate code by myself to handle optimistic response, caching, etc. I would probably do it wrong, and it’s a problem already (mostly) solved. More importantly, I would miss all the tooling provided by Apollo or Relay.
Today, I’ll use the Apollo client. I chose it mostly because of its great integration with Redux. Also, the Apollo team wrote excellent documentation, and published a lot of tutorials and articles about GraphQL. It makes the learning curve smoother for Apollo than for Relay. Most people choose Apollo over Relay these days, so it’s the safest choice, too. Finally, Apollo plays well with any GraphQL server, while Relay requires a Relay server.
yarn add react-apolloIf you want more reasons to choose either Apollo or Relay, check out these two articles: Relay vs Apollo: An un-opinionated comparison of GraphQL clients for React apps, and Choosing a GraphQL Client: Apollo vs. Relay. Caveat: both use the old version of Relay (which will be abandoned), instead of Relay Modern.

Loading Data With GraphQL
The entry point of the Apollo client is a Higher Order Component (HOC) named graphql. Its signature is the following:
import { graphql } from 'react-apollo';
const MyComponent = ({ data }) => // ...
export default graphql(query, options)(MyComponent);
The graphql HOC injects a data prop into the decorated component, using the data fetched from the GraphQL backend.
The query argument must be a GraphQL document, which is an object-oriented representation of a GraphQL query. Since I manipulate a GraphQL string, I have to convert it to a document first. That’s the purpose of the gql template literal, also provided by the react-apollo library. In practice, here is the query requesting all the data needed for the home page:
// in App.jsimport { gql } from "react-apollo";
const query = gql`  query homePageQuery {    currentUser: User {      id      username      full_name      avatar_url    }    tweets: Tweets(limit: 10, sort_field: "date", sort_order: "desc") {      id      body      date      author: Author {        id        username        full_name        avatar_url      }      stats: Stats {        views        likes        retweets        responses      }    }  }`;
I named the query homePageQuery, and it returns two fields: currentUser, and tweets (I used GraphQL aliases here to rename User to currentUser and Tweets to tweets).
As explained in the second article in this series, always name your queries to make debugging easier.
Let’s use the homePageQuery with the App component:
// in App.jsimport React from "react";import { gql, graphql } from "react-apollo";import { LinearProgress } from "material-ui/Progress";
import Header from "./Header";import Tweet from "./Tweet";
export const App = ({ data: { loading, currentUser, tweets } }) => (  <div>    <Header currentUser={currentUser} />    {loading && <LinearProgress />}    {!loading && tweets.map((tweet) => <Tweet key={tweet.id} tweet={tweet} />)}  </div>);
const query = gql`...`; // the homePageQuery defined above
export default graphql(query)(App);
When the component mounts, the graphql HOC injects a data prop with the value { loading: true }. At the same time, the HOC sends the query to the GraphQL backend. When the response arrives, the HOC passes the result in the data prop, so its value becomes { loading: false, currentUser: {...}, tweets: [...] }, and the component re-renders. The loading field makes it super easy to show and hide a loading indicator while the client waits for the server response. No need to mess around with the AJAX ready state!
The <App> component doesn’t yet have the context of where the GraphQL server is. This is the job of the <ApolloProvider> component, which should be placed higher in the component hierarchy. This component expects an ApolloClient instance configured for the GraphQL backend. Let’s modify the main index.js file:
// in index.jsimport React from "react";import ReactDOM from "react-dom";import { ApolloClient, ApolloProvider, createNetworkInterface,} from "react-apollo";
import App from "./App";
const client = new ApolloClient({ networkInterface: createNetworkInterface({ uri: "http://localhost:4000/graphql", }),});
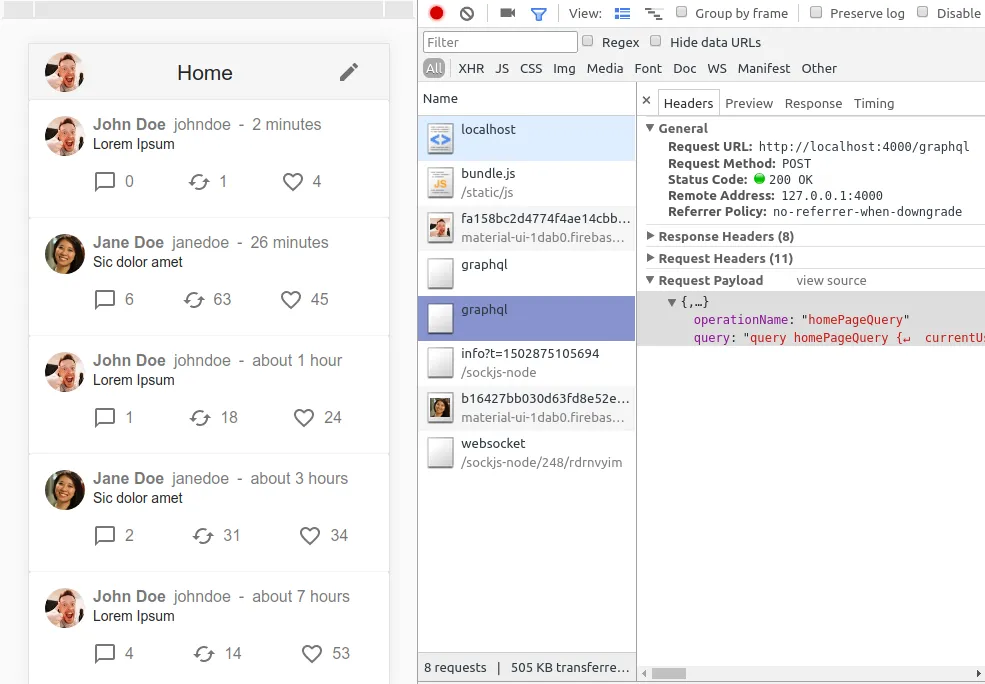
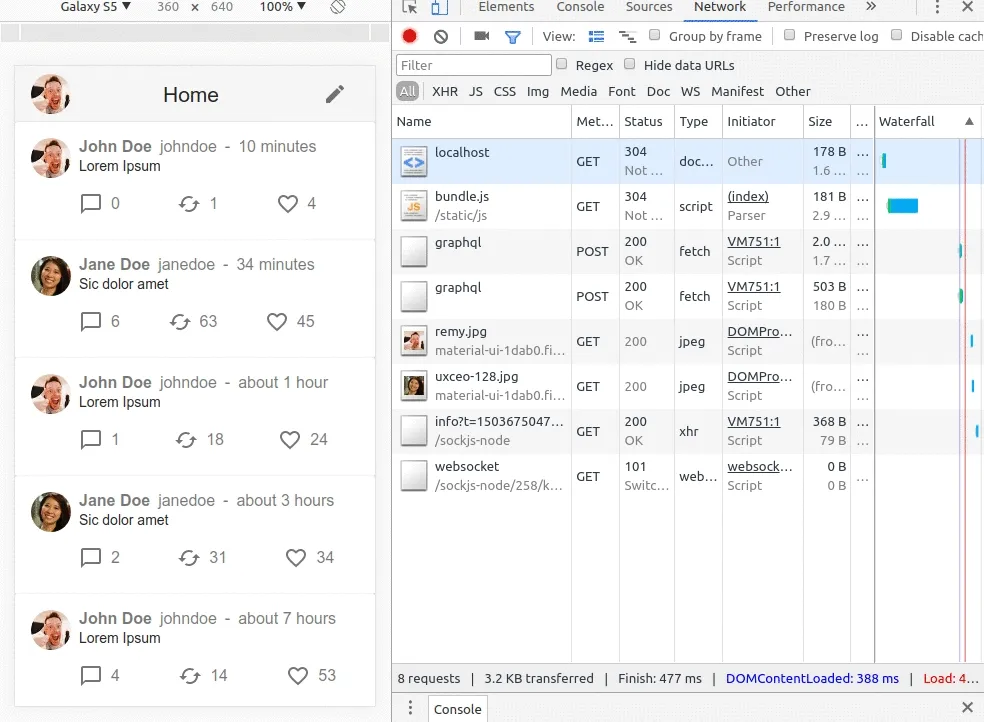
ReactDOM.render( <ApolloProvider client={client}> <App /> </ApolloProvider>, document.getElementById("root"),);The application is now connected to the GraphQL backend, and data from the server replace data from the default props:
To summarize, all it takes to connect a React component to a GraphQL backend is to decorate it with the graphql HOC, and to pass it a GraphQL query in the parameters.
Problem solved? Not quite yet. No real life application is as simple as a list of tweets. Each new requirement adds more complexity, and this is where the tooling and good practices make the difference. This is also where Apollo starts to shine.
To avoid repeating the user fields twice in the GraphQL query, I can use a GraphQL fragment to keep the code DRY.
// in App.jsimport { gql } from "react-apollo";
const query = gql`  fragment UserFields on User {    id    username    full_name    avatar_url  }
  query homePageQuery {    currentUser: User {      ...UserFields # Use the fragment here    }
    tweets: Tweets(limit: 10, sort_field: "date", sort_order: "desc") {      id      body      date      author: Author {        ...UserFields # Use the fragment here, too      }      stats: Stats {        views        likes        retweets        responses      }    }  }`;
Checking GraphQL Syntax While Coding
My IDE (VSCode) supports ESLint, so I can take advantage of syntax check and highlighting of GraphQL queries inside the gql tag. To enable it, I added the eslint-plugin-graphql to my ESLint configuration. This boosts my productivity, and gives me more confidence while coding. I definitely recommend using it.
And since GraphQL is a strongly typed language, it’s possible to get type validation and autosuggestion of GraphQL queries. In VSCode, this requires the installation of the GraphQL plugin. Another must have if you’re going to write GraphQL queries regularily.
If you’re using prettier to format your code (you really should), you’ll be happy to know that it understands the gql tag too, and is able to reformat your GraphQL code.
The Apollo Client Developer Tools
The Apollo team has created a fantastic debugging tool called the Apollo Client Developer Tools, packaged as a browser extension for Chrome.
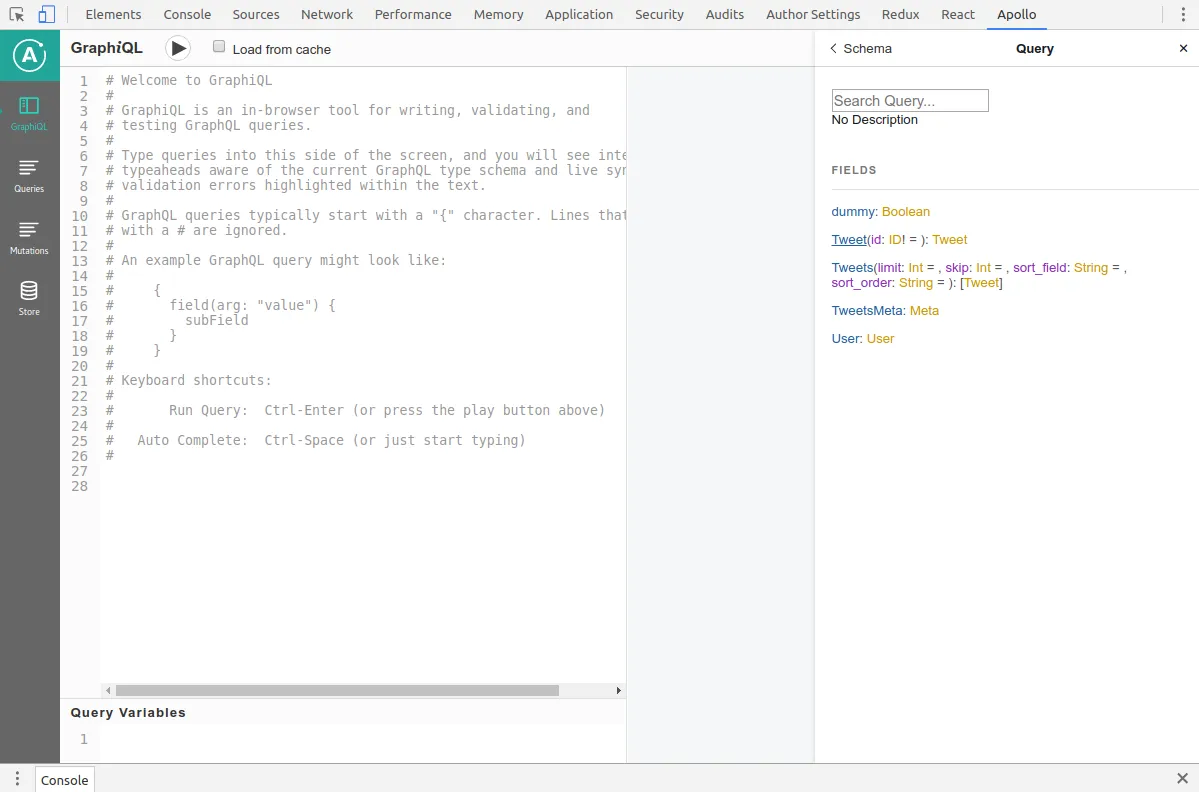
The developer tools include a GraphiQL interface automatically connected to the backend used by the ApolloClient. It allows to explore the GraphQL API while developing.
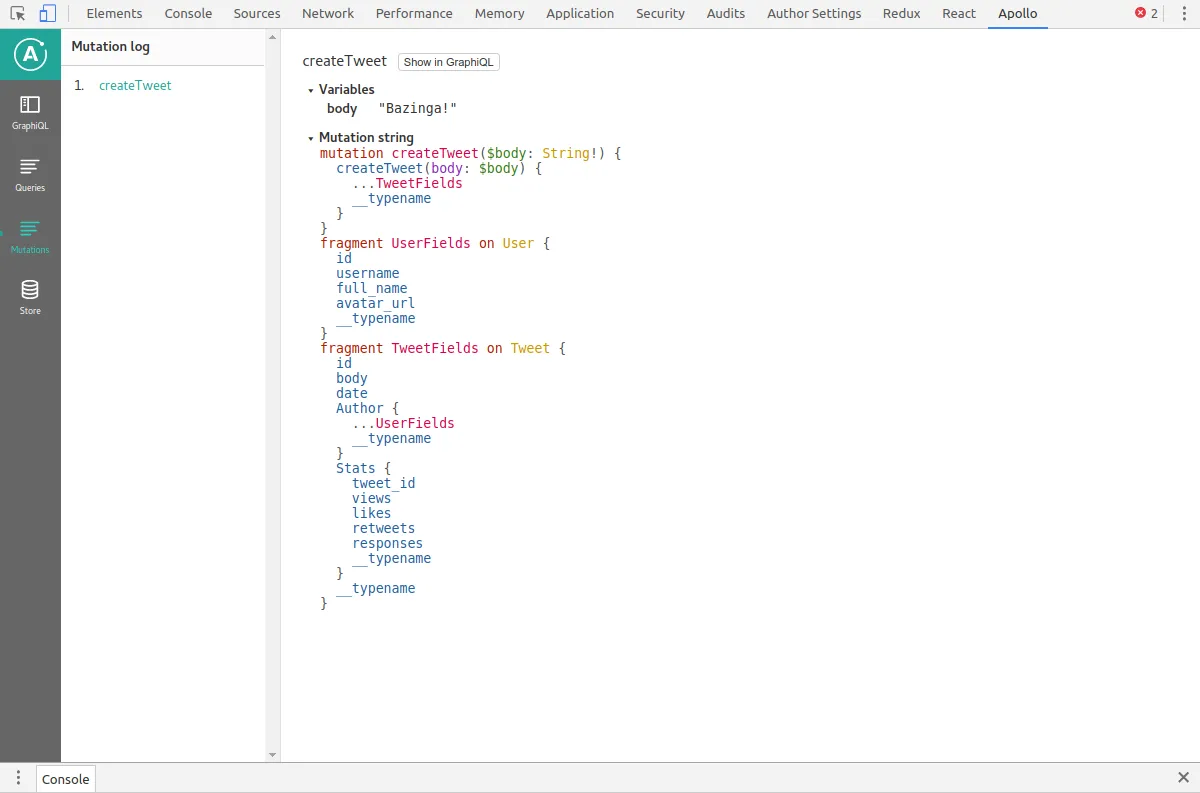
The developer tools also include Queries and Mutations tabs, where I can see the calls made by my app in real time. The GraphQL code is highlighted for readability, and I can run them in the included GraphiQL interface with the click of a button.

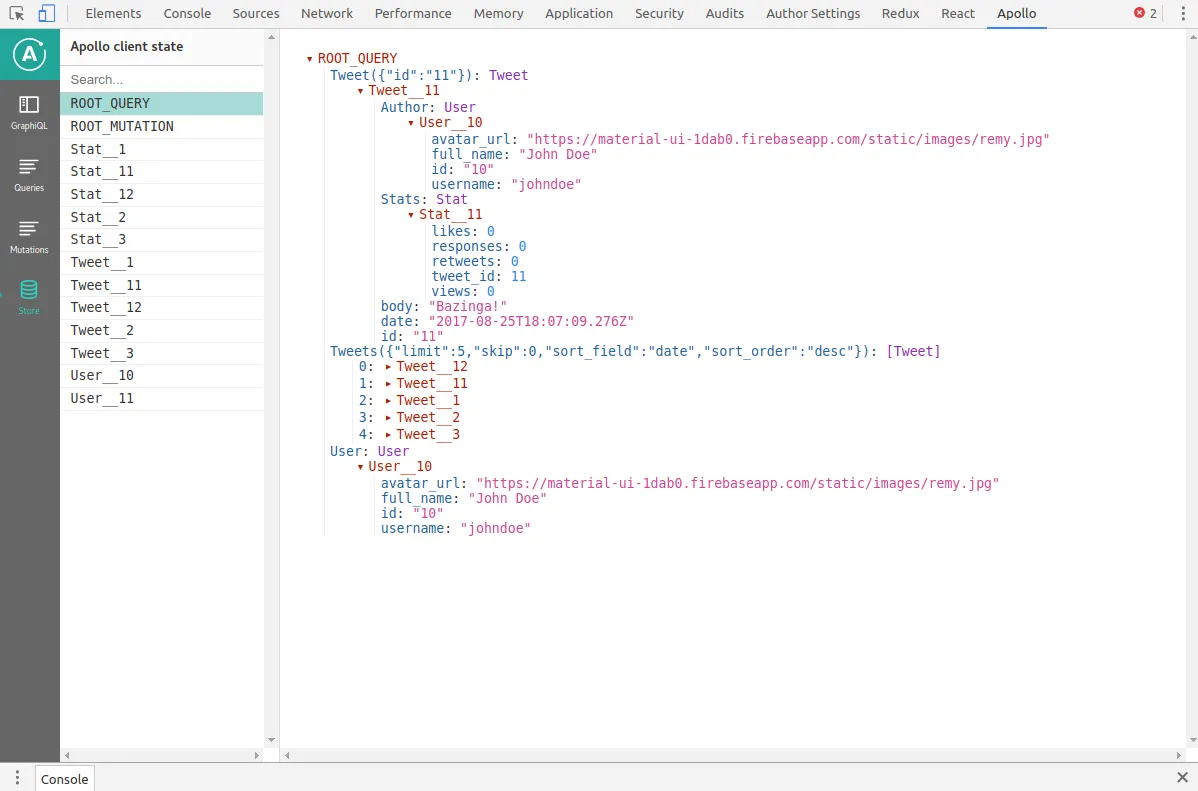
Finally, the developer tools also include a store explorer, which lets me know exactly what’s in the local Apollo cache (more on this in a few minutes).
This extension is a must have for every frontend developer building a GraphQL-powered app. I simply can’t live without it!
Binding Variables To GraphQL Queries
In a real life Twitter app, clicking on a tweet shows a new “tweet” page, where the user can read the reactions to the tweet. This means my app will have multiple pages, so I need to introduce a router here. Let’s add react-router, the de facto standard in React router land.
yarn add react-router-domMy app should have two pages: HomePage, and TweetPage. As the Header component appears in both pages, I’ll put it in the main App component. Also, the list of tweets is no longer necessary in the App component, so I’ll remove it from the GraphQL query of the App component.
// in App.jsimport React from "react";import { BrowserRouter as Router, Route } from "react-router-dom";import { gql, graphql } from "react-apollo";
import Header from "./Header";import HomePage from "./HomePage";import TweetPage from "./TweetPage";import { userFragment } from "./fragments";
export const App = ({ data: { currentUser } }) => (  <Router>    <div>      <Header currentUser={currentUser} />      <Route exact path="/" component={HomePage} />      <Route exact path="/:id" component={TweetPage} />    </div>  </Router>);
const query = gql`  ${userFragment}
  query appQuery {    currentUser: User {      ...UserFields    }  }`;
export default graphql(query)(App);
I could have put the query for the current user inside the Header component, but as you’ll see later, including it in the App component provides interesting benefits.
I export both the component decorated with graphql (it’s the default export) and the non-decorated App component. That way, I can easily unit test the App component by injecting fake data props.
Note: I extracted the userFragment into a fragment.js file, so that I can reuse it across many queries.
// in fragments.jsimport { gql } from "react-apollo";
export const userFragment = gql`  fragment UserFields on User {    id    username    full_name    avatar_url  }`;
Here is the new HomePage component, decorated with a GraphQL query for the list of tweets:
// In HomePage.jsimport React from "react";import { gql, graphql } from "react-apollo";import { LinearProgress } from "material-ui/Progress";
import Tweet from "./Tweet";import { userFragment } from "./fragments";
export const HomePage = ({ data: { loading, tweets } }) => (  <div>    {loading && <LinearProgress />}    {!loading && tweets.map((tweet) => <Tweet key={tweet.id} tweet={tweet} />)}  </div>);
const query = gql`  ${userFragment}
  query homePageQuery {    tweets: Tweets(limit: 10, sort_field: "date", sort_order: "desc") {      id      body      date      Author {        ...UserFields      }      Stats {        views        likes        retweets        responses      }    }  }`;
export default graphql(query)(HomePage);
Let’s update the Tweet component so that, when users click on a tweet, they navigate to the tweet page:
// in Tweet.jsimport { Link } from "react-router-dom";
const Tweet = ({ tweet }) => (  <Link to={`/${tweet.id}`}>    <Card>...</Card>  </Link>);
export default Tweet;
Now, for the interesting part: passing variables to a GraphQL query. The new TweetPage component needs to grab the tweet id from the URL, and pass this id to the GraphQL query as a variable. React router makes URL parameters available to pages by injecting a match prop. How am I going to pass the id from react-router to graphql?
// in TweetPage.jsimport React from "react";import { gql, graphql } from "react-apollo";import { LinearProgress } from "material-ui/Progress";
import Tweet from "./Tweet";import { userFragment } from "./fragments";
export const TweetPage = ({ data: { loading, tweet } }) => (  <div>    {loading && <LinearProgress />}    {!loading && <Tweet tweet={tweet} />}  </div>);
const query = gql`  ${userFragment}
  query tweetPageQuery($id: ID!) {    tweet: Tweet(id: $id) {      id      body      date      Author {        ...UserFields      }      Stats {        views        likes        retweets        responses      }    }  }`;
export default graphql(query, {  options: ({ match }) => ({ variables: { id: match.params.id } }),})(TweetPage);
Note that the tweetPageQuery query requires an $id parameter which is of type ID.
I configured the graphql HOC so that it populates the variables options based on the match prop. This options property can be either a simple object, or a function receiving the component props. Note that I didn’t prefix the id variable with a $ - the Apollo client does it automatically.
And that’s how to populate GraphQL variables in Apollo.
Merging Queries
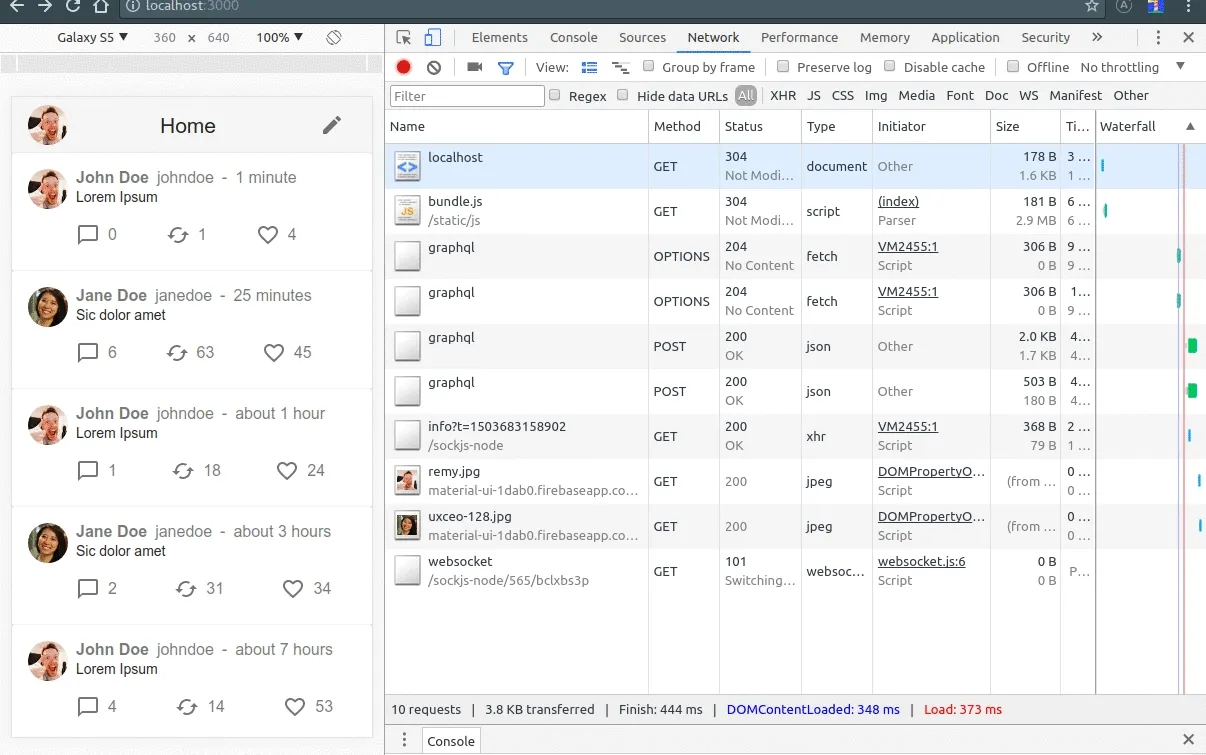
If I now browse the application, I can see that two requests are emitted: one for the currentUser, and another for the tweets:
Apollo offers a way to merge all the queries issued in a (configurable) time interval into a single query, but with a major drawback: the resulting query is not a standard GraphQL query. That means that I need a specific package on the server side to handle Apollo merged queries (called “Query Batching” in the Apollo documentation).
Unfortunately, this package (apollo-server-express) is not compatible with the one I used in the previous post in this series (express-graphql). Nevermind. For the sake of learning, let’s imagine that I’m using apollo-server-express on the server side, and see how to enable batched queries on the client side.
I just need to replace createNetworkInterface by createBatchingNetworkInterface in the ApolloClient initialization:
// in index.js// ...import {  ApolloClient,  ApolloProvider,  createBatchingNetworkInterface,} from "react-apollo";import App from "./App";
const networkInterface = createBatchingNetworkInterface({  uri: "http://localhost:4000/graphql",});const client = new ApolloClient({ networkInterface });
ReactDOM.render(  <ApolloProvider client={client}>    <App />  </ApolloProvider>,  document.getElementById("root"),);
Under the hood, instead of sending one query for each component, the BatchedNetworkInterface accumulates the queries issued by all the components, and sends them as an array of queries. This is very similar to what we did at marmelab with the koa-multifetch middleware.
Note: The Apollo client used to be able to merge queries into a real GraphQL query. But they’ve removed this feature in late 2016, because it was too difficult to implement in corner cases. Relay Modern managed to implement this approach correctly, but it requires both specific tooling on the server side, and a radical change in the client code.
Even if they are convenient, we don’t use either one of Apollo’s or Relay’s batching features for our GraphQL apps at marmelab. The sad truth is that there is no consensus about how to batch queries in GraphQL yet, and the tools are not mutually compatible. I hope that, in the near future, both Apollo and Relay will provide a better way to manage batched queries. For now, it’s a serious limitation of both client libraries.
Adding Client-Side Cache
Apollo keeps the results of previous queries in an internal cache called the store. It reuses data from the store in some cases, but not in all cases. Let’s see that in practice.
When a user navigates from the list to a tweet, and then back to the list, the browser doesn’t issue a new request to the GraphQL server. The store already contains the response for the list of tweets query, so Apollo reuses it. However, when a user comes to a tweet page from the list, the browser makes another request for the single tweet - even though the app already has the data for this tweet from the list. That’s because Apollo does not assume that data from a query can be reused for another one.
In my case, this default caching strategy is a bit weak. When a user navigates to a single tweet page coming from the home, I know the store already has all the required data already. How can I force Apollo to use data from the store, even it if comes from a different query?
I need to declare a custom resolver on the client:
// in index.js// ...import {  ApolloClient,  ApolloProvider,  createNetworkInterface,  toIdValue,} from "react-apollo";
/** * Generates a unique id for an entity * * @example 'Tweet__12' */const dataIdFromObject = (object) =>  `${object.__typename}__${object.id || object.tweet_id}`;
const customResolvers = {  Query: {    Tweet: (_, { id }) =>      toIdValue(dataIdFromObject({ __typename: "Tweet", id })),  },};const client = new ApolloClient({  networkInterface,  dataIdFromObject,  customResolvers,});
Here, I declared a custom dataIdFromObject function. Apollo calls this function whenever it needs to uniquely identify an entity (in my case, Tweet, User and Stats). I used the entity type name from GraphQL, concatenated with the object id. That’s actually the default identifier - but I need to use this function in the resolver, so I have to redefine it.
In the custom resolver for the Tweet query, I call the toIdValue function provided by Apollo, using the unique id of the object to look for. This way, Apollo knows which object I’m expecting, and can return it directly from the store if available. Otherwise, it will send the query to the server.
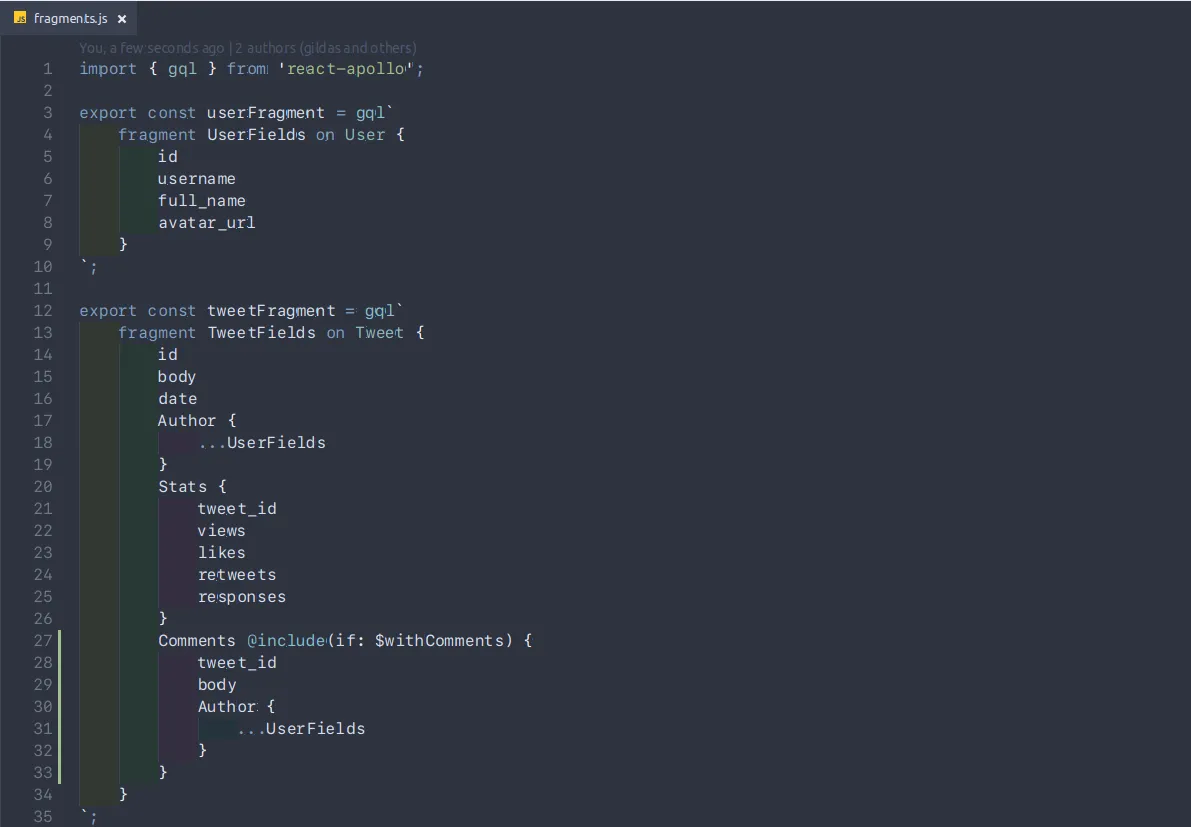
Note: I made sure to use tweet_id for the Stats, as we only have one Stats object for each Tweet. I also have to ensure that this tweet_id is requested by all the queries which return a Tweet and its Stats. I should add a fragment for the Tweet objects to avoid such cumbersome changes in multiple files. Let’s do that now:
// in fragments.js
export const tweetFragment = gql`  fragment TweetFields on Tweet {    id    body    date    Author {      ...UserFields    }    Stats {      tweet_id      views      likes      retweets      responses    }  }`;
I need to update the HomePage component to use this new fragment:
// in HomePage.jsimport { tweetFragment, userFragment } from "./fragments";
const query = gql`  query homePageQuery {    tweets: Tweets(limit: 10, sort_field: "date", sort_order: "desc") {      ...TweetFields    }  }
  ${userFragment}  ${tweetFragment}`;
And the TweetPage component, too:
// In TweetPage.jsimport { tweetFragment, userFragment } from "./fragments";
export const tweetPageQuery = gql` query tweetPageQuery($id: ID!) { tweet: Tweet(id: $id) { ...TweetFields } }
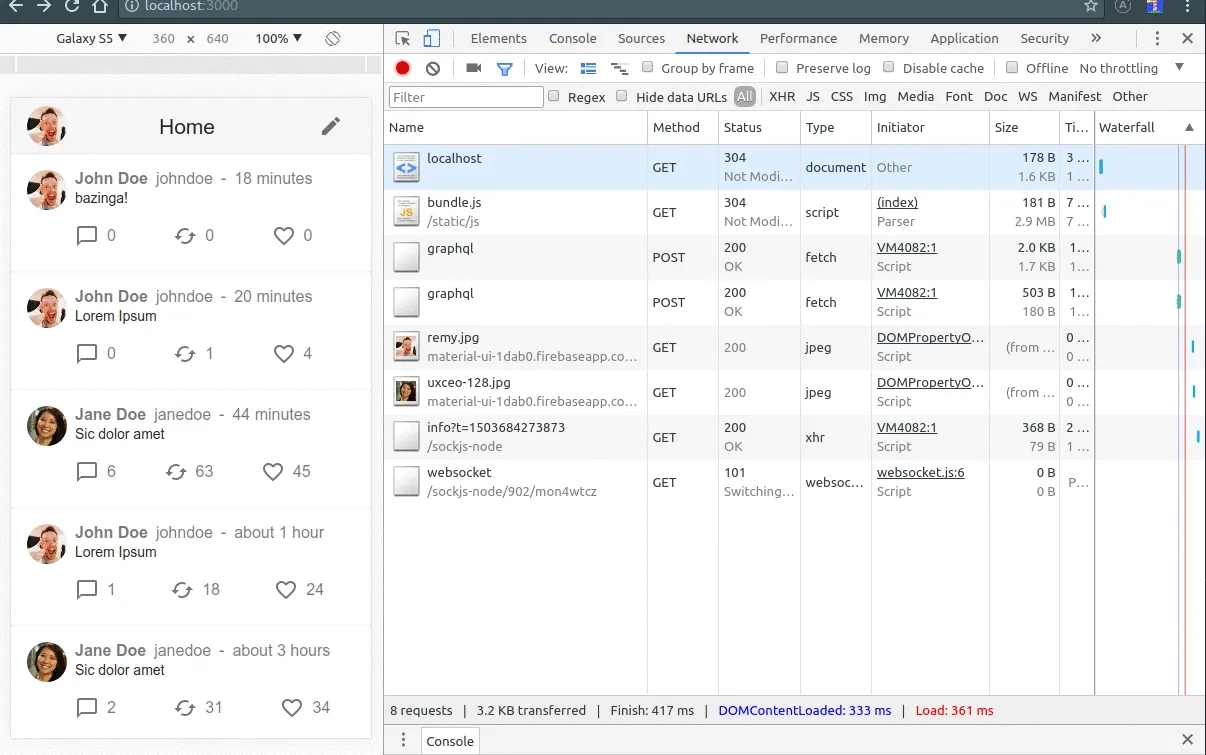
${userFragment} ${tweetFragment}`;Now, if I navigate back and forth between any tweets and the home page, I can see that only the initial two requests are made:
The Apollo caching policy is controlled by an option of the graphql HOC called fetchPolicy. I can choose to never use cached data, or to display cached data immediately but still request an up to date version, or to show only cached data. All options are described in the Apollo client documentation.
Apollo makes client-side caching relatively easy, and this is good news for client-side performance: an app that doesn’t need to fetch a backend is a fast app! Most of all, it’s flexible enough to adapt to most use cases.
Calling Mutations
To illustrate how to update data using GraphQL mutations, let’s add a page component for creating a new tweet. It’s a simple page with a controlled textarea. Notice the submit prop, a function taking the textarea content as argument:
// in NewTweetPage.jsimport React, { Component } from "react";import Button from "material-ui/Button";import { gql, graphql } from "react-apollo";
import { tweetFragment } from "./fragments";
export class NewTweetPage extends Component {  state = { body: "" };
  handleChange = (event) => {    this.setState({ body: event.target.value });  };
  handleSubmit = () => {    this.props.submit(this.state.body);  };
  render() {    const { body } = this.state;    return (      <div>        <label htmlFor="body">Enter your message</label>        <textarea value={body} onChange={this.handleChange} rows={4} />        <Button onClick={this.handleSubmit} color="primary" raised>          Send        </Button>      </div>    );  }}
I need to bind this component to the following GraphQL mutation:
const mutation = gql`  mutation createTweet($body: String!) {    createTweet(body: $body) {      ...TweetFields    }  }
  ${tweetFragment}`;
Just like for for the tweet query, I specified a $body parameter, which will be passed to the inner mutation call. Once again, the place to bind the component methods with the GraphQL variables is the graphql HOC options:
export default graphql(mutation, { props: ({ mutate }) => ({ submit: (body) => mutate({ variables: { body } }), }),})(NewTweetPage);Apollo gives access to the mutation via a callback prop called mutate. I use the props option to inject props into the decorated component - in this case, the submit prop. It allows me to hide the mutation call logic from the NewTweetPage component.
As you can see, binding data to a mutation takes only one line of code. It may seem a bit convoluted the first time you see it, but after doing it once or twice, using the graphql props option feels super convenient.
Even if a mutation usually returns data, the Apollo documentation recommends that you don’t rely on the result. Instead, you should reload the data using a GraphQL query. The Apollo cache should avoid a server round trip in most cases. Besides, in many cases you can use optimistic UI to display the result without waiting for the server response (as I’ll explain in a few minutes).
Reacting To Mutations
Once the mutation request has finished, I need to redirect the user to the list of tweets. To determine when I can do the redirection, I rely on the fact that the mutate function returns a promise - and so does my custom submit prop.
I’ll use react-router’s withRouter HOC to inject the history object into my component, and do the redirection using history.push(). I chose to put this redirection in a prop injected by the graphql HOC rather than in the component code itself, in order to make it testable:
// ...import { compose, gql, graphql } from "react-apollo";import { withRouter } from "react-router";
export class NewTweetPage extends Component {  // ...  handleSubmit = () => {    const { submit, redirectToHome } = this.props;    submit(this.state.body).then(() => redirectToHome());  };  // ...}
const mutation = gql`...`;
export default compose(  withRouter,  graphql(mutation, {    name: "createTweet",    props: ({ createTweet, ownProps: { history } }) => ({      submit: (body) => createTweet({ variables: { body } }),      redirectToHome: () => history.push("/"),    }),  }),)(NewTweetPage);
When calling props, the graphql passes my component props in an ownProps parameter to avoid conflicts with the Apollo props. That’s where I grab the history function, which is injected by the withRouter HOC.
The compose function allows to compose multiple HOCs on a component. In my opinion this is more readable than the equivalent code without compose, which accumulates parentheses in a LISP way:
export default withRouter( graphql(mutation, { name: "createTweet", props: ({ createTweet, ownProps: { history } }) => ({ submit: (body) => createTweet({ variables: { body } }), redirectToHome: () => history.push("/"), }), })(NewTweetPage),);I used the name option to rename the mutate function to createTweet. I systematically do this to have a method name consistent with the mutation name. This also proves useful when I have to bind multiple mutations to a single component: I avoid name conflicts on the mutate prop. In case you wonder how to call multiple mutations, you just need to compose the component with the graphql HOC more than once.
Updating The UI In An Optimistic Way
What if the network is slow? What if the server is currently very busy? The current NewTweetPage would be frozen until the server returns, which is bad UX. I could insert a loading animation to help the end user wait for the result, but I can do better. And what’s better than a loading animation? No loading animation!
Indeed, I’ll use the data I included in the mutation to display the new tweet even before the server acknowledges the change. This is called optimistic rendering. This was one of the killer features of Meteor.js, and fortunately the Meteor team ported it to the Apollo client.
To achieve optimistic rendering with Apollo, I add two options to the mutate call (renamed createTweet): optimisticResponse, and update.
// in NewTweetPage.jsimport { query as homePageQuery } from "./HomePage";// ...class NewTweetPage extends Component {  // ...  handleSubmit = () => {    const { submit, redirectToHome } = this.props;    // The submit promise resolves once the server has responded    submit(this.state.body);    // As the optimistic response is set up, don't wait for the promise    // to be resolved, but redirect the user to the list immediately    redirectToHome();  };  // ...}
export default compose(  withRouter,  graphql(mutation, {    name: "createTweet",    props: ({ createTweet, ownProps: { currentUser, history } }) => ({      submit: (body) =>        createTweet({          variables: { body },          optimisticResponse: {            __typename: "Mutation",            createTweet: {              __typename: "Tweet",              id: "newTweet",              date: new Date(),              body,              Author: {                __typename: "User",                id: currentUser.id,                avatar_url: currentUser.avatar_url,                username: currentUser.username,                full_name: currentUser.full_name,              },              Stats: {                __typename: "Stats",                tweet_id: "newTweet",                views: 0,                likes: 0,                retweets: 0,                responses: 0,              },            },          },          update: (store, { data: { createTweet } }) => {            // Read the data from the cache for this query            const localData = store.readQuery({ query: homePageQuery });            // Add the new tweet from the mutation to the beginning            localData.tweets.unshift(createTweet);            // Write the data back to the cache            store.writeQuery({ query: homePageQuery, localData });          },        }),      redirectToHome: () => history.push("/"),    }),  }),)(NewTweetPage);
Don’t be frightened by the long graphql function call, it’s actually quite straightforward.
The optimisticResponse option allows me to define a fake response from the server, that Apollo will use to update the local store before the server returns. The fake response must match the createTweet mutation response format, and contain GraphQL type information, hence the __typename I have to add for each entity. Note that I use a currentUser prop to fill in the new tweet Author fields; I’ll explain how the parent App component passes that prop to NewTweetPage in a few moments. I also need to provide an empty Stats, as it’s required by the schema.
As for the update option, it’s a function taking two parameters. The store is the Apollo internal data store, which keeps the responses of all previous queries. It’s a registry object where the keys are the queries. The second parameter, data, contains the result of the query. Apollo calls this update function twice: first with the data returned by the optimisticResponse, and then with the data from the GraphQL server when the mutation resolves.
Here is how I inject the optimistic response to the store: I first get the data for the homePageQuery query (exported by the HomePage.js file). I then put the newly created tweet at the first position of the tweets array. Note that it is named createTweet according to the mutation name. Finally, I write that updated data back into the store.
The optimisticResponse and update props may look hard to write at first sight. But imagine the boilerplate code that you would have to write to reproduce the same optimistic rendering : it would be a lot more complicated. Optimistic rendering is not an easy task, but Apollo makes it manageable.
Note: As Apollo executes the update function twice, you may fear that a new tweet gets added twice to the list. Fortunately, when receiving the real result from the GraphQL server, the Apollo client rolls back the update done with the optimistic response first, then calls the update() function again. For the end user, if the optimistic response and the server response are the same, everything happens as if the page was only rendered once.
For more information about the store object, I invite you to read the direct cache access documentation on the Apollo website, as well as this article by Caleb Meredith: Apollo Client’s new imperative store API.
Plugging In All Together
To make sure everything works as expected, I still have to add the NewTweetPage as a new route:
// In App.jsimport React from "react";import { BrowserRouter as Router, Route, Switch } from "react-router-dom";
import HomePage from "./HomePage";import Header from "./Header";import TweetPage from "./TweetPage";import NewTweetPage from "./NewTweetPage";
const App = ({ data: { currentUser } }) => (  <Router>    <div>      <Header currentUser={currentUser} />      <Switch>        <Route exact path="/" component={HomePage} />        <Route          exact          path="/new"          render={() => <NewTweetPage currentUser={currentUser} />}        />        <Route exact path="/:id" component={TweetPage} />      </Switch>    </div>  </Router>);
// ...export default graphql(query)(App);
I have to use react-router’s Switch component here to prevent the last route from matching the /new path. Moreover, the route matching the /new path must be declared before the route matching a tweet id.
Note: I used the render prop for the /new route so that I can pass additional props to the NewTweetPage component. Here, it’s the currentUser prop (I told you it would be convenient to have that user inside the App component and not in the Header).
I also updated the New Tweet button in the Header component to link to the /new path:
// in Header.js// ...import { Link } from "react-router-dom";
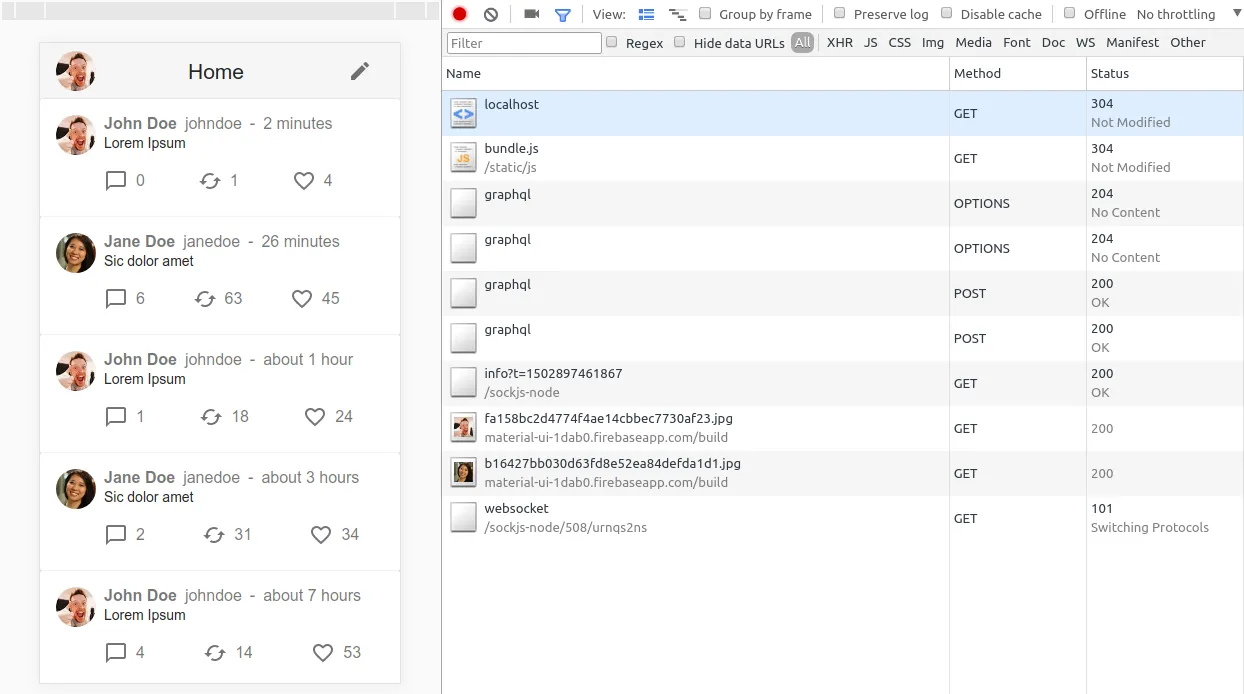
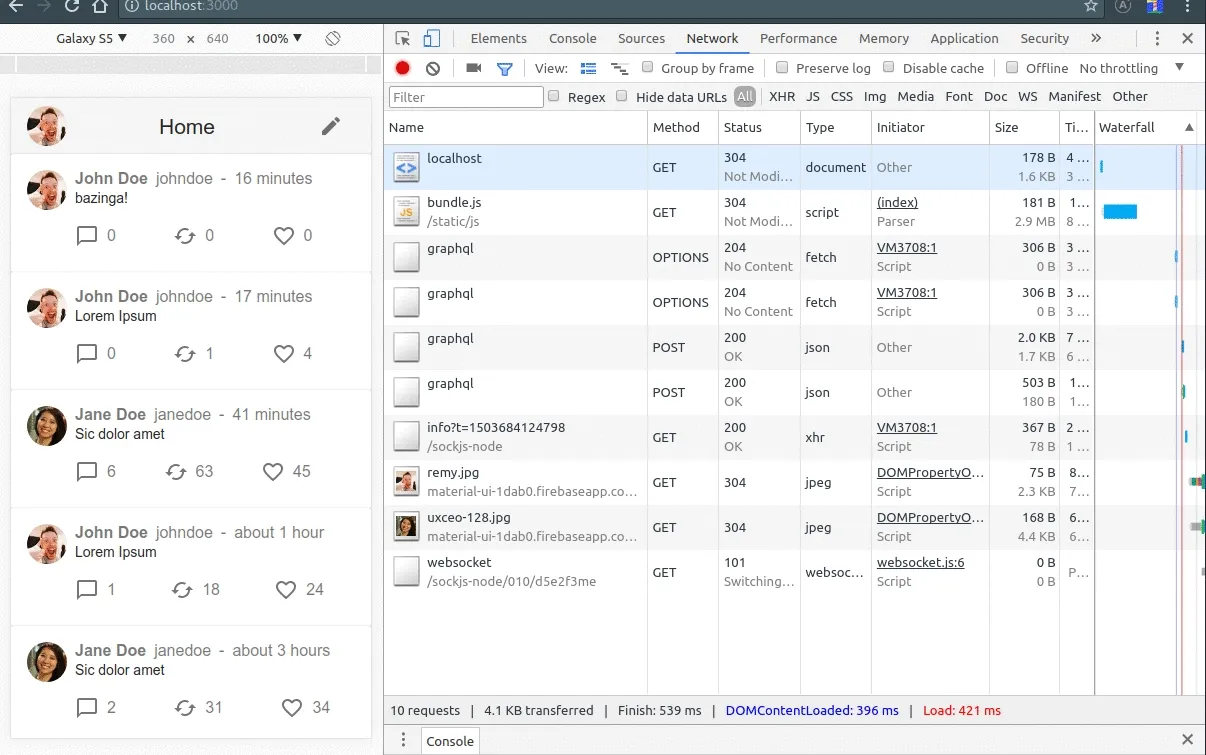
const Header = ({ data: { currentUser } }) => ( <AppBar position="static" color="default"> <Toolbar> {currentUser && ( <Avatar alt={currentUser.full_name} src={currentUser.avatar_url} /> )} <Typography component="span" type="title" color="inherit"> Home </Typography> <IconButton component={Link} to="/new"> <ModeEditIcon /> </IconButton> </Toolbar> </AppBar>);Now if I create a new tweet, I can see that it appears immediately on the home page. When the mutation resolves, the new tweet is updated using the server response. Since it’s the same tweet as in the optimistic response, the UI doesn’t change. With network throttling enabled in the Chrome devtools, I can see that the new tweet appears before the GraphQL request is resolved.
Handling Server Errors
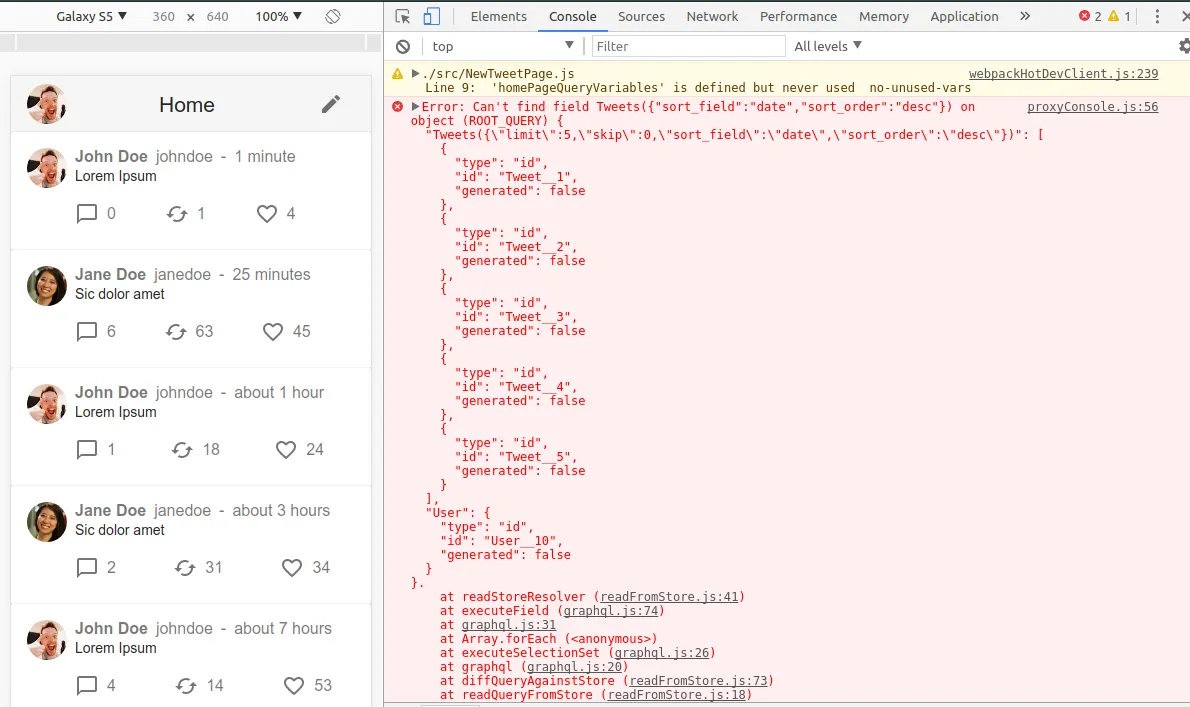
My Twitter clone is progressively looking like a real life application. But what if the server rejects the mutation? What if the network connection is lost? Let’s simulate that with the Chrome devtools.
Did you notice the error in the console? The mutate function (renamed createTweet) returns a rejected promise. What’s more interesting is that the Apollo client automatically rolls back the optimistic changes! As you can see in the screencast above, the end user has hardly enough time to see it appearing.
The only thing left to do is to notify the user about the mutation failure. Since the mutate function returns a promise, I can catch errors there:
// in NewTweetPage.js// ...
export default compose(  withRouter,  graphql(mutation, {    name: "createTweet",    props: ({ createTweet, ownProps: { currentUser, history } }) => ({      submit: (body) =>        createTweet({          // ...        }).catch((error) => {          console.error(error);          alert(`                    Sorry, we weren't able to send your tweet.                    Please check your network connection and retry.`);        }),      redirectToHome: () => history.push("/"),    }),  }),)(NewTweetPage);
Using an alert is really ugly, right? It would be better to display a nice notification using an in-app notification (called a Snackbar in Material Design lingo). But, when the mutation is rejected, the user has already been redirected to the home page, because of the optimistic rendering. So the user is no longer in the NewTweetPage. I need a way to pass the error from one component to the other, asynchronously.
Using a Custom Redux Store To Show Notifications
I could store an error value in the state of the App component, and pass it as props to the pages. But I can do better than that.
Let’s call Redux to the rescue! Redux is a state management library for React - probably the best one. It’s also the library used by Apollo to manage its internal store. And it’s pretty easy to extend the Apollo store, by adding (or composing) new reducer functions. It’s a bit long to describe here, because I must initialize a Redux store. But if you’ve already used Redux before, you’ll be in a familiar place. Otherwise, I recommend that you take a few minutes to read the Redux Gist before going on.
I’ll start by creating the notifications duck. In case you don’t know, a duck is a redux pattern where you group the related action types, action creators, and reducers into the same file, organizing files by feature. This makes it easier to reason about a given feature. The reducer should be the default export in the file. You can read more about the duck pattern in this article by S.C. Barrus: The Ducks File Structure for Redux.
// in notifications.jsimport uuid from "uuid";
// action type constantsexport const ADD_NOTIFICATION = "ADD_NOTIFICATION";export const REMOVE_NOTIFICATION = "REMOVE_NOTIFICATION";
// action creatorsexport const addNotification = (message) => ({  type: ADD_NOTIFICATION,  payload: message,});export const removeNotification = (id) => ({  type: REMOVE_NOTIFICATION,  payload: id,});
const initialState = [];
// the reducer functionexport default (previousState = initialState, action) => {  if (action.type === ADD_NOTIFICATION) {    return [...previousState, { id: uuid.v1(), message: action.payload }];  }
  if (action.type === REMOVE_NOTIFICATION) {    const removedIndex = previousState.findIndex(      (n) => n.id === action.payload,    );    return [      ...previousState.slice(0, removedIndex),      ...previousState.slice(removedIndex + 1),    ];  }
  return previousState;};
Then, I bootstrap a Redux store, composed of the Apollo client reducer and my custom notifications reducer. I pass this store to the ApolloProvider component, to be used instead of the default Apollo store:
// in index.js// ...import { createStore, combineReducers, applyMiddleware, compose } from "redux";import notificationsReducer from "./notifications";// ...
const client = new ApolloClient({  networkInterface,  dataIdFromObject,  customResolvers,});
const store = createStore(  combineReducers({    notifications: notificationsReducer,    apollo: client.reducer(),  }),  {}, // initial state  compose(    applyMiddleware(client.middleware()),    // If you are using the devToolsExtension, you can add it here also    typeof window.__REDUX_DEVTOOLS_EXTENSION__ !== "undefined"      ? window.__REDUX_DEVTOOLS_EXTENSION__()      : (f) => f,  ),);
ReactDOM.render(  <ApolloProvider store={store} client={client}>    <App />  </ApolloProvider>,  document.getElementById("root"),);
The Apollo client instance exposes reducer and middleware methods. They facilitate the creation of a custom Redux store.
Note: No need to include your own react-redux <Provider> component - it’s included by the ApolloProvider component, which uses Redux internally.
Now, let’s update the HomePage component to show a notification when the store contains one:
// in HomePage.js// ...import { connect } from "react-redux";import Notification from "./Notification";import { removeNotification } from "./notifications";// ...
class HomePage extends Component {  // ...  handleNotificationClose = (notificationId) => {    this.props.removeNotification(notificationId);  };
  render() {    const { loading, notifications, tweets } = this.props;    return (      <div>        {loading && <LinearProgress />}        {!loading &&          tweets.map((tweet) => <Tweet key={tweet.id} tweet={tweet} />)}        {notifications.map((notification) => (          <Notification            key={notification.id}            onClose={this.handleNotificationClose}            notification={notification}          />        ))}      </div>    );  }}
// ...const mapStateToProps = (state) => ({ notifications: state.notifications });
export default compose(  connect(mapStateToProps, { removeNotification }),  graphql(homePageQuery, {    // ...  }),)(HomePage);
The Notification component simply uses material-ui’s Snackbar component:
import React, { Component } from "react";import Snackbar from "material-ui/Snackbar";
const anchorOrigin = { vertical: "bottom", horizontal: "center" };
class Notification extends Component {  handleClose = () => {    this.props.onClose(this.props.notification.id);  };
  render() {    const {      notification: { message },    } = this.props;    return (      <Snackbar        anchorOrigin={anchorOrigin}        autoHideDuration={6e3}        message={<span>{message}</span>}        onClick={this.handleClose}        onRequestClose={this.handleClose}        open      />    );  }}
export default Notification;
Finally, I updated the NewTweetPage to dispatch a notification on error, instead of showing an alert:
// in NewTweetPage.js...import { connect } from 'react-redux';import { addNotification } from './notifications';...
export default compose(    withRouter,    connect(null, { addNotification }),    graphql(mutation, {        name: 'createTweet',        props: ({ createTweet, ownProps: { currentUser, history, addNotification } }) => ({            redirectToHome: () => history.push('/'),            submit: body => {                createTweet({                    // ...                }).catch(error => {                    console.error(error);                    addNotification(`                        Sorry, we weren't able to send your tweet.                        Please check your network connection and retry.`                    );                });            }        }),    }),)(NewTweetPage);
And here is the result:
You’ll probably need to add a custom Redux reducer to the Apollo store for notifications, too. Fortunately, you only need to do it once, and then you can dispatch notifications from anywhere in the app.
Including Authentication Credentials
Now that users can post data, my Twitter app needs an authentication layer. I won’t expand here on how the user authenticates (a classical login form sending a connection request, and receiving a token in return). But I’ll show how to include the token in all requests to the GraphQL server. Oh, and since a secure API requires both a token header and an HTTP-only cookie, I’ll also include these credentials in the call.
All it takes to include static headers in every request to the GraphQL server is a modification in the network interface configuration. For dynamic headers, Apollo supports middleware functions - just like you would add middlewares in an Express app:
// in index.jsconst networkInterface = createNetworkInterface({  uri: "/graphql",  opts: {    // additional options for fetch    credentials: "same-origin", // your backend server is on the same domain    credentials: "include", // your backend server is not on the same domain  },});
const includeAuthTokenMiddleware = {  applyMiddleware(req, next) {    if (!req.options.headers) {      req.options.headers = {}; // Create the header object if needed.    }    // get the authentication token from local storage if it exists    const token = localStorage.getItem("token");    req.options.headers.authorization = token ? `Bearer ${token}` : null;    next();  },};
networkInterface.use([includeAuthTokenMiddleware]);
const client = new ApolloClient({  networkInterface,});
You can read more about how to customize the networkInterface for authentication in the Apollo documentation.
Loading Paginated Data
The home page currently displays only 2 tweets. What happens when the database has hundreds of them for a given user? I’ll have to limit the number of tweets requested by the component, and include a way to load more tweets on demand.
The Tweets query exposed by the server accepts two parameters for pagination: limit, and skip. You may remember that I hard coded limit to 10 in the homePageQuery before. I’ll add a skip variable to the query.
To manage the skip parameter, let’s add a Load more button in the HomePage component:
// in HomePage.js// ...import Button from "material-ui/Button";
class HomePage extends Component {  state = { skip: 5 };
  handleClick = () => {    this.props.loadMore(this.state.skip).then(() => {      this.setState(({ skip }) => ({ skip: skip + 5 }));    });  };
  render() {    return (      <div>        {/* ... */}        <Button onClick={this.handleClick}>Load more</Button>      </div>    );  }}
I’ll define the loadMore props through the graphql props option, but first, let’s update the homePageQuery so that it takes a skip variable:
// in HomePage.js// ...export const homePageQuery = gql`  query homePageQuery($skip: Int!) {    tweets: Tweets(      skip: $skip      limit: 10      sort_field: "date"      sort_order: "desc"    ) {      ...TweetFields    }  }
  ${userFragment}  ${tweetFragment}`;
Now, it’s time to update the graphql HOC call:
// in HomePage.js...export default compose( connect(mapStateToProps, { removeNotification }), graphql(homePageQuery, { options: { variables: { skip: 0 }, }, props: ({ data: { loading, tweets, fetchMore } }) => ({ loading, tweets, loadMore: skip => fetchMore({ variables: { skip }, updateQuery: (previousResult, { fetchMoreResult }) => ({ ...previousResult, tweets: [ ...previousResult.tweets, ...fetchMoreResult.tweets, ], }), }) }), }))(HomePage);In addition to loading, Apollo injects another utility function in the data prop, called fetchMore. It allows to do a new GraphQL query, and merge the result into the original result. I use it in the loadMore custom prop. When called, it will execute fetchMore, overriding the initial variables with the specified skip argument.
The updateQuery option is called to merge the results from fetchMore with the current store. Here, I just add the new tweets to the existing array from the previous queries.
I love that Apollo takes care of most common use cases, like pagination. The loadMore option offers a great shortcut for that. You can read more about pagination with the Apollo client in the Apollo documentation.
Refactoring Query Variables
Wait! If I try to create a new Tweet, now I get a bunch of error messages in the console, and the new tweet does not appear anymore after the redirection.
That’s because the homePageQuery now requires the skip variable, and Apollo needs this variable in the update method of the NewTweetPage component as well, so that it can update its store correctly.
This will bite you, too : updating the parameters of a GraphQL query that is reused in several places will break your app. That’s one of the reasons why you should have automated tests to detect that kind of regression.
Let’s fix that bug. First, I export the default variables for the homePageQuery:
// in HomePage.js// ...export const homePageQueryVariables = { skip: 0 };
export default compose(    connect(mapStateToProps, { removeNotification }),    graphql(homePageQuery, {        options: {            variables: homePageQueryVariables,        },        props: ({ data: { loading, tweets, fetchMore } }) => ({            ...        }),    }),)(HomePage);
Now, I must update the graphql HOC update method inside the NewTweetPage component:
// In NewTweetPage.js// ...import { homePageQuery, homePageQueryVariables } from "./HomePage";// ...
export default compose(  withRouter,  connect(null, { notify: notifyAction }),  graphql(mutation, {    props: ({ mutate, ownProps: { currentUser, history, notify } }) => ({      redirectToList: () => history.push("/"),      submit: (body) => {        mutate({          // ...          update: (store, { data: { createTweet } }) => {            // pass the variables here            const localData = store.readQuery({              query: homePageQuery,              variables: homePageQueryVariables,            });            localData.tweets.unshift(createTweet);            // pass the variables here, too            store.writeQuery({              query: homePageQuery,              variables: homePageQueryVariables,              localData,            });          },        }).catch((error) => {          console.error(error);          addNotification(`                        Sorry, we weren't able to send your tweet.                        Please check your network connection and retry.`);        });      },    }),  }),)(NewTweetPage);
Note that I passed the variables to both store.readQuery and store.writeQuery.
The application is now back to normal!
I’m lucky with my use case here, as I only have to insert the newly created tweet at the first position in the tweets array. If tweets were sorted in chronological order, things would be more complicated. I would have to push the new tweet at the end of the tweets array. But as I use the initial variables of the homePageQuery, the new tweet would be pushed at the end of the first page. I currently have no way to know whether the user requested to see all tweets on the HomePage component. Resolving this would imply some additional Redux state, where I would store the current state of displayed tweets (variables, end of available tweets from server, etc.). I would connect this state to the NewTweetPage, and use it to compute the variables.
Separating Views and Data Dependencies
In this article, you may have noticed that I collocated my components and their data dependencies (queries, mutations and the graphql HOC). I find that it makes it easy to reason about the application. On the other side, doing a refactoring like the one in the previous section is a little cumbersome. Not to mention the fact that, as an application grows, two components may need the same data dependency.
That means that for large code bases, it’s often better to separate React components from the graphql logic. A good solution for that is to create higher order components for each data requirement.
For example, the logic for requesting the list of tweets could be moved to a withTweets HOC, as follows:
// in data/withTweets.jsimport { gql, graphql } from "react-apollo";
const listTweetsQuery = gql`...`;
const listTweetsQueryVariables = {  /* ... */};
export default graphql(listTweetsQuery, {  options: {    variables: listTweetsQueryVariables,  },  props: ({ data: { loading, tweets, fetchMore } }) => ({    loading,    tweets,    loadMore: (skip) =>      fetchMore({        variables: { limit: 5, skip },        updateQuery: (previousResult, { fetchMoreResult }) => ({          ...previousResult,          tweets: [...previousResult.tweets, ...fetchMoreResult.tweets],        }),      }),  }),});
Using such an HOC in a page component is extremely straightforward:
// in HomePage.jsimport withTweets from "./data/withTweets";// ...
export default withTweets(HomePage);
Unit Testing The GraphQL Logic
Now that the GraphQL logic is separated from the components, it’s easier to test in isolation. But what can I test? Many of the graphql HOC options are pure functions, so they can be extracted, and unit tested.
For instance, I can refactor the withTweets HOC to export the updateQuery and loadMore functions:
// in data/withTweets.jsimport { gql, graphql } from "react-apollo";
const listTweetsQuery = gql`...`;const listTweetsQueryVariables = {  /* ... */};
export const updateQuery = (previousResult, { fetchMoreResult }) => ({  ...previousResult,  tweets: [...previousResult.tweets, ...fetchMoreResult.tweets],});
export const loadMore = (fetchMore) => (skip) =>  fetchMore({    variables: { limit: 5, skip },    updateQuery,  });
export default graphql(listTweetsQuery, {  options: {    variables: listTweetsQueryVariables,  },  props: ({ data: { loading, tweets, fetchMore } }) => ({    loading,    tweets,    loadMore: loadMore(fetchMore),  }),});
Even before writing the unit tests, I find that the code is now easier to read. That’s, in my opinion, one of the greatest benefits of unit testing: it forces a better code architecture. And now, I can test the intermediate functions. Just like for the server side, I’ll use Jest to run tests.
// in data/withTweets.spec.jsimport { updateQuery } from "./withTweets";
describe("updateQuery", () => {  it("concatenates tweets from fetchMore results to the previous result", () => {    const previouResult = {      foos: [{ bar: 1 }],      tweets: [{ id: 1 }, { id: 2 }],    };    const fetchMoreResult = {      tweets: [{ id: 5 }, { id: 6 }],    };    expect(updateQuery(previousResult, { fetchMoreResult })).toEqual({      foos: [{ bar: 1 }],      tweets: [{ id: 1 }, { id: 2 }, { id: 5 }, { id: 6 }],    });  });});
How about testing the React components themselves? It’s possible if, like me, you always take care of exporting the non-decorated component, too:
export const HomePage = ({ data }) => // ...
export default graphql(homePageQuery, { /* ... */})(HomePage);
This enables me to unit test the non-decorated components, by simulating Apollo’s data prop. I usually use enzyme for that, and there is nothing specific to GraphQL so I won’t expand here.
As for unit testing the HOC itself (the default export), I wouldn’t recommend it. HOC tests require quite a lot of plumbing (creating a mock context, providing a dummy component, decorating the component with the mock context, using mount() instead of shallow() in enzyme, etc.), and it is equivalent to testing the react-apollo package.
Note: The Apollo team bootstrapped a package called apollo-test-utils a few months ago, dedicated to mocking networkInterface. There is also a <MockedProvider> component in the react-apollo package. Both are quite rudimentary, I wouldn’t recommend them for now. In my opinion, the Apollo tooling is lacking to make unit tests on the client easy.
If you want to test if a GraphQL-powered component works as expected, you’ll have to turn to end-to-end testing. That’s a lot more work than unit tests, but fortunately we’ve already covered that topic in another article: End to End (e2e) Testing React Apps With Selenium WebDriver And Node.js is Easier Than You Think. You’ll also need a mock GraphQL server. Fortunately, Apollo provides a one-liner to create a mock server based on a GraphQL schema. You can read more about it in this article by Jonas Helfer: Mocking your server with just one line of code.
Storing GraphQL Queries In Separate Files
Separating the logic from the presentation is a good practice, but I can go further in the separation of concerns.
In this article, I wrote every queries and mutations as strings, and passed them to the gql template literal tag. However, strings are inconvenient to manipulate when you start to add extra fields, merge multiple queries, or include fragments. Besides, it means that the GraphQL code is parsed at runtime ; even if it happens only once (the parsing result is cached), it has a cost.
An alternative way to store GraphQL queries is to move them to static *.graphql files. This enables Persisted Queries, which offer performance and security benefits. Persisted queries will be introduced in the next post in this series. It also triggers compile-time syntax check of the GraphQL queries, which will raise errors before I deploy the code to production.
// in data/HomeQuery.graphql#import "./TweetFragment.graphql"
query homePageQuery($limit: Int!, $skip: Int!) {    tweets: Tweets(limit:$limit, skip:$skip, sort_field:"date", sort_order:"desc") {        ...TweetFields    }}
Writing queries inside .graphql doesn’t prevent me from reusing fragments across many files, thanks to the #import statement.
To process *.graphql files, I need to preprocess them using webpack or babel. The graphql-tag package comes with a webpack loader doing just that. There is also a babel plugin: babel-plugin-graphql-tag.
Once Babel is configured, I just need to import a *.graphql file to use the query in JavaScript:
// in data/withTweets.jsimport { graphql } from "react-apollo";import listTweetsQuery from "./HomeQuery.graphql";
export default graphql(listTweetsQuery, {  /* ... */});
Using *.graphql files may reduce the production bundle size a bit, by removing the need for gql at runtime.
Just like separate data logic, static queries may not make sense for a small application. I recommend using it when the amount of GraphQL code in the components goes beyond a few lines. You can also read the 5 benefits of static GraphQL queries article by Sashko Stubailo to decide if it makes sense for your project.
Using Directives For Dynamic Queries
Using static query files has one major drawback: you can’t alter the query at runtime anymore. A/B testing, or feature flags, are common use cases for altering a query at runtime. For instance, I might want to hide the Stats in my Twitter application for a subset of users, to test a new user experience.
Fortunately, you can add conditions to static GraphQL queries, too, using directives. We briefly introduced directives in the second post of this series. I can use the @include(if) directive to include the Stats only if the corresponding feature is activated.
// in data/TweetFragment.graphql#import "./UserFragment.graphql"
fragment TweetFields on Tweet {    id    body    date    Author {        ...UserFields    }    Stats @include(if: $withStats) {        tweet_id        views        likes        retweets        responses    }}
You can learn more about the @include directive in the official GraphQL documentation.
I’ve introduced a new $withStats variable ; the home page query must therefore declare this variable:
// in data/HomeQuery.graphql#import "./TweetFragment.graphql"
query homePageQuery($limit: Int!, $skip: Int!, $withStats: Boolean!) {    tweets: Tweets(limit:$limit, skip:$skip, sort_field:"date", sort_order:"desc") {        ...TweetFields    }}
Now, it’s time to bind the $withStats variable to something significant. I’ll introduce an environment variable called REACT_APP_FEATURE_STATS, using the mechanism provided by create-react-app.
// in data/withTweets.jsimport { graphql } from "react-apollo";import listTweetsQuery from "./HomeQuery.graphql";
export const listTweetsQueryVariables = {  limit: 5,  skip: 0,  withStats: process.env.REACT_APP_FEATURE_STATS,};
export default graphql(listTweetsQuery, {  options: { variables: listTweetsQueryVariables },  props: {    /* ... */  },});
Whenever I manipulate a GraphQL query on the client side (concatenating substrings, adding conditions, interpolating variables), a bell rings in my mind: You’re doing it wrong! Static queries support fragments, conditions, and variables, so there is usually no reason to alter them at runtime.
Miscellaneous
My app is now complete. You can find the final code on GitHub: marmelab/GraphQL-example. I’ll briefly cover a few more use cases, but feel free to skip to the conclusion if you’re in a hurry.
Offline Usage
On flaky mobile networks, the ability to use an application while offline is becoming a must have feature. Out of the box, Apollo does not provide anything for that. However, Apollo is built on Redux, and the Redux ecosystem has already addressed the offline scenario with the redux-persist and redux-offline packages. So enabling offline mode on a GraphQL-powered web app is definitely possible.
This topic deserves multiple articles by itself, and Pete Corey already did a fantastic job at it. I invite you to read his two articles:
- Offline GraphQL queries with Redux Offline and Apollo
- Offline GraphQL mutations with Redux Offline and Apollo
Note: The Apollo team has planned to address offline support in their roadmap.
Server Side Rendering
Server Side Rendering (SSR) a React app is not harder with GraphQL. You don’t have to modify anything related to the GraphQL client code. The server responsible for the SSR of the client application simply makes HTTP requests to the GraphQL backend (which is usually the same server). However, Apollo is using Redux, so it implies the usual Redux store rehydratation work.
You can read more about this (with an actual SSR example) in the Apollo documentation.
Real Time Updates And Subscriptions
In addition to queries and mutations, GraphQL also supports subscriptions. They allow to address real time updates using the Publish/Subscribe pattern.
Exploring this subject requires another article! You can refer to those articles for a primer:
Be warned that subscription support is very young in both Apollo and Relay. I’d advise to wait for a few months until the tools settle down.
A Word About Relay Modern
Facebook’s Relay Modern is an alternative to the Apollo client library. We haven’t had any significant experience with it so far, but I advise you to read this article by Sashko Stubailo from the Apollo team to learn more about it: Exploring Relay Modern.
The main premise of Relay is that your data fetching should be just as modular as your UI.
In a nutshell, Relay is built from the ground up to allow developers to group React components with small GraphQL fragments. This ensures that each component is only responsible for its data, regardless of the other components requirements.
This is achieved by using several HOCs such as the createFragmentContainer, which does not send requests by itself. It just collects data requirements from the components. Once all data requirements are collected, a single query can be made to optimize network traffic.
However, be warned that adding Relay Modern requires an additional babel plugin in the client side, to allow a compilation step for your schema. This compilation step will help Relay to analyze your graphql code, do a compile-time check, and further optimize data fetching.
Conclusion
If you’ve read that far, thank you! I’ve tried to share my experience, and the one of my coworkers. I believe this post is enough to get you up and running to build your own GraphQL-powered app - in just one hour!
As you may have understood by reading this post, I really enjoy the Apollo client library, and the tooling around it. Developing React apps on top of a GraphQL server is definitely a pleasant experience - even more pleasant than developing REST-powered apps. And it makes complex features (optimistic rendering, caching) entirely manageable.
I have two regrets though, it’s the lack of tools for unit tests, and the (absence of) solution for merged queries. One strong GraphQL promise is to reduce the number of HTTP calls, but on the client side, if you want to merge queries for more than one component, you still have to do it by hand. I have no doubt that this will be solved in the near future.
Now that you know how to use GraphQL both in the server side and in the client side, you probably made up your mind about the technology. Is it worth the hassle? We have a strong opinion on that. Read it in the next and last post in this series: Dive Into GraphQL Part V: Should You Use GraphQL?.
Authors
Full-stack web developer at marmelab, Gildas has a strong appetite for emerging technologies. If you want an informed opinion on a new library, ask him, he's probably used it on a real project already.
Marmelab founder and CEO, passionate about web technologies, agile, sustainability, leadership, and open-source. Lead developer of react-admin, founder of GreenFrame.io, and regular speaker at tech conferences.