How To Implement Web Login In A Private NPM Registry

NPM v9 is now using Web Login as its default authentication type. Let’s see how it works and what it takes to implement it in a private registry.
Why A Private Registry?
As you may already know, marmelab is very implicated in the Open Source community. We provide several Open Source tools and projects, and also contribute to other projects by opening issues or pull requests whenever we have the chance. React-admin, an Open Source frontend framework for building B2B applications on top of REST/GraphQL APIs, is totaling more than 21k stars on GitHub at the time of writing, and is one of our flagship projects.
However, it can be challenging to find the resources to maintain such ambitious Open Source projects without a source of income. With React-admin, we tried to take on this challenge by also providing an Enterprise Edition. It includes several packages offering pre-built components for advanced features. The Enterprise Edition also generates the income needed to keep maintaining the Open Source version. Feel free to have a look at both the Community Edition and the Enterprise Edition of React-admin if you don’t know about them already!
Now you may see where I’m going with this. To build the Enterprise Edition, we need a way to make our packages accessible only to the Enterprise Edition subscribers. To do this, NPM supports the publication of private packages to their registry, and also supports using a private registry, which allows for self-hosting the packages.
Since we wanted to self-host our packages, and self-manage the list of users authorized to download them, we opted for the latter. Initially built using verdaccio, we eventually chose to build our own registry system. This allowed for more control over the subscribers’ list, and to manage our users using… you guessed it, React-admin!
Breaking Changes In NPM V9
NPM is the default package manager used with Node.js. Its settings are used even when using other package managers such as Yarn. On October 19, 2022, NPM released a new major version, NPM v9. The goal for this major release was to standardize appropriate defaults and clean up legacy configurations where possible. This leads, among other things, to several breaking changes in the configuration and default behaviors. Have a look at this great post to learn more about its changes and new features.
One of those changes impacted the auth-type used for the npm login and npm addUser CLI commands.
To be precise:
- Only two
auth-typevalues are now supported:webandlegacy - The
auth-typeiswebby default - These
auth-typevalues have been removed in NPM v9:sso,saml,oauth, andwebauthn webandlegacyonly try their respective methods, i.e. NPM no longer tries them all until one succeeds
Since our private registry only supported the legacy authentication type, the first time we tried it with NPM v9, we got this error:
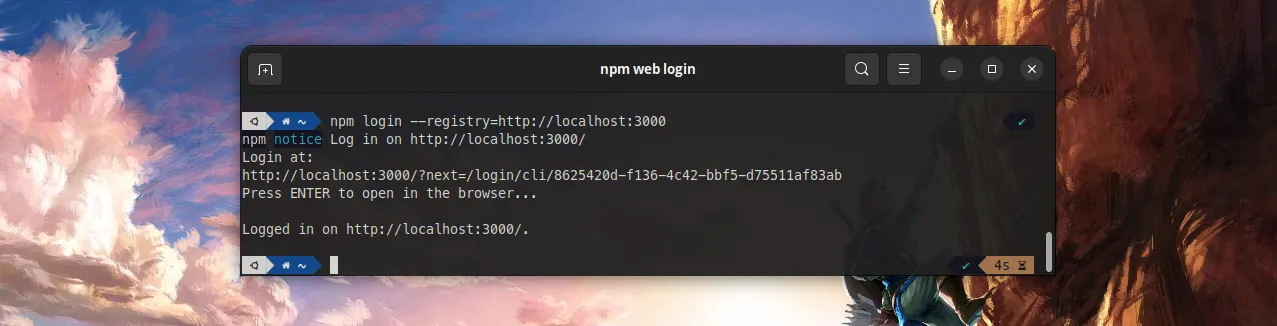
$> npm login --registry=https://registry.marmelab.comnpm notice Log in on https://registry.marmelab.com/npm ERR! code ENYInpm ERR! Web login not supportedOf course, all our customers using NPM v9 had the same error. Hence we had to come up with a solution quickly.
The first easy solution would be to ask our customers to force the auth-type all the time, like so:
$> npm login --registry=https://registry.marmelab.com --auth-type=legacyBut we figured, since NPM now encourages to use Web Login by default, then we should do the same. That’s why we decided to implement support for Web Login in our private registry.
How Does Web Login Work?
Here is where our true journey began… It turns out that the technical details of the NPM Web Login are - currently, at least - very poorly documented.
How does the NPM CLI know if a registry supports Web Login? What request will get sent? What response does it expect? I could find no answer to those questions neither in the docs nor from Google.
This was a bit of a surprise and a disappointment. But I was not ready to give up so easily. I figured that it shouldn’t be too hard to retro engineer the whole login process, since after all the CLI is simply sending HTTP requests to a server and expecting a response.
Good news for me, increasing the log level with --loglevel=verbose is enough for the NPM CLI to output all queried URLs, as well as the body of the responses. All I had to do was to grab the URLs and responses from a real npm login to the public NPM registry (https://registry.npmjs.org/), and grab all requests along with their data by setting up NPM to query my locally running registry server (http://localhost:3000/).
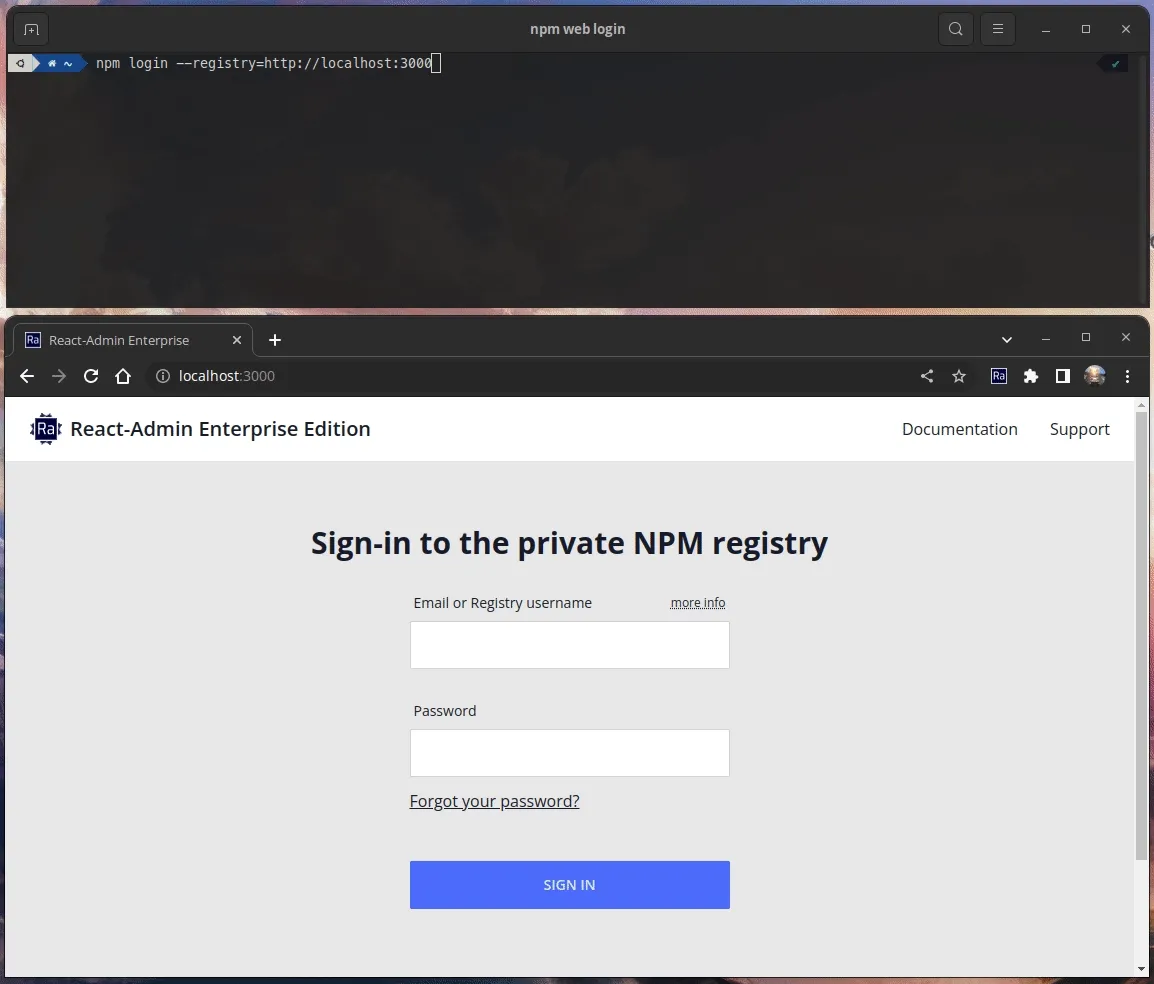
As you would have guessed from the name, Web Login also implies a step where you need to open up a browser to a login page. This step is easy to retro engineer, using my browser’s DevTools.

So, now that all this work is done, I am finally ready to share with you all the technical details I gathered.
The NPM Web Login Workflow
Here is how it works.
First, npm login will make a POST request to your registry at endpoint /-/v1/login (e.g. https://registry.npmjs.org/-/v1/login).
It expects in return a JSON body shaped like this:
{ "loginUrl": "https://www.npmjs.com/login?next=/login/cli/82737ae6-7557-4e7d-b3cb-edcc195aa34a", "doneUrl": "https://registry.npmjs.org/-/v1/done?sessionId=82737ae6-7557-4e7d-b3cb-edcc195aa34a"}Note the redirect part in the loginUrl: ?next=/login/cli/eaae5de8-2c61-4492-bf96-357daf8c8843.
This POST request contains a hostname field in its body, which can be used to implement some sort of control over who is allowed to call this endpoint, for example by setting up a black list or a white list.
Second, the NPM CLI will periodically call the doneUrl, which is responsible for letting it know when the user is successfully authenticated, and returning the user’s token afterward.
It expects the server to return either:
- A HTTP code
202, along with an HTTP headerretry-after, as long as the token is not available - A HTTP code
200response, along with the token, once the login is successful
The token must be put inside the response body as JSON:
{ "token": "npm_token0123456789abcdef=="}Most likely for security reasons, once the token is successfully retrieved, the session matching the sessionId gets destroyed, and the doneUrl is no longer available. Hence, one can use the doneURL to fetch the token only once.
Third, while the NPM CLI is waiting for the doneURL to return a token, it offers to open up a web browser to the loginUrl.
It is now the responsibility of this web page to:
- Authenticate the user
- Update the login attempt session with the user’s token, and make it available through the
doneURL - This is can be achieved (and this is the way NPM does it) by redirecting to the
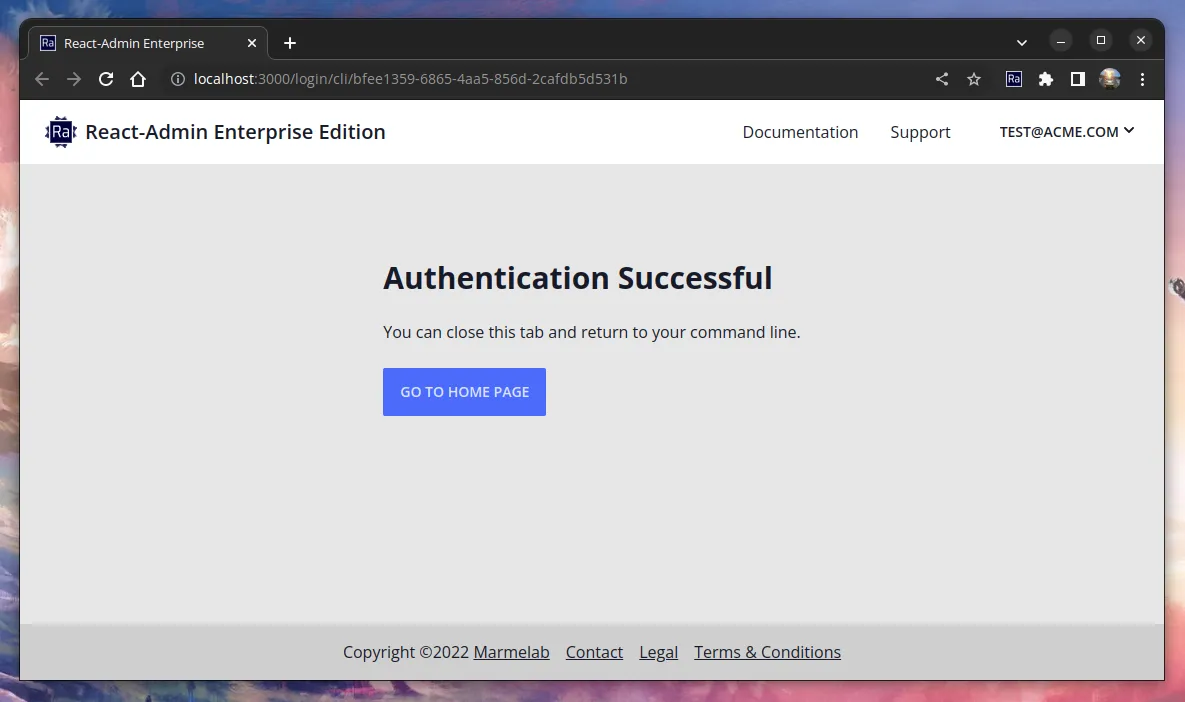
/login/cli/<sessionId>page after the user has successfully logged in - This page can then display a message to let the user know the operation was successful
Implementing NPM Web Login: The Plan
Once I could figure out and understand the whole workflow, implementing Web Login in our private registry turned out to be a pretty straightforward task.
It required:
- creating a new table in our database to store the sessions (i.e. the login attempts), along with their corresponding token when available,
- adding a
/-/v1/loginroute to initiate a login attempt (create a new session and store it in the database), - adding a
/-/v1/doneroute to return the token when login is complete (and removing the session once the token has been read), - adding a
/login/cli/<sessionId>route to handle the successful login of the user (this creates the token and saves it in the database), - and finally making our login page handle redirection with the
nextquery parameter.
Implementation Challenges
Even though the implementation went pretty smoothly, there were mainly two challenges I had to overcome.
The first one was to figure out the exact response expected by the NPM CLI for the doneUrl. Indeed, it turns out that if you don’t return an HTTP code of exactly 202, or if the HTTP header retry-after is missing, the NPM CLI will throw a (very misleading) error, making it hard to figure out what’s going wrong:
npm ERR! code FETCH_ERRORnpm ERR! errno FETCH_ERRORnpm ERR! invalid json response body at http://localhost:3000/-/v1/done?sessionId=npm_*** reason: Unexpected end of JSON input
Fortunately, once you figure it out and fix the response format, the error goes away.
The second challenge was to deal with the redirection from the loginUrl to the URL passed in the next query parameter (usually /login/cli/<sessionId>). I wanted to avoid open redirection vulnerabilities, so I had to add strict validations on the URL passed as the next parameter.
If you have to implement a user-controlled redirection on your server, make sure to follow the guidelines provided in this link as well.
Conclusion
Taking the time to dig into the NPM Web Login protocol turned out to be time well spent, because it allowed me to learn more about the major changes that occur with NPM v9, and to add support for the web authentication to our registry. This is nice because this new way of authenticating is now available to all NPM versions that support it, and not only to NPM v9. I consider it to be more user-friendly than terminal-based authentication because it allows you to use the password manager feature from your favorite browser.
I also wanted to write this blog post to contribute to better documenting the Web Login authentication mode, which I find under-documented at the moment.
And lastly, it allowed me to mention the open redirection vulnerabilities, which I believe every developer should be aware of.
Thank you for reading me, and see you later on Github or on the React-admin pages.
Authors
Full-stack web developer at marmelab, JB is a Software Engineer with a strong Java experience. He plays the piano and runs fast, and not only because he has long fingers and tall legs.