
Add Role-Based Access Control On Top Of Your REST API

The Problem: Full-Stack Authorization
Web applications often need some kind of Authorization Checks, to restrict access to certain resources or actions depending on the user’s role.
In a Single-Page Application, these checks must be done both:
- on the client-side to hide or disable UI elements depending on the user’s role, and
- on the server-side to actually prevent users from performing actions they are not allowed to.
A popular authorization pattern is Role-Based Access Control — or RBAC — where you assign roles like admin, user, moderator or guest to your users, and define a set of permissions for each role to specify what each one is allowed to do or not.
For single-page apps built with React, React-admin already includes an RBAC module, which implements Role-Based Access Control.
For the record, here is an extract of the RBAC module configuration in react-admin:
// the admin role has all the permissionsconst adminRole = [{ action: '*', resource: '*' }];
// the reader role can only read content, not create, edit or delete itconst readerRole = [{ action: 'read', resource: '*' }];
// fine-grained permissions on a per resource basisconst salesRole = [    { action: ['list', 'show'], resource: 'companies' },    { action: ['list', 'show', 'edit', 'create'], resource: 'people' },    { action: ['list', 'show', 'edit', 'create', 'export'], resource: 'deals' },    { action: ['show', 'edit', 'create', 'delete'], resource: 'notes' },    { action: ['list', 'show', 'edit', 'create', 'delete'], resource: 'tasks' },];
However, this only solves the client-side part of the problem.

Developers need to reimplement the same checks on the server-side. This is often done in an ad-hoc manner, leading to duplicated code and inconsistencies between client and server.
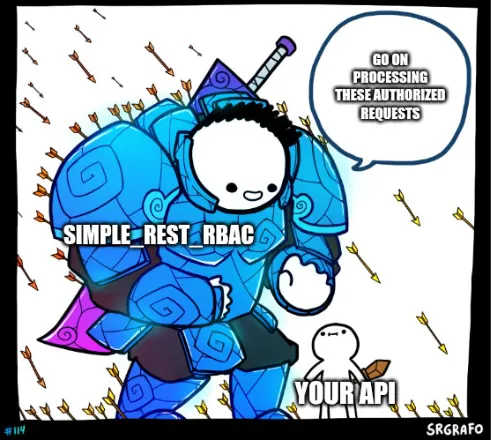
The Solution: simple_rest_rbac
Being fully aware of this, we had this long-standing idea to build a generic RBAC proxy server that could reuse the role definitions of react-admin’s RBAC module and enforce authorization checks on the server side.
Well, what do you know, today might be the day this is finally happening!
simple_rest_rbac is a Caddy module implementing RBAC on top of any REST API, using a simple roles and permissions format. Check out this demo showing how a REST API is allowing or denying access to CRUD operations depending on the user’s role:
For each request made, the simple_rest_rbac middleware will:
- Compute the role from the request (e.g., from a JWT claim)
- Get the associated permissions set (based on a roles configuration file)
- Compute the resource and action from the request (e.g.
DELETE /posts/1will be checked againstaction: 'delete'andresource: 'posts') - Verify whether or not the requested action on the specified resource is allowed
If the action is not permitted, the middleware responds with a 403 Forbidden status code. Otherwise, the request is allowed to proceed.
simple_rest_rbac is open source and can be found in the following GitHub repository: marmelab/caddy-rbac-rest-middleware.
Features
Simple Roles Configuration
simple_rest_rbac uses the same formalism as ra-rbac to define roles and their permissions, per resource and action, in a JSON format.
It also supports wildcards in resource names, and deny rules.
// Example roles.json file{ "guest": [ { "action": ["list"], "resource": "posts" }, { "action": "read", "resource": "posts.*" }, { "type": "deny", "action": "read", "resource": "posts.views" }, { "type": "deny", "action": "read", "resource": "posts.average_note" } ], "user": [ { "action": ["list", "show"], "resource": "posts" }, { "action": "read", "resource": "posts.*" }, { "type": "deny", "action": "read", "resource": "posts.views" }, { "type": "deny", "action": "read", "resource": "posts.average_note" }, { "action": ["list", "show", "create"], "resource": "comments" }, { "action": "read", "resource": "comments.*" }, { "action": "write", "resource": "comments.*" } ], "admin": [{ "action": "*", "resource": "*" }]}Easy JWT Integration
simple_rest_rbac integrates easily with JWT auth modules such as caddy-jwt to obtain the user’s role from JWT claims, using Caddy’s Placeholder mechanism.
# Caddyfile:8080 { route { # See https://github.com/ggicci/caddy-jwt jwtauth { sign_key {file./path/to/jwt-secret.txt} sign_alg HS256 issuer_whitelist https://jwt.example.com audience_whitelist "api-endpoint-1" user_claims sub meta_claims role # this sets the {http.auth.user.role} placeholder } simple_rest_rbac { roles_file /etc/caddy/roles.json role {http.auth.user.role} } reverse_proxy api:3000 }}simple_rest_rbac makes some assumptions about the REST API, for instance that resources are identified by their names in the URL path (e.g., /posts, /comments), and are assumed to be the first segment of the path.
If these assumptions do not work out in your particular use case, you can easily fork the code to adapt it to your needs. This is open source after all!
How To Use It With Your API
First, you’ll need to build Caddy with the caddy-rbac-rest-middleware plugin, using xcaddy:
xcaddy build --with github.com/marmelab/caddy-rbac-rest-middleware/pluginTo use the plugin, add the simple_rest_rbac directive to your Caddyfile:
:8080 { route { simple_rest_rbac { roles_file <path-to-roles-file> role <role> } respond "Protected API endpoint." }}The plugin has two required configuration options:
roles_file: The path to the roles JSON file containing role definitions and their permissions.role: The role used to determine permissions.
The role can be a static value but it will most likely be a placeholder (e.g., {http.auth.user.role}) to extract the role from JWT claims or any authentication mechanism.
And that’s it! Your endpoint is now protected!
Why Caddy
Of course, there are many other server solutions we could have chosen to achieve this result, like building plugins for Apache or Nginx, or even using any other language or framework to develop a middleware (Node, Python, Rust, Elixir, …).
So why did we go with Caddy?
Personally I first learned about Caddy when diving into API Platform’s tech stack. As you may know, API Platform uses react-admin for its built-in admin app, so we often collaborate on each other’s projects.
Caddy immediately caught my eye as being a fully featured web server, supporting many things like reverse proxy, load balancing, cluster coordination, caching and many others.
It’s often praised by PHP users as it allows up to 4x faster PHP requests thanks to FrankenPHP.
Another thing that makes it noteworthy to me is the easy HTTPS integration, allowing you to start working with HTTPS (and addressing its challenges) right from the development environment.
I also appreciated its config file format — the Caddyfile — as being much more readable and concise than, say, an httpd.conf file. Plus, it comes built-in with a REST API allowing you to manage its configuration even at runtime!

Lastly, Caddy is written in Go, and I had wanted to try out the Go language for a long time. So for all these reasons, I chose to give Caddy a try for this project!
Writing A Caddy Module
Here are some key takeaways about my own experience writing a Caddy module. This section is neither a documentation nor a tutorial. If you’re interested in writing yours, I suggest you read the Extending Caddy doc section.
Caddy modules are basically Go modules, which need to implement specific interfaces, depending on where/how you want to use them (i.e. for auth, logging, as HTTP handlers, route matchers, etc.). Your module will also need to implement a specific interface (caddyfile.Unmarshaler) to be able to parse its configuration from the Caddyfile. In my case, since I wanted my module to be a middleware, I implemented the caddyhttp.MiddlewareHandler interface as well.
The official documentation showcases a complete example which is a good way to get started. I also used the Modules list page to find existing plugins doing similar tasks, so that I could learn from their implementation. Most notably I used the caddy-jwt-issuer and caddy-jwt modules as examples.
Surprisingly, the hardest part for me was not so much implementing the RBAC logic, but rather understanding how to parse the Caddyfile.

At first I planned to paste the JSON roles configuration directly into the Caddyfile, but that approach turned out to be impractical because the Caddyfile format is not JSON, and I could not get the parser to return the raw JSON to me.
So instead, I decided the configuration should be in its own JSON file (which also has the benefit of indicating the expected format more clearly), and we would only have to pass the file’s path to the plugin. All that was left to do was read the file and parse its content into the data structure I expected (RoleDefinitions object).
func (m *Middleware) Provision(ctx caddy.Context) error {  m.logger = ctx.Logger()
  // m is the instance of my Caddy module  // m.RolesFilePath is the file path obtained from parsing the Caddyfile  // Read the file from disk  file, err := os.ReadFile(m.RolesFilePath)  if err != nil {    return err  }
  // Create an instance of the RoleDefinitions structure  // and call `UnmarshalJSON` to parse the JSON content into it  var rd RoleDefinitions  if err := rd.UnmarshalJSON(file); err != nil {    return err  }
  // Finally, store the parsed config in the m.roles field  m.roles = rd
  return nil}
As you can see in the above snippet, during the Provisioning phase I also instantiate a logger (m.logger). This proved very helpful for debugging the module code during testing.
As I said earlier, implementing the RBAC logic was actually not the most challenging part. I teamed up with Claude Sonnet to adapt the existing implementation from ra-rbac, and the result was a function that worked on the first try!
Getting The Role From JWT
Another challenge I had to solve was getting the role dynamically from the HTTP request, and more specifically from a JSON Web Token (JWT), as this is probably the most common authentication mechanism nowadays.
At first I planned to reuse an existing JWT implementation in Caddy, either by copying and pasting the code or by leveraging Caddy’s Host Modules mechanism.
But, as I was studying the code of caddy-jwt, I ended up finding a simpler and (probably) better way to obtain the role: Caddy Placeholders.
Indeed, caddy-jwt will provide the requested meta_claims as placeholders under the key http.auth.user.<claim>.
For instance, meta_claims role will set the role claim value in the {http.auth.user.role} placeholder.
All we have to do then is use this placeholder in the simple_rest_rbac configuration, and update our plugin’s code to support resolving placeholder values at runtime for this field.
:8080 { route { jwtauth { # ... meta_claims role # this sets the {http.auth.user.role} placeholder } simple_rest_rbac { roles_file /etc/caddy/roles.json role {http.auth.user.role} } reverse_proxy api:3000 }}The placeholder value needs to be resolved for each request, so it is implemented in the ServeHTTP function. To resolve placeholder values, we use the replacer provided by Caddy’s runtime.
func (m Middleware) ServeHTTP(w http.ResponseWriter, r *http.Request, next caddyhttp.Handler) error {  // Retrieve the replacer from the request context  repl, ok := r.Context().Value(caddy.ReplacerCtxKey).(*caddy.Replacer)  if !ok {    return caddyhttp.Error(http.StatusInternalServerError, nil)  }  // ...redacted...
  // Resolve placeholders in the role  resolvedRole := repl.ReplaceAll(m.Role, "")  resolvedRole = strings.TrimSpace(resolvedRole)
  // Get permissions for the current role  permissions, exists := m.roles[resolvedRole]  if !exists {    return caddyhttp.Error(http.StatusForbidden, fmt.Errorf("role not found: %s", resolvedRole))  }
  // Check if access is allowed  if !canAccessWithPermissions(permissions, action, resource) {    return caddyhttp.Error(http.StatusForbidden, fmt.Errorf("access denied"))  }
  // Access allowed, continue to next handler  return next.ServeHTTP(w, r)}
It turns out doing things this way was much easier and much more versatile, as it allows you to use any JWT plugin with any settings (e.g. no assumption is made whether the token is stored in a Cookie or in the Authorization header), and we’re not even limited to JWT authentication, as long as the auth plugin allows you to get the user’s role via a placeholder.
Conclusion
In the end, I’m pretty happy with how this project turned out. The solution described above, despite being pretty basic, is already functional and can easily be adapted to support other authentication mechanisms as well as other API conventions.
I also don’t regret my choice of going with Caddy, as this experiment confirmed my first impressions of this software: it is very capable and developer-friendly. The only difficulty I had with it at first was understanding the Caddyfile format, but this project was a good opportunity to dive deeper into it and get my questions answered.
While I had my doubts initially, working with the Go language also turned out to be a breeze, as the standard library is very complete and the typing system is fairly flexible. I understand better now why people would choose it over C, C++, or maybe even Rust, which can be a little too strict at times.
If it turns out this project gains interest, the next feature I’d like to add would be support for field-level permissions (e.g., allow reading posts.views but not posts.average_note). It would also be interesting to try porting this project to other server types, for instance making it an Express middleware.
In any case, I’m excited to see how it will be useful to others!
The source code for this project, along with a built-in demo, can be found in the marmelab/caddy-rbac-rest-middleware GitHub repository.

Authors
Full-stack web developer at marmelab, JB is a Software Engineer with a strong Java experience. He plays the piano and runs fast, and not only because he has long fingers and tall legs.
