
A Free Laravel Admin With API Platform and React-Admin

To build an administration panel for a Laravel app, you probably think of Laravel Nova. Although it is well integrated with the Laravel ecosystem, it restricts the admin UI to Nova’s conventions and pricing model.
An alternative approach is to use API Platform to expose a REST API from Laravel, and then use React-Admin to build the admin UI on top of that API.
In the following article, we build an admin app for a simple library system. We wire together Laravel, API Platform, and React-Admin to create a CRUD app for books and authors, with authentication handled by Laravel Sanctum.
Two Must-Have Tools for Laravel Developers
API Platform is a powerful framework for building APIs in PHP. It supports various backends (including Laravel), generates endpoints from your models, offers built-in OpenAPI documentation, and comes with features like pagination, filtering, and validation out of the box.
React-Admin is a popular React framework for building admin interfaces that can connect to any API (including API Platform). It comes with a huge set of pre-built components and features, making it a great fit for sophisticated admin UIs.
Best of all, both tools are open source, so you can use them for free.
Spinning Up the Laravel Project
We start fresh — a clean Laravel install, no baggage.
composer create-project laravel/laravel my-api-platform-laravel-appcd my-api-platform-laravel-appNow, install API Platform for Laravel — this is where Laravel learns to speak API fluently.
composer require api-platform/laravelphp artisan api-platform:installOnce installed, let’s allow localhost to call the API (CORS). Add config/cors.php and set:
<?php
return [    'paths' => ['api', 'api/*'],    'allowed_methods' => ['*'],    'allowed_origins' => [],    'allowed_origins_patterns' => ['#^http://localhost:[0-9]+$#'],    'allowed_headers' => ['Content-Type', 'Authorization'],    'exposed_headers' => ['Link'],    'max_age' => 3600,    'supports_credentials' => false,];
After that, fire up the server and take a peek.
php artisan serveOpen http://127.0.0.1:8000/api/.
The page will greet you with an empty API.
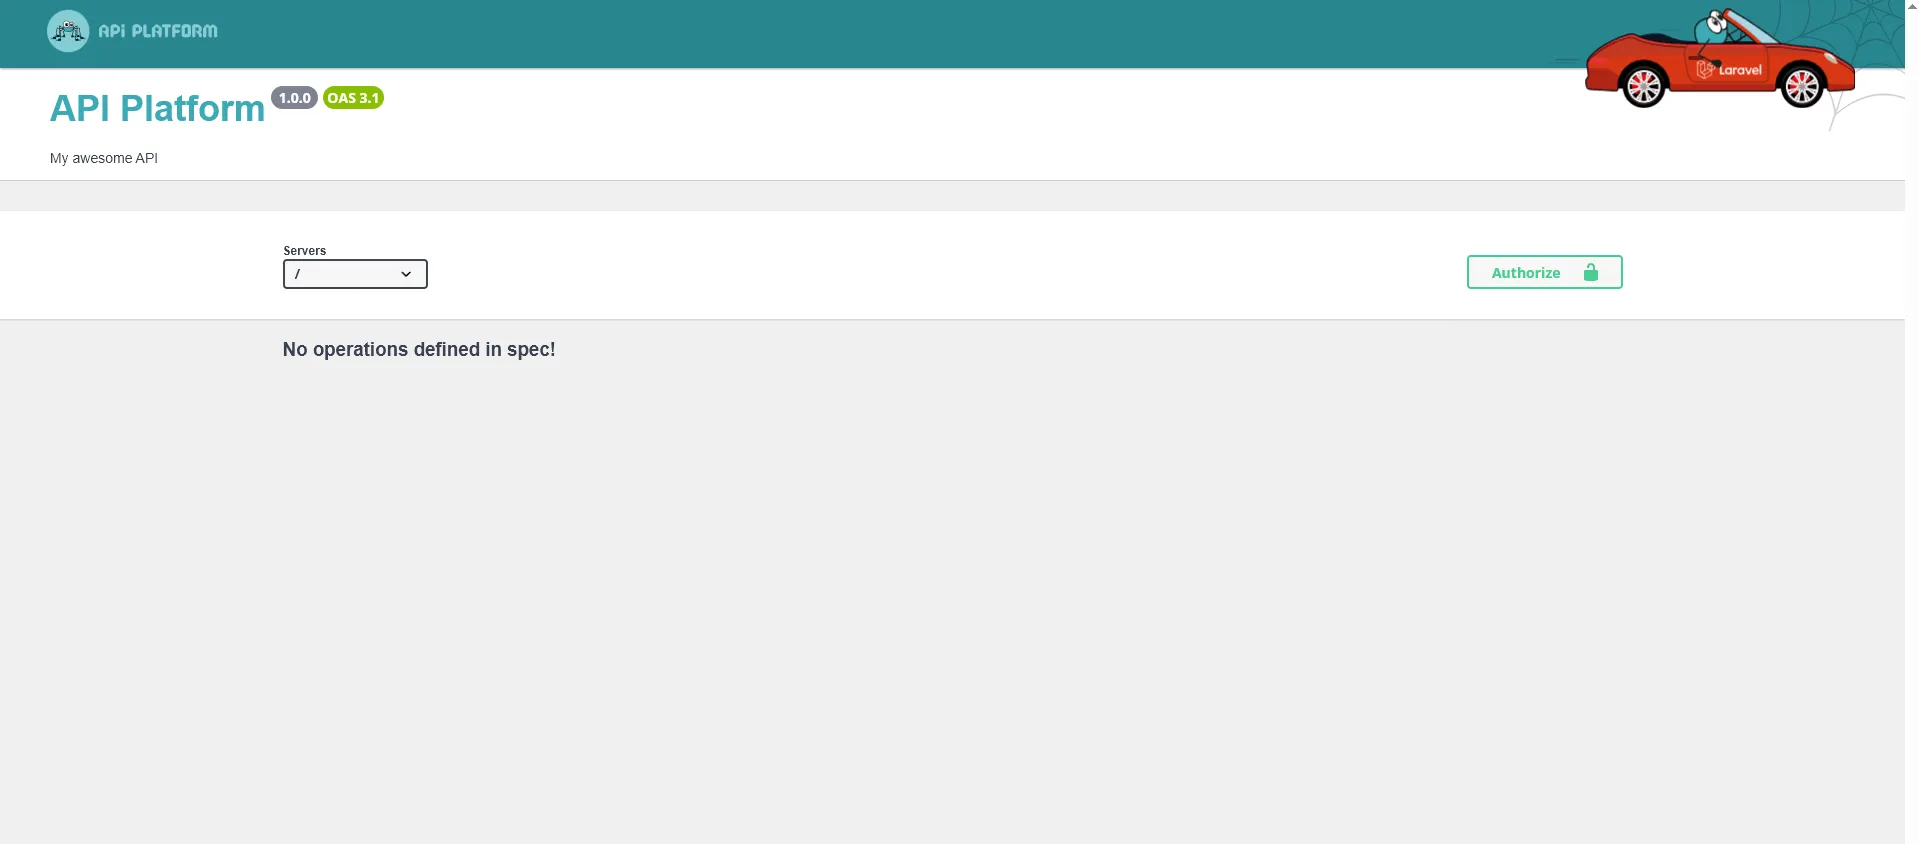
It’s alive, but lonely. Time to fix that.
Defining Our Heroes: Authors and Books
We’ll create two models: Author and Book. They’ll live happily together, one-to-many style. We’ll use Laravel’s Artisan command to generate Eloquent models and migrations.
php artisan make:model Author -mphp artisan make:model Book -m💡 The -m flag tells Laravel to generate a migration file for each model.
Edit the file database/migrations/xxxx_xx_xx_create_authors_table.php and update its up method with author fields:
public function up(): void{ Schema::create('authors', function (Blueprint $table) { $table->id(); $table->string('name'); $table->text('bio')->nullable(); $table->timestamps(); });}Edit the file database/migrations/xxxx_xx_xx_create_books_table.php and update its up method with book fields and a foreign key to authors:
public function up(): void{ Schema::create('books', function (Blueprint $table) { $table->id(); $table->string('isbn')->nullable(); $table->string('title'); $table->text('description'); $table->date('publication_date')->nullable(); $table->foreignId('author_id')->constrained()->cascadeOnDelete(); $table->timestamps(); });}Run migrations and watch the database come to life.
php artisan migrateMaking Them Talk: API Resources
Now we expose our models through API Platform. This part feels like magic — one annotation and boom, you’ve got endpoints.
Edit the file app/Models/Author.php:
use ApiPlatform\Metadata\ApiResource;use Illuminate\Database\Eloquent\Model;use Illuminate\Database\Eloquent\Relations\HasMany;
#[ApiResource]class Author extends Model{    protected $fillable = ['name', 'bio'];
    public function books(): HasMany    {        return $this->hasMany(Book::class);    }}
Now edit app/Models/Book.php:
use ApiPlatform\Metadata\ApiResource;use Illuminate\Database\Eloquent\Model;use Illuminate\Database\Eloquent\Relations\BelongsTo;
#[ApiResource]class Book extends Model{    protected $fillable = [        'isbn',        'title',        'description',        'publication_date',        'author_id',    ];
    protected $casts = [        'publication_date' => 'date',    ];
    public function author(): BelongsTo    {        return $this->belongsTo(Author::class);    }}
Now we need a small bit of wiring so that API endpoints are exposed properly. It’s boilerplate, but the admin UI relies on it.
Edit app/Providers/AppServiceProvider.php and add this:
<?php
namespace App\Providers;
use ApiPlatform\JsonLd\Action\ContextAction;use ApiPlatform\JsonLd\ContextBuilderInterface;use ApiPlatform\Laravel\ApiPlatformMiddleware;use ApiPlatform\Metadata\Resource\Factory\ResourceMetadataCollectionFactoryInterface;use ApiPlatform\Metadata\Resource\Factory\ResourceNameCollectionFactoryInterface;use ApiPlatform\State\ProcessorInterface;use ApiPlatform\State\ProviderInterface;use Illuminate\Http\Request;use Illuminate\Support\Facades\Route;use Illuminate\Support\ServiceProvider;use Symfony\Component\Serializer\SerializerInterface;
class AppServiceProvider extends ServiceProvider{ /** * Register any application services. */ public function register(): void { $this->app->bind(ContextAction::class, function ($app) { return new ContextAction( $app->make(ContextBuilderInterface::class), $app->make(ResourceNameCollectionFactoryInterface::class), $app->make(ResourceMetadataCollectionFactoryInterface::class), $app->make(ProviderInterface::class), $app->make(ProcessorInterface::class), $app->make(SerializerInterface::class), ); }); }
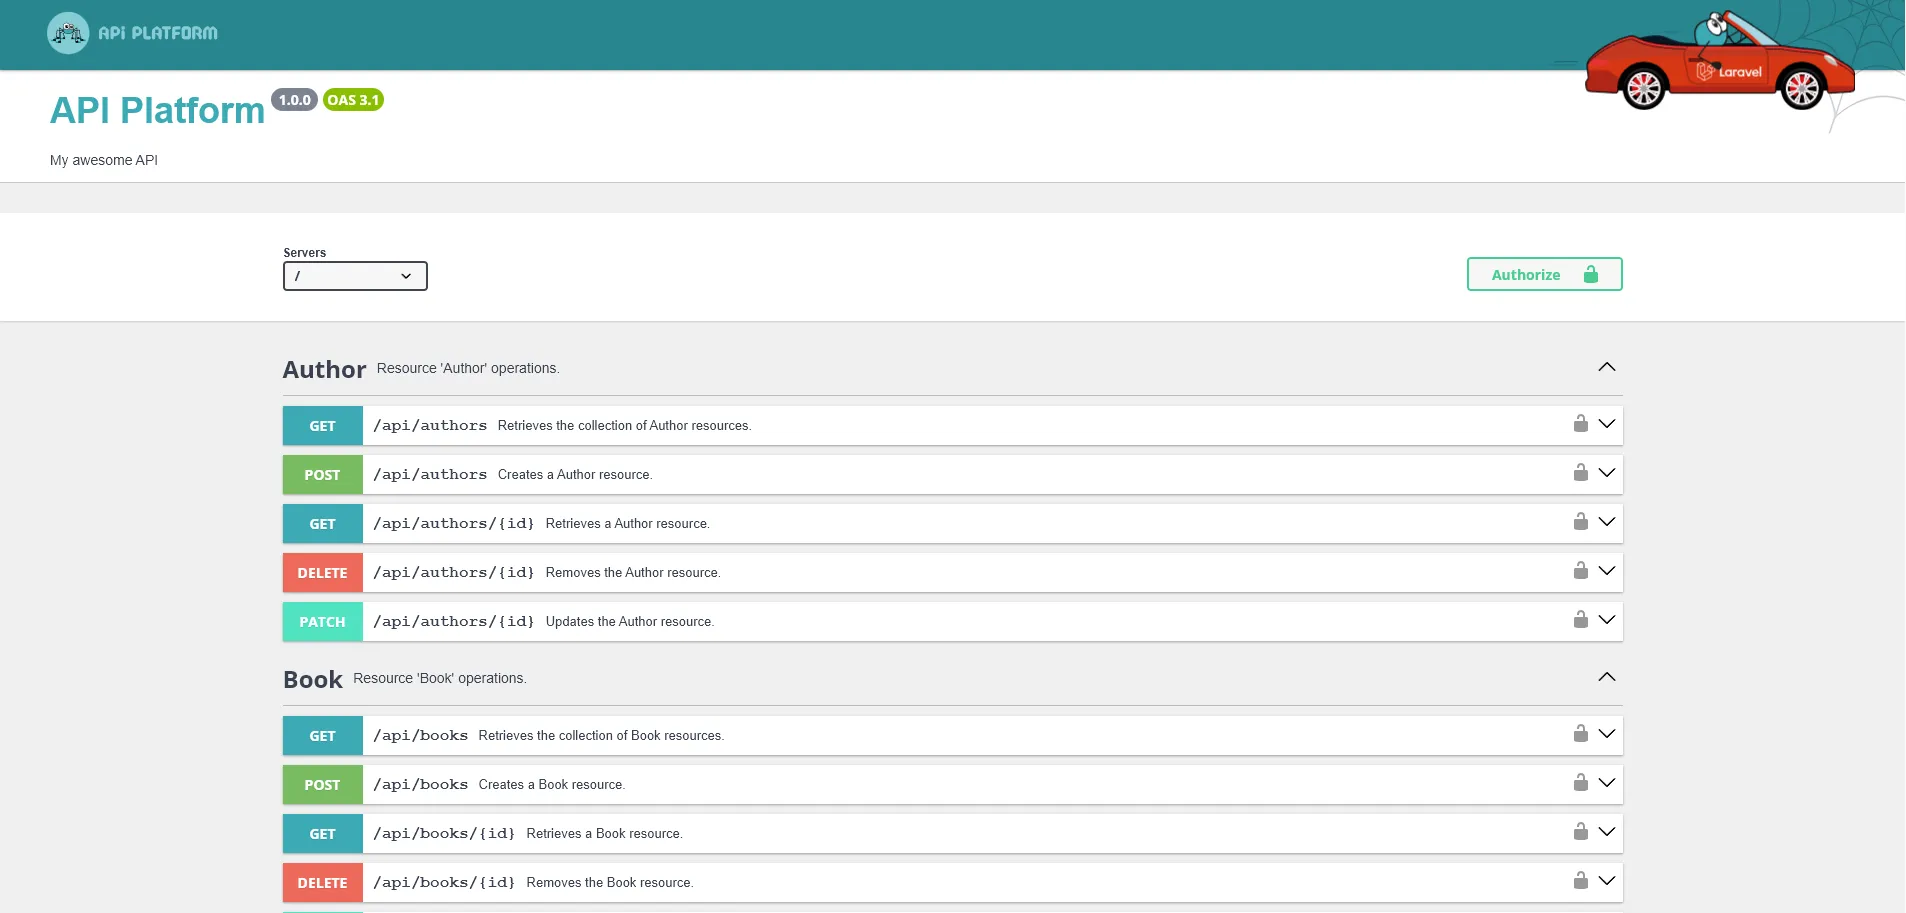
/** * Bootstrap any application services. */ public function boot(): void { Route::middleware(['api', ApiPlatformMiddleware::class]) ->get('/api/contexts/{shortName?}{_format?}', function (Request $request, ?string $shortName = null) { return app(ContextAction::class)($shortName, $request); }) ->name('api_jsonld_context'); }}Head back to the API homepage: your endpoints are live. /api/books and /api/authors are CRUD resources ready for action.
Locking the Door: Authentication with Sanctum
Every good API needs a bouncer. Enter Laravel Sanctum — the quiet guard that checks IDs at the door.
Install and migrate:
composer require laravel/sanctumphp artisan vendor:publish --tag=sanctum-migrationsphp artisan migrateWe need to add the Sanctum trait to the user model so it can issue API tokens. Edit the file app/Models/User.php:
 use Illuminate\Database\Eloquent\Factories\HasFactory; use Illuminate\Notifications\Notifiable; use Laravel\Sanctum\HasApiTokens;
class User extends Authenticatable{   use HasApiTokens, HasFactory, Notifiable;    //...}
Next, we’ll need login and register endpoints. Create routes/api.php with:
php artisan install:apiAdd new routes to routes/api.php to have basic register and login endpoints:
use App\Models\User;use Illuminate\Http\Request;use Illuminate\Support\Facades\Hash;use Illuminate\Support\Facades\Route;
Route::post('/login', function (Request $request) {     $credentials = $request->validate([         'email' => ['required', 'email'],         'password' => ['required'],     ]);
     $user = User::where('email', $credentials['email'])->first();
     if (! $user || ! Hash::check($credentials['password'], $user->password)) {         return response()->json(['message' => 'Invalid credentials'], 401);     }
     return ['token' => $user->createToken('api')->plainTextToken];});
Route::post('/register', function (Request $request) {    $data = $request->validate([        'name' => ['required'],        'email' => ['required', 'email'],        'password' => ['required'],    ]);
    $user = User::create([        'name' => $data['name'],        'email' => $data['email'],        'password' => Hash::make($data['password']),    ]);
    return ['id' => $user->id];});
Add the Sanctum middleware in config/api-platform.php:
'defaults' => [ // ... 'route_prefix' => '/api', 'middleware' => [], 'middleware' => ['auth:sanctum'],],Swagger Time: Testing with Tokens
Want to use Swagger with authentication? Just let it know about the header.
Edit the file config/api-platform.php:
'swagger_ui' => [ 'enabled' => true, 'apiKeys' => [ 'api' => [ 'name' => 'Authorization', 'type' => 'header', ], ],],Now you can create a user:
curl -X POST http://127.0.0.1:8000/api/register \ -H "Content-Type: application/json" \ -d '{"name":"Admin","email":"admin@example.com","password":"secret123"}'Then get the token:
curl -X POST http://127.0.0.1:8000/api/login \ -H "Content-Type: application/json" \ -d '{"email":"admin@example.com","password":"secret123"}'Finally, paste the TOKEN into Swagger:

Boom. Authenticated.
Building the Admin UI with React-Admin
Now the fun part — giving your API a face.
npx create-react-admin@latest admincd adminnpm run devThis launches a React-Admin boilerplate app. Open http://localhost:5173/ to see it in action.

API Platform is a first-class citizen in React-Admin thanks to the @api-platform/admin package. Let’s install it.
npm install @api-platform/adminSetting Up Authentication
Add the file src/authProvider.ts to let the admin app talk to the Laravel Sanctum API:
export const authProvider = { login: ({ username, password }) => { return fetch("http://127.0.0.1:8000/api/login", { method: "POST", headers: { "Content-Type": "application/json" }, body: JSON.stringify({ email: username, password }), }) .then((res) => { if (!res.ok) throw new Error("Auth failed"); return res.json(); }) .then(({ token }) => { localStorage.setItem("token", token); }); }, logout: () => { localStorage.removeItem("token"); return Promise.resolve(); }, checkAuth: () => localStorage.getItem("token") ? Promise.resolve() : Promise.reject(), checkError: (error) => { if (error.status === 401 || error.status === 403) { localStorage.removeItem("token"); return Promise.reject(); } return Promise.resolve(); }, getPermissions: () => Promise.resolve(),};In react-admin, an authProvider is an object with methods to handle login, logout, authentication checks, and error handling. Here, we implement these methods to interact with our Laravel Sanctum API.
Setting Up the Data Provider
Just like for authentication, react-admin apps use a dataProvider to fetch data from an API. For an API Platform backend, we can use the hydraDataProvider from @api-platform/admin, which understands API Platform’s Hydra format.
💡 Hydra is a standard for building hypermedia APIs; API Platform and @api-platform/admin follow this standard.
Create the file src/dataProvider.tsx with:
import { hydraDataProvider, fetchHydra } from '@api-platform/admin';import { parseHydraDocumentation } from '@api-platform/api-doc-parser';import { authProvider } from './authProvider';
// Token-aware HTTP client for protected APIsconst httpClient = (url: string, options: RequestInit = {}) => {    const headers = new Headers(        options.headers || { Accept: 'application/ld+json' }    );    const token = localStorage.getItem('token');    if (token) headers.set('Authorization', `Bearer ${token}`);    return fetchHydra(url, { ...options, headers });};
// Parse Hydra docs with the same Authorization header (so protected docs work)const apiDocumentationParser = (entrypoint: string) => {    const headers = new Headers({ Accept: 'application/ld+json' });    const token = localStorage.getItem('token');    if (token) headers.set('Authorization', `Bearer ${token}`);    return parseHydraDocumentation(entrypoint, { headers });};
export const dataProvider = hydraDataProvider({    entrypoint: 'http://127.0.0.1:8000/api',    httpClient,    apiDocumentationParser,    disableCache: true,});
API Platform exposes Hydra documentation, and @api-platform/admin reads it out of the box. We just add the Authorization header so protected calls succeed.
Plugging It All Together
Time to bring it all together in the main app file. Edit the file src/App.tsx and replace its contents with this:
import { HydraAdmin, ResourceGuesser } from '@api-platform/admin';import { authProvider } from './authProvider';import { dataProvider } from './dataProvider';
export default function App() {    return (        <HydraAdmin            entrypoint="http://127.0.0.1:8000/api"            dataProvider={dataProvider}            authProvider={authProvider}        >            {/* Auto-generate screens from the Hydra docs */}            <ResourceGuesser name="books" />            <ResourceGuesser name="authors" />        </HydraAdmin>    );}
The @api-platform/admin package gives us <HydraAdmin>, a wrapper for admin apps using API Platform APIs. It also gives us Guessers that auto-generate screens based on the API docs.
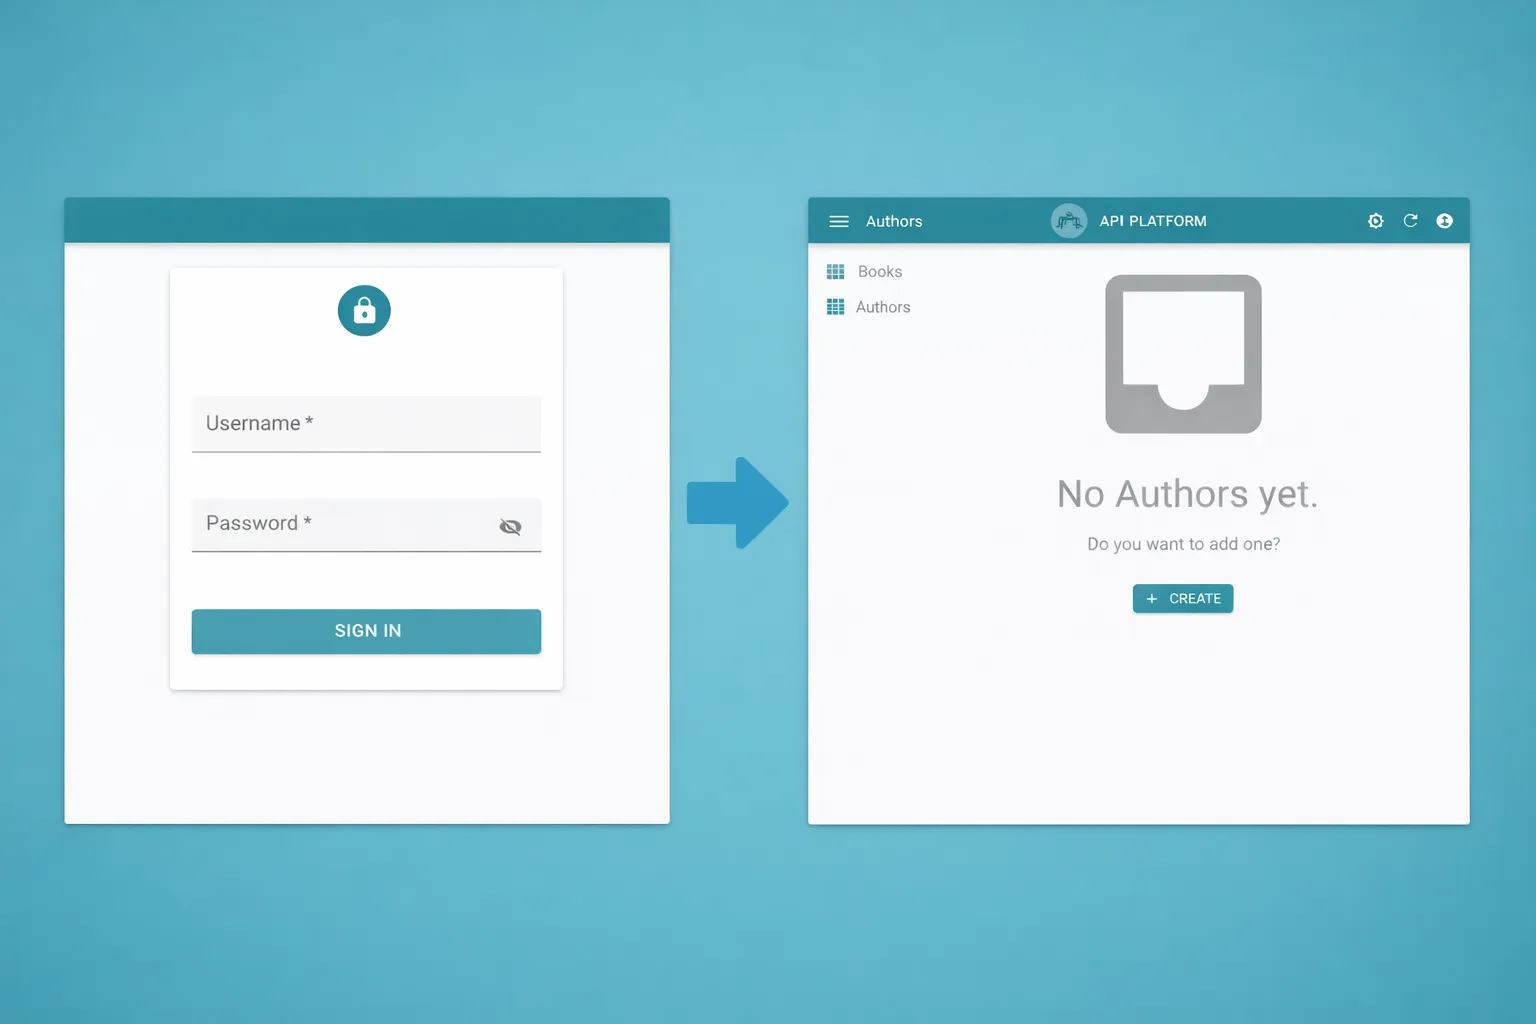
All set up! You can login with the admin user you created earlier, list and filter books and authors, view details, and even create, edit, and delete records.
Customizing CRUD Screens
Guessers are great for quick setups, but real apps need custom screens. We replace the guessers with list, create, and edit components for both resources.
💡 If you open the browser console, you will see that API Platform admin has logged the code needed to build these screens.
Create the authors CRUD screens in src/authors.tsx. In react-admin, you configure views using JSX components, which look a lot like XML. This declarative style makes it easy to see what the UI will look like.
import { Create, DataTable, Edit, List, required, SimpleForm, TextInput,} from 'react-admin';
export const AuthorList = () => ( <List> <DataTable> <DataTable.Col source="name" /> <DataTable.Col source="bio" /> </DataTable> </List>);
export const AuthorCreate = () => ( <Create> <SimpleForm> <TextInput source="name" validate={required()} /> <TextInput source="bio" multiline /> </SimpleForm> </Create>);
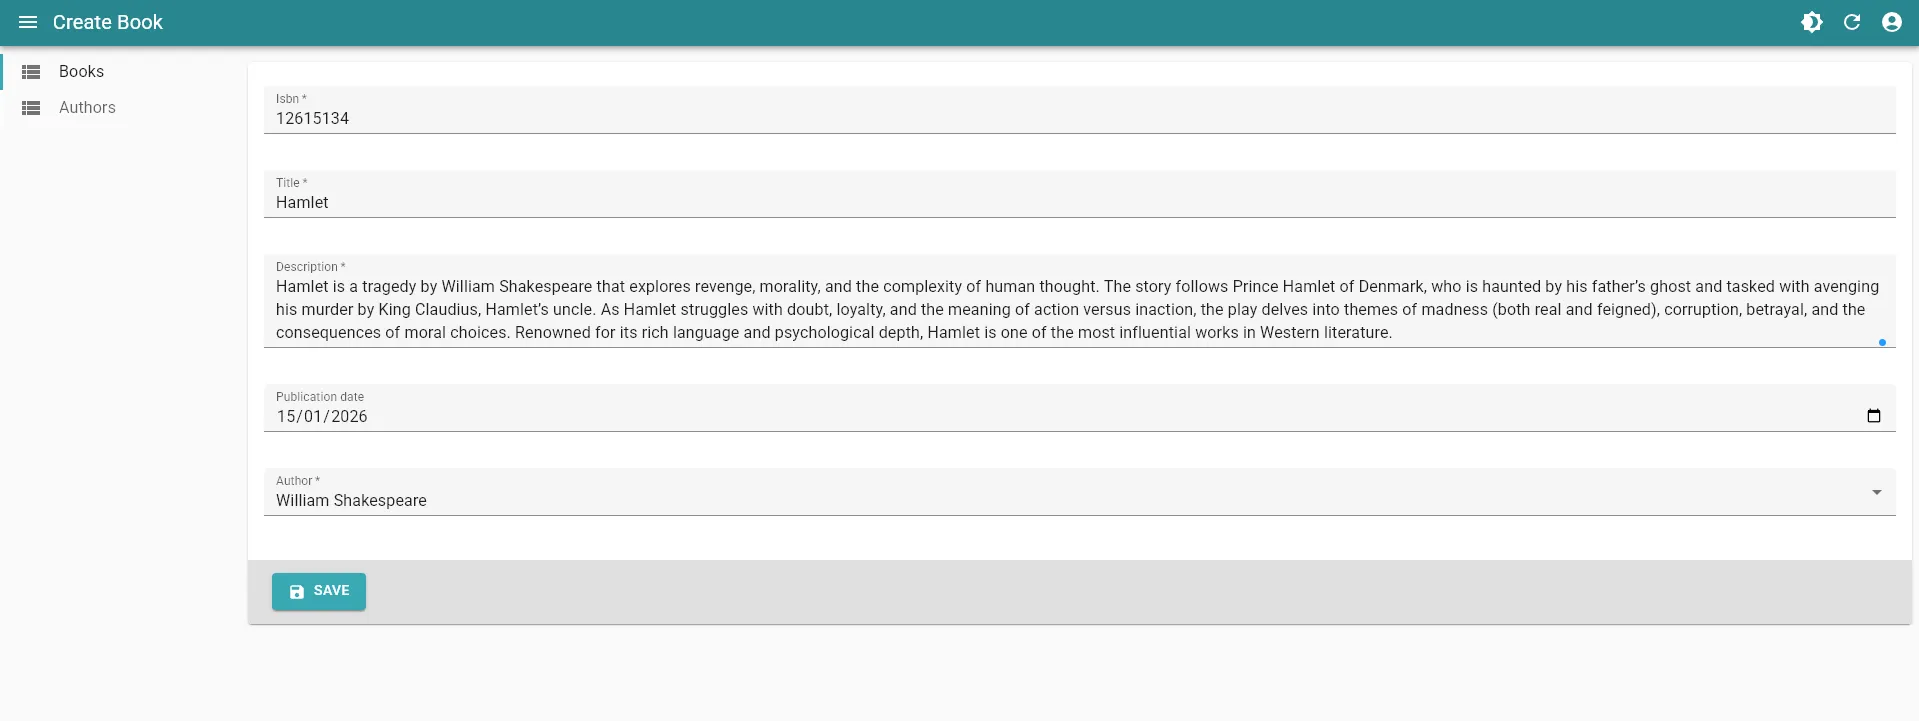
export const AuthorEdit = () => ( <Edit> <SimpleForm> <TextInput source="name" validate={required()} /> <TextInput source="bio" multiline /> </SimpleForm> </Edit>);Do the same for books in src/books.tsx. Books have a relation to authors, so we use ReferenceField and ReferenceInput components to display and select related authors.
import {    Create,    DataTable,    DateField,    DateInput,    Edit,    List,    ReferenceField,    ReferenceInput,    required,    SelectInput,    SimpleForm,    TextInput,} from 'react-admin';
export const BookList = () => (    <List>        <DataTable>            <DataTable.Col source="title" />            <DataTable.Col source="isbn" />            <DataTable.Col label="Author">                <ReferenceField source="author" reference="authors" />            </DataTable.Col>            <DataTable.Col label="Publication date">                <DateField source="publicationDate" />            </DataTable.Col>        </DataTable>    </List>);
export const BookCreate = () => (    <Create>        <SimpleForm>            <TextInput source="isbn" validate={required()} />            <TextInput source="title" validate={required()} />            <TextInput source="description" multiline validate={required()} />            <DateInput source="publicationDate" />            <ReferenceInput source="author" reference="authors">                <SelectInput optionText="name" validate={required()} />            </ReferenceInput>        </SimpleForm>    </Create>);
export const BookEdit = () => (    <Edit>        <SimpleForm>            <TextInput source="isbn" validate={required()} />            <TextInput source="title" validate={required()} />            <TextInput source="description" multiline validate={required()} />            <DateInput source="publicationDate" />            <ReferenceInput source="author" reference="authors">                <SelectInput optionText="name" validate={required()} />            </ReferenceInput>        </SimpleForm>    </Edit>);
Now we wire up real screens for resources, replacing the guessers with our custom components. We also strip Hydra/JSON-LD metadata (like @id and @type) inside the dataProvider lifecycle callbacks before sending payloads. That way we don’t post unnecessary fields back to Laravel.
Edit the file src/App.tsx like this:
import { HydraAdmin } from '@api-platform/admin';import { withLifecycleCallbacks, Resource } from 'react-admin';import { BookList, BookCreate, BookEdit } from './books';import { AuthorList, AuthorCreate, AuthorEdit } from './authors';import { authProvider } from './authProvider';import { dataProvider } from './dataProvider';
// Remove Hydra/JSON-LD metadata before sending payloads back to the APIconst stripHydraMeta = (data: Record<string, unknown>) => {    const { id, '@id': _atId, '@type': _atType, ...rest } = data as any;    return rest;};
const cleanDataProvider = withLifecycleCallbacks(dataProvider, [    {        resource: 'authors',        beforeCreate: (params) => ({            ...params,            data: stripHydraMeta(params.data),        }),        beforeUpdate: (params) => ({            ...params,            data: stripHydraMeta(params.data),        }),    },    {        resource: 'books',        beforeCreate: (params) => ({            ...params,            data: stripHydraMeta(params.data),        }),        beforeUpdate: (params) => ({            ...params,            data: stripHydraMeta(params.data),        }),    },]);
export default function App() {    return (        <HydraAdmin            entrypoint="http://127.0.0.1:8000/api"            dataProvider={cleanDataProvider}            authProvider={authProvider}        >            {/* We now wire CRUD screens for both resources */}            <Resource                name="books"                list={BookList}                create={BookCreate}                edit={BookEdit}            />            <Resource                name="authors"                list={AuthorList}                create={AuthorCreate}                edit={AuthorEdit}            />        </HydraAdmin>    );}
Mission accomplished! The admin app is now using custom CRUD screens for books and authors.
And That’s It
You’ve got:
- A Laravel backend serving a clean, RESTful API.
- API Platform taking care of the API layer so you can move faster.
- Sanctum protecting it all.
- React-Admin on top, giving you a smooth UI out of the box.
It’s clean, it’s fun, and it actually works.
To go further, explore the docs of these tools and see what else you can build.

Authors
Experienced full-stack web developer, maniac of corrections, specially documentation wise. He lives in Montevideo, Uruguay. He likes to play blitz chess every day of the year on internet.