
Building a Kanban Board With React

This tutorial explains how to build a Trello-like board where users can drag and drop cards. We’ll start from scratch, using react, react-admin, and react-beautiful-dnd (or rather, its successor).
Bootstrapping The Project With React-Admin
We’ll start with an empty react-admin project. React-admin is a SPA framework for B2B apps in React, based on Material UI, react-query, react-router, and react-hook-form. It’s a good way to abstract the data fetching part of this tutorial, and focus on the UI and React challenges. Besides, react-admin already has a working Kanban board in one of its demos, that we’ll use as a guide: the Atomic CRM.
We simplified and extracted the relevant code to a dedicated GitHub repository: marmelab/ra-example-kanban, that you can use to follow along this tutorial.
React Admin comes with a CLI tool to help us bootstrap a new app: create-react-admin. So we can start by calling the following command:
npx create-react-admin@latest ra-example-kanbanFor this project, we will use fakerest as our dataProvider, and we won’t use an authProvider.
Once the app is created, we can start it with npm run dev command and open it in our browser at http://localhost:5173.
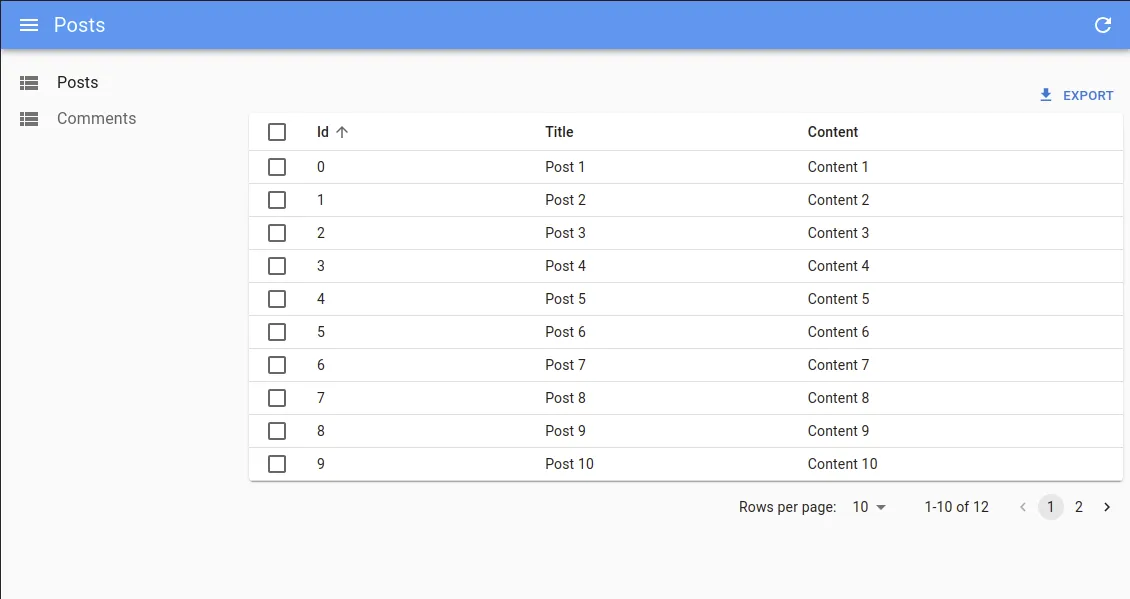
Creating and Modeling the Data
Our admin app comes with a pre-populated list of posts. To make the data more realistic, we’ll give them a status tracking their writing progress. The Kaban will serve as a publication workflow for these posts.
Let’s add a status field to each post, with one of the following values:
draftto_reviewto_be_fixedto_publishpublished
Let’s also add an index field, so that we can sort the posts inside a column.
Lastly, it would be nice to have more diversified content, to better distinguish the posts and, later, to be able to filter them. Let’s change the content field of each post with some Lorem Ipsum text.
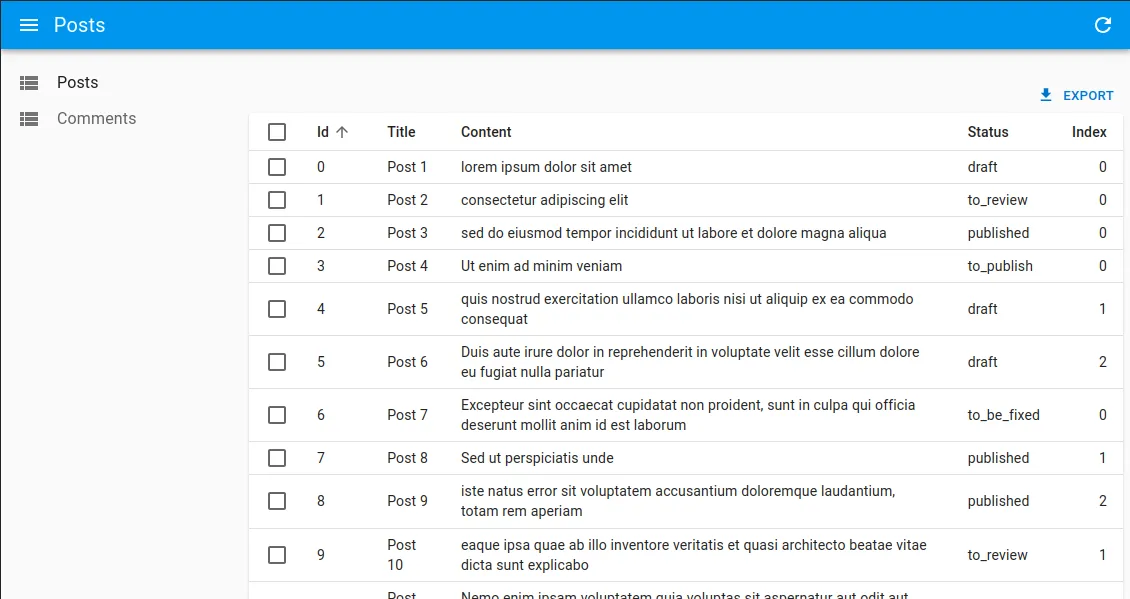
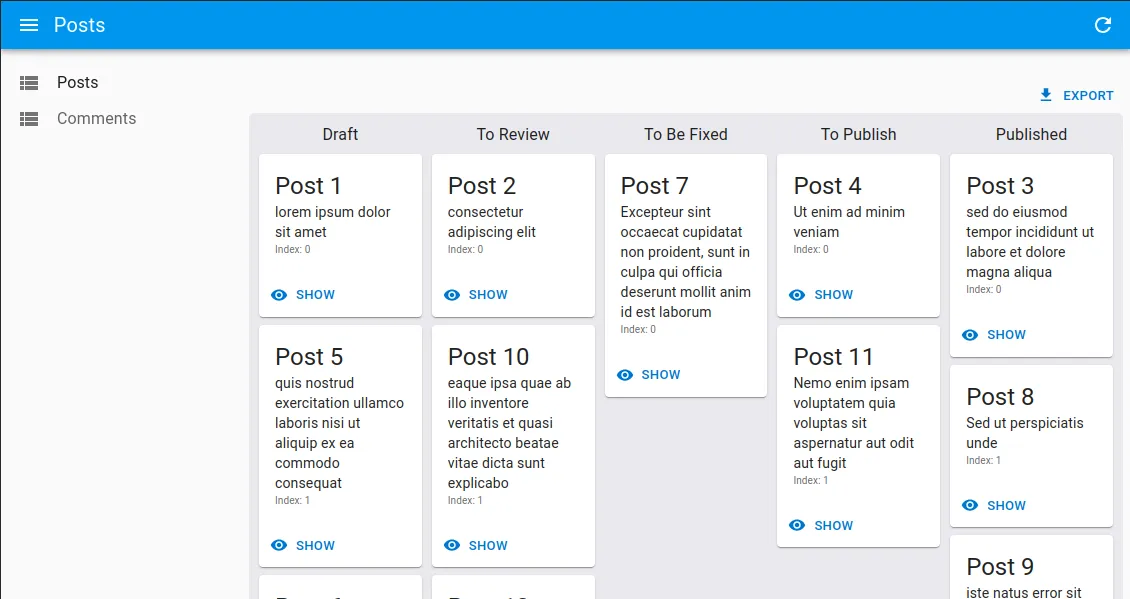
With these changes, here is what a post looks like in data.json:
{ "id": 0, "title": "Post 1", "content": "lorem ipsum dolor sit amet", "status": "draft", "index": 0}And in the app:
Picking a Drag And Drop Library
One of the core features of a Kanban board is the ability to drag and drop cards from one column to another. This is not a trivial feature to implement, especially if we want accessibility and performance. Fortunately, some libraries can help us with that. The most popular is react-beautiful-dnd.
It’s a great choice, as it offers valuable core characteristics:
- beautiful and natural movement of items
- accessible
- fast
- clean and powerful API
- plays well with standard browser interactions (e.g. scrolling, touch events, etc.)
In addition, it supports many helpful features, such as:
- virtual list (to handle large lists)
- multi drag support (to drag multiple items at once)
- mouse, touch, and keyboard support
- auto-scrolling
- and more…
But it has a big drawback: it’s not in active development anymore. In particular, it’s not compatible with React 18 in strict mode. Fortunately, there is a fork that is maintained: @hello-pangea/dnd. It’s a drop-in replacement for react-beautiful-dnd, so we’ll use it in this article.
npm add @hello-pangea/dndreact-beautiful-dnd’s API is pretty straightforward. It’s based on 3 core concepts.
<DragDropContext>: Wraps the part of your application you want to have drag and drop enabled for<Droppable>: An area that can be dropped into. Contains the<Draggable>elements<Draggable>: What can be dragged around
<DragDropContext> is the place where we can implement our callbacks: onDragStart, onDragUpdate, onDragEnd or onBeforeDragStart.
We will only need onDragEnd in our example.
Thinking In Components
Before we start coding, let’s think about the component architecture and naming.
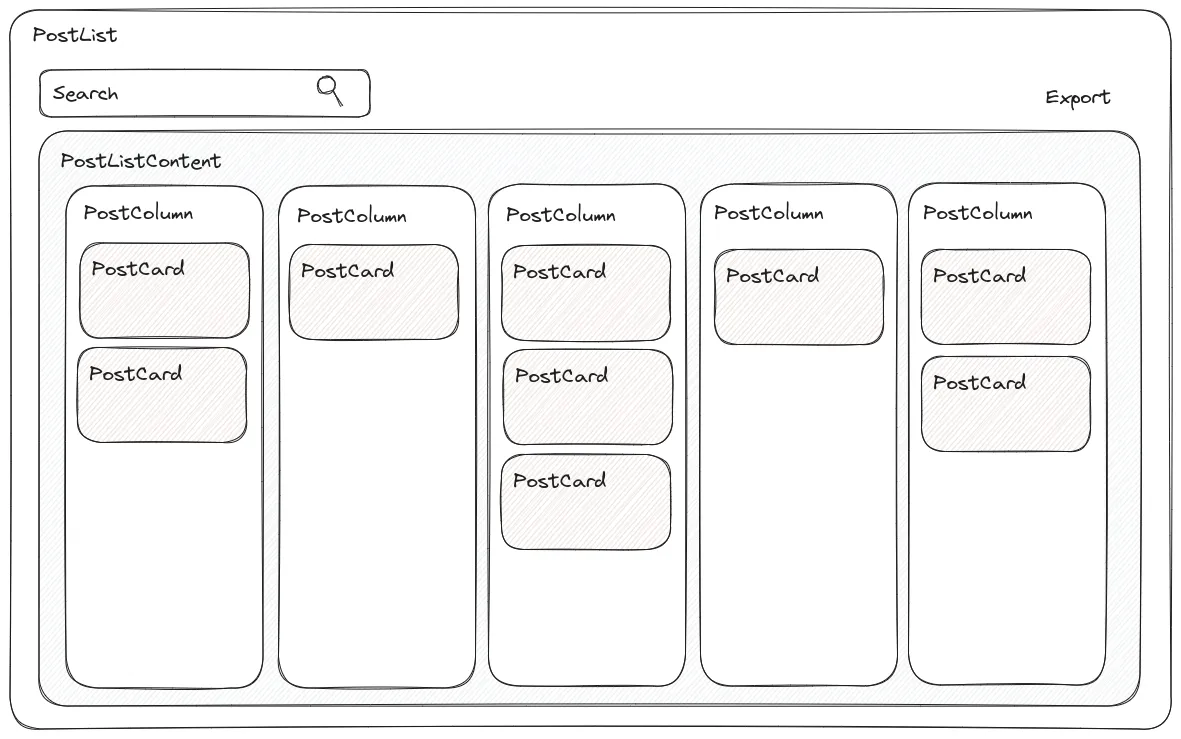
Our Kanban board will come as a replacement for the List view, so we should call our root component PostList. Inside it, we will use the ListContext to get the list of posts fetched from the API by react-admin, and we will render the data in a PostListContent component. This component will also be responsible for providing the <DragDropContext>.
Inside PostListContent, we will render 5 PostColumn components, one for each status. Each PostColumn will be wrapped in a <Droppable> component.
Lastly, inside each PostColumn, we will render a list of PostCard components, one for each post. Each PostCard will be wrapped in a <Draggable> component.
PostListPostListContent(with<DragDropContext>)PostColumn(with<Droppable>)PostCard(with<Draggable>)
Now that we have a clear idea of the component architecture, let’s start coding!
Climbing the Component Tree
We will start with the leaf components, and work our way up to the root component.
First of all, let’s create a Post interface, to describe our data and enable type-checking.
// In src/posts/index.tsexport interface Post { id: number; title: string; content: string; status: "draft" | "to_review" | "to_be_fixed" | "to_publish" | "published"; index: number;}Now, let’s create a component to render a single post in our Kanban. We will use Material UI’s Card component, and we will add a CardActions component to display a ShowButton from React Admin.
// In src/posts/PostCard.tsximport { Box, Card, CardContent, CardActions, Typography } from "@mui/material";
import type { Post } from ".";import { ShowButton } from "react-admin";
export const PostCard = ({ post }: { post: Post }) => {  return (    <Box sx={{ marginBottom: 1 }}>      <Card>        <CardContent>          <Typography variant="h5" component="div">            {post.title}          </Typography>          <Typography variant="body2">{post.content}</Typography>          <Typography sx={{ fontSize: 10 }} color="text.secondary">            {`Index: ${post.index}`}          </Typography>        </CardContent>        <CardActions>          <ShowButton resource="posts" record={post} />        </CardActions>      </Card>    </Box>  );};
Next, let’s create a component to render a column of posts. We will use a simple Box component from Material UI with a flex display, and we will add a Typography component to display the title (the status) of the column.
The first and last columns will have some border radius, to make the board look nicer.
// In src/posts/PostColumn.tsximport { Box, Typography } from "@mui/material";
import type { Post } from ".";import { statusNames } from ".";import { PostCard } from "./PostCard";
export const PostColumn = ({  status,  posts,}: {  status: Post["status"];  posts: Post[];}) => (  <Box    sx={{      flex: 1,      paddingTop: "8px",      paddingBottom: "16px",      bgcolor: "#eaeaee",      "&:first-child": {        paddingLeft: "5px",        borderTopLeftRadius: 5,      },      "&:last-child": {        paddingRight: "5px",        borderTopRightRadius: 5,      },    }}  >    <Typography align="center" variant="subtitle1">      {statusNames[status]}    </Typography>    <Box      sx={{        display: "flex",        flexDirection: "column",        borderRadius: 5,        padding: "5px",      }}    >      {posts.map((post) => (        <PostCard key={post.id} post={post} />      ))}    </Box>  </Box>);
To get the status label, we will use a simple map, that we create in a dedicated file.
// In src/posts/statuses.tsimport type { Post } from ".";
export const statusNames: Record<Post["status"], string> = {  draft: "Draft",  to_review: "To Review",  to_be_fixed: "To Be Fixed",  to_publish: "To Publish",  published: "Published",};
We can now create a component to render the list content. We will leverage the useListContext hook to get the list of posts, and we will render 5 PostColumn components, one for each status.
Let’s add a helper function to statuses.ts, responsible for grouping the posts by status.
// In src/posts/statuses.tsexport const statuses: Post["status"][] = [  "draft",  "to_review",  "to_be_fixed",  "to_publish",  "published",];
export type PostsByStatus = Record<Post["status"], Post[]>;
export const getPostsByStatus = (unorderedPosts: Post[]) => {  const postsByStatus: PostsByStatus = unorderedPosts.reduce(    (acc, post) => {      acc[post.status].push(post);      return acc;    },    statuses.reduce(      (obj, status) => ({ ...obj, [status]: [] }),      {} as PostsByStatus,    ),  );  // order each column by index  statuses.forEach((status) => {    postsByStatus[status] = postsByStatus[status].sort(      (recordA: Post, recordB: Post) => recordA.index - recordB.index,    );  });  return postsByStatus;};
Now let’s use this in PostListContent to compute a local state, holding the grouped posts. This local state will be updated each time the (unordered) list of posts changes.
// In src/posts/PostListContent.tsximport { Box } from "@mui/material";import { isEqual } from "lodash";import { useEffect, useState } from "react";import { useListContext } from "react-admin";
import type { Post } from ".";import { PostsByStatus, getPostsByStatus, statuses } from ".";import { PostColumn } from "./PostColumn";
export const PostListContent = () => {  const { data: unorderedPosts, isLoading } = useListContext<Post>();
  const [postsByStatus, setPostsByStatus] = useState<PostsByStatus>(    getPostsByStatus([]),  );
  useEffect(() => {    if (unorderedPosts) {      const newPostsByStatus = getPostsByStatus(unorderedPosts);      if (!isEqual(newPostsByStatus, postsByStatus)) {        setPostsByStatus(newPostsByStatus);      }    }    // eslint-disable-next-line react-hooks/exhaustive-deps  }, [unorderedPosts]);
  if (isLoading) return null;
  return (    <Box display="flex">      {statuses.map((status) => (        <PostColumn          status={status}          posts={postsByStatus[status]}          key={status}        />      ))}    </Box>  );};
Experienced React users may argue that we don’t need a separate state here, because we could (and should) derive this state from unorderedPosts instead.
That would be 100% true (and I even did it at first), if it wasn’t for the fact that react-beautiful-dnd actually requires managing a local copy of the data in a synchronous way, and encourages firing off a request in the background to persist the changes.
To avoid UI flickering, we have no choice but to use a local state.
Now, all that’s left to do is to create the PostList component, and to use it in our App.tsx file.
// In src/posts/PostList.tsximport { List } from "react-admin";
import { PostListContent } from ".";
export const PostList = () => {  return (    <List      perPage={100}      sort={{ field: "index", order: "ASC" }}      pagination={false}      component="div"    >      <PostListContent />    </List>  );};
// In src/App.tsximport { Admin, Resource, ListGuesser, EditGuesser, ShowGuesser,} from "react-admin";import { dataProvider } from "./dataProvider";import { PostList } from "./posts";
export const App = () => ( <Admin dataProvider={dataProvider}> <Resource name="posts" list={ListGuesser} list={PostList} edit={EditGuesser} show={ShowGuesser} /> <Resource name="comments" list={ListGuesser} edit={EditGuesser} show={ShowGuesser} /> </Admin>);This is already enough to completely change the way the posts are displayed in the List view.
Adding Drag and Drop Abilities
Like earlier, we will start with the leaf components, and work our way up to the root component.
Let’s wrap our PostCard component in a <Draggable> component. We will use the id of the post as the draggableId.
But wait, there is a trap here! We can’t simply use the index of the post as the index of the draggable. Why is that? Because there is no guarantee our indexes will be consecutive, for instance if the data is filtered. And react-beautiful-dnd requires the index to be consecutive, otherwise unexpected behavior may occur, such as the inability to drop items in some positions.
Hence, we will need to use the position of the post in its column as the index of the draggable, and not the post index directly. We will add a new position prop to PostCard to pass this information.
We will also use the provided snapshot.isDragging property to add some styling to the card, to make it more obvious that it’s being dragged.
// In src/posts/PostCard.tsximport { Draggable } from "@hello-pangea/dnd";import { Box, Card, CardActions, CardContent, Typography } from "@mui/material";
import { ShowButton } from "react-admin";import type { Post } from ".";
export const PostCard = ({ post }: { post: Post }) => {export const PostCard = ({ post, position }: { post: Post; position: number }) => {  return (   <Draggable draggableId={String(post.id)} index={position}>     {(provided, snapshot) => (       <Box sx={{ marginBottom: 1 }}>       <Box         sx={{ marginBottom: 1 }}         {...provided.draggableProps}         {...provided.dragHandleProps}         ref={provided.innerRef}       >         <Card>         <Card           style={{             opacity: snapshot.isDragging ? 0.9 : 1,             transform: snapshot.isDragging ? "rotate(-2deg)" : "",           }}           elevation={snapshot.isDragging ? 3 : 1}         >            <CardContent>              <Typography variant="h5" component="div">                {post.title}              </Typography>              <Typography variant="body2">{post.content}</Typography>              <Typography sx={{ fontSize: 10 }} color="text.secondary">                {`Index: ${post.index}`}              </Typography>            </CardContent>            <CardActions>              <ShowButton resource="posts" record={post} />            </CardActions>          </Card>        </Box>     )}   </Draggable>  );};
Next, let’s wrap our PostColumn component in a <Droppable> component. We will use the status of the column as the droppableId.
We will also use the provided snapshot.isDraggingOver property to add some styling to the column when it’s being hovered.
Lastly, let’s not forget to add that position prop we just added to PostCard.
// In src/posts/PostColumn.tsximport { Droppable } from "@hello-pangea/dnd";import { Box, Typography } from "@mui/material";
import type { Post } from ".";import { statusNames } from ".";import { PostCard } from "./PostCard";
export const PostColumn = ({  status,  posts,}: {  status: Post["status"];  posts: Post[];}) => (  <Box    sx={{      flex: 1,      paddingTop: "8px",      paddingBottom: "16px",      bgcolor: "#eaeaee",      "&:first-child": {        paddingLeft: "5px",        borderTopLeftRadius: 5,      },      "&:last-child": {        paddingRight: "5px",        borderTopRightRadius: 5,      },    }}  >    <Typography align="center" variant="subtitle1">      {statusNames[status]}    </Typography>   <Droppable droppableId={status}>     {(droppableProvided, snapshot) => (        <Box         ref={droppableProvided.innerRef}         {...droppableProvided.droppableProps}         className={snapshot.isDraggingOver ? " isDraggingOver" : ""}          sx={{            display: "flex",            flexDirection: "column",            borderRadius: 5,            padding: "5px",           "&.isDraggingOver": {             bgcolor: "#dadadf",           },          }}        >         {posts.map((post) => (           <PostCard key={post.id} post={post} />         ))}         {posts.map((post, position) => (           <PostCard key={post.id} post={post} position={position} />         ))}         {droppableProvided.placeholder}        </Box>     )}   </Droppable>  </Box>);
Also note the addition of droppableProvided.placeholder. This is used to create space in the <Droppable /> as needed during a drag.
Lastly, let’s wrap our PostListContent component in a <DragDropContext>. We will use an empty onDragEnd callback for now (we will implement it later).
// In src/posts/PostListContent.tsximport { DragDropContext, OnDragEndResponder } from "@hello-pangea/dnd";import { Box } from "@mui/material";import { isEqual } from "lodash";import { useEffect, useState } from "react";import { useListContext } from "react-admin";
import type { Post } from ".";import { PostsByStatus, getPostsByStatus, statuses } from ".";import { PostColumn } from "./PostColumn";
export const PostListContent = () => {  const { data: unorderedPosts, isLoading } = useListContext<Post>();
  const [postsByStatus, setPostsByStatus] = useState<PostsByStatus>(    getPostsByStatus([])  );
  useEffect(() => {    if (unorderedPosts) {      const newPostsByStatus = getPostsByStatus(unorderedPosts);      if (!isEqual(newPostsByStatus, postsByStatus)) {        setPostsByStatus(newPostsByStatus);      }    }    // eslint-disable-next-line react-hooks/exhaustive-deps  }, [unorderedPosts]);
  if (isLoading) return null;
 const onDragEnd: OnDragEndResponder = async () => {};
  return (   <DragDropContext onDragEnd={onDragEnd}>      <Box display="flex">        {statuses.map((status) => (          <PostColumn            status={status}            posts={postsByStatus[status]}            key={status}          />        ))}      </Box>   </DragDropContext>  );};
And that’s it! As you can see, the dnd library is fairly easy to integrate, and we can now enjoy beautiful and natural movement of items in our Kanban board.
Updating the Data
Now that we have a Kanban board that supports dragging the posts around, we need to update the data when a card is moved from one column to another.
In practice, this means we need to implement the onDragEnd callback.
Each time a card is moved, we need to perform several updates:
- update the
statusandindexof the moved post, - decrease the
indexof all posts that were below the moved post in the source column, - increase the
indexof all posts that are after the moved post in the destination column.
These updates can be computed and triggered by the front-end app, but for a real-life app I would recommend doing it in the back-end. This way, we can be sure that the data is always consistent, even if the user closes the browser tab before some of the updates are sent to the server, or if they temper with the front-end code.
React Admin is definitely compatible with this approach, as it allows to add custom methods to the dataProvider. This way, you can use React Admin to call a dedicated route in your API and let the back-end handle the updates.
However, for the reasons explained earlier (react-beautiful-dnd requiring us to update the local copy of the data before firing off the request to persist the changes), we will still need to implement some logic to compute the changes client-side.
In our example, we have extracted the logic to update the local copy of the data in a dedicated method. We will also simulate having a back-end with a dedicated API route to persist the changes, so that it can be adapted very easily to a real-life application.

So, how did we do it? Let’s dive in.
First, we added a new method to the dataProvider, called updatePostStatus, with the following signature:
export interface MyDataProvider extends DataProvider { updatePostStatus: ( source: Post, destination: { status: Post["status"]; index?: number; // will be undefined if dropped after the last item }, ) => Promise<void>;}It takes 2 arguments:
source: the post that was moveddestination: the new status (column) and index of the post
It doesn’t need to return anything, only a Promise, to let us know when the update is done.
Let’s add this new method to the existing dataProvider.
// In src/dataProvider.tsimport fakeRestDataProvider from "ra-data-fakerest";import { DataProvider } from "react-admin";import data from "./data.json";import { Post, statuses } from "./posts";
export const dataProvider = fakeRestDataProvider(data, true);const baseDataProvider = fakeRestDataProvider(data, true);
export interface MyDataProvider extends DataProvider {  updatePostStatus: (    source: Post,    destination: {      status: Post["status"];      index?: number; // will be undefined if dropped after the last item    }  ) => Promise<void>;}
export const dataProvider: MyDataProvider = {  ...baseDataProvider,  updatePostStatus: async (source, destination) => {    // TODO: implement  },};
updatePostStatus is where you can call your dedicated API route if you have one. In our case, we implemented the logic that computes the updates in this method and called the baseDataProvider directly to perform the updates.
The implementation is a bit long, and a bit out of scope for this article, so I won’t paste it here. You can of course find it in the source code.

Now, let’s call this new method in our component.
We will use the useDataProvider hook to get the dataProvider, and the useMutation hook to wrap our call in a React-Query mutation.
This allows us to benefit from the React-Query features like automatic retry, state management, or side effects. In particular, we will use the onSettled side effect to automatically refetch the data after the mutation is done.
The refetch callback can be obtained directly from the useListContext hook.
// In src/posts/PostListContent.tsximport { DragDropContext, OnDragEndResponder } from "@hello-pangea/dnd";import { Box } from "@mui/material";import { isEqual } from "lodash";import { useEffect, useState } from "react";import { useDataProvider } from "react-admin";import { useDataProvider, useListContext } from "react-admin";import { useMutation } from "react-query";import type { Post } from ".";import { PostsByStatus, getPostsByStatus, statuses } from ".";import { PostColumn } from "./PostColumn";import { MyDataProvider } from "../dataProvider";
export const PostListContent = () => { const { data: unorderedPosts, isLoading } = useListContext<Post>(); const { data: unorderedPosts, isLoading, refetch } = useListContext<Post>(); const dataProvider = useDataProvider<MyDataProvider>();
  const [postsByStatus, setPostsByStatus] = useState<PostsByStatus>(    getPostsByStatus([])  );
  useEffect(() => {    if (unorderedPosts) {      const newPostsByStatus = getPostsByStatus(unorderedPosts);      if (!isEqual(newPostsByStatus, postsByStatus)) {        setPostsByStatus(newPostsByStatus);      }    }    // eslint-disable-next-line react-hooks/exhaustive-deps  }, [unorderedPosts]);
 const mutation = useMutation<   void,   Error,   {     source: Parameters<MyDataProvider["updatePostStatus"]>[0];     destination: Parameters<MyDataProvider["updatePostStatus"]>[1];   } >(   ({ source, destination }) =>     dataProvider.updatePostStatus(source, destination),   { onSettled: () => refetch() } );
  if (isLoading) return null;
  const onDragEnd: OnDragEndResponder = async () => {};
  return (    <DragDropContext onDragEnd={onDragEnd}>      <Box display="flex">        {statuses.map((status) => (          <PostColumn            status={status}            posts={postsByStatus[status]}            key={status}          />        ))}      </Box>    </DragDropContext>  );};
We will also need to add a function to update the local state, that we will call updatePostStatusLocal.
// In src/posts/PostListContent.tsxconst updatePostStatusLocal = ( sourcePost: Post, source: { status: Post["status"]; index: number }, destination: { status: Post["status"]; index?: number; // undefined if dropped after the last item }, postsByStatus: PostsByStatus,) => { if (source.status === destination.status) { // moving deal inside the same column const column = postsByStatus[source.status]; column.splice(source.index, 1); column.splice(destination.index ?? column.length + 1, 0, sourcePost); return { ...postsByStatus, [destination.status]: column, }; } else { // moving deal across columns const sourceColumn = postsByStatus[source.status]; const destinationColumn = postsByStatus[destination.status]; sourceColumn.splice(source.index, 1); destinationColumn.splice( destination.index ?? destinationColumn.length + 1, 0, sourcePost, ); return { ...postsByStatus, [source.status]: sourceColumn, [destination.status]: destinationColumn, }; }};Feel free to reuse and adapt this function in your own app. It’s a generic helper function that can be used to update the local copy of the data when a draggable is moved from one column to another.
Now, all that’s left to do, is to call the mutation and the updatePostStatusLocal function in the onDragEnd callback.
// In src/posts/PostListContent.tsximport { DragDropContext, OnDragEndResponder } from "@hello-pangea/dnd";import { Box } from "@mui/material";import { isEqual } from "lodash";import { useEffect, useState } from "react";import { useDataProvider, useListContext } from "react-admin";import { useMutation } from "react-query";import type { Post } from ".";import { PostsByStatus, getPostsByStatus, statuses } from ".";import { PostColumn } from "./PostColumn";import { MyDataProvider } from "../dataProvider";
export const PostListContent = () => {  const { data: unorderedPosts, isLoading, refetch } = useListContext<Post>();  const dataProvider = useDataProvider<MyDataProvider>();
  const [postsByStatus, setPostsByStatus] = useState<PostsByStatus>(    getPostsByStatus([])  );
  useEffect(() => {    if (unorderedPosts) {      const newPostsByStatus = getPostsByStatus(unorderedPosts);      if (!isEqual(newPostsByStatus, postsByStatus)) {        setPostsByStatus(newPostsByStatus);      }    }    // eslint-disable-next-line react-hooks/exhaustive-deps  }, [unorderedPosts]);
  const mutation = useMutation<    void,    Error,    {      source: Parameters<MyDataProvider["updatePostStatus"]>[0];      destination: Parameters<MyDataProvider["updatePostStatus"]>[1];    }  >(    ({ source, destination }) =>      dataProvider.updatePostStatus(source, destination),    { onSettled: () => refetch() }  );
  if (isLoading) return null;
 const onDragEnd: OnDragEndResponder = async () => {}; const onDragEnd: OnDragEndResponder = (result) => {   const { destination, source } = result;
   if (!destination) {     return;   }
   if (     destination.droppableId === source.droppableId &&     destination.index === source.index   ) {     return;   }
   const sourceStatus = source.droppableId as Post["status"];   const destinationStatus = destination.droppableId as Post["status"];   const sourcePost = postsByStatus[sourceStatus][source.index]!;   const destinationPost = postsByStatus[destinationStatus][     destination.index   ] ?? {     status: destinationStatus,     index: undefined, // undefined if dropped after the last item   };
   // compute local state change synchronously   setPostsByStatus(     updatePostStatusLocal(       sourcePost,       { status: sourceStatus, index: source.index },       { status: destinationStatus, index: destination.index },       postsByStatus     )   );
   // trigger the mutation to persist the changes   mutation.mutateAsync({     source: sourcePost,     destination: destinationPost,   }); };
  return (    <DragDropContext onDragEnd={onDragEnd}>      <Box display="flex">        {statuses.map((status) => (          <PostColumn            status={status}            posts={postsByStatus[status]}            key={status}          />        ))}      </Box>    </DragDropContext>  );};
And that’s it! Our changes will now be persisted when we move a card from one column to another.
Bonus: Adding Filters
Would you believe me if I told you that we can add filters to our Kanban board with only 4 lines of code?
Yet it’s true!
Since we used the React Admin hooks (mainly useListContext), we can benefit from all the features provided by the List component, including the ability to add filters.
Let’s add a SearchInput to provide a full-text search on the posts.
// In src/posts/PostList.tsximport { List } from "react-admin";import { List, SearchInput } from "react-admin";
import { PostListContent } from ".";
const postFilters = [  <SearchInput source="q" alwaysOn />,];
export const PostList = () => {  return (    <List     filters={postFilters}      perPage={100}      sort={{ field: "index", order: "ASC" }}      pagination={false}      component="div"    >      <PostListContent />    </List>  );};
You see? Told you! 😀
Further Improvements
To better complement the Kanban UX, it is often a good idea to allow viewing or editing the cards directly from the board, without having to navigate the edit or show views.
In fact, it is what the CRM Demo does: by leveraging matchPath and useLocation from react-router, it detects whether the Show or Edit route is active, and opens up a MUI Dialog accordingly.
Feel free to check out the CRM Demo source code to see how it’s done.
Conclusion
I started writing this article thinking I would use the CRM Demo as a base, but along the way, I realized that it was too complex in its current shape to be broken down into simple steps.
Hence, I decided to create a new example app, and I’m glad I did. First, it allowed me to understand (and later, emphasize in this article) the key parts of the process, as well as some traps. Besides, it allowed me to simplify some of the code, to make it easier to understand and explain. Lastly, it allowed me to move the computation of the updates to the dataProvider layer, which will make it easier to adapt this example to a real-life application.
You can find the source code of the resulting project on Github, in the marmelab/ra-example-kanban repository.
This was also the opportunity to discover the react-beautiful-dnd library and to demonstrate, once again, how easy it is to integrate custom components with React Admin.
I hope you enjoyed this article, and that it will help you build your own Kanban board with React.

Authors
Full-stack web developer at marmelab, JB is a Software Engineer with a strong Java experience. He plays the piano and runs fast, and not only because he has long fingers and tall legs.