Build a Drag-and-Drop Scheduler in React with Bryntum


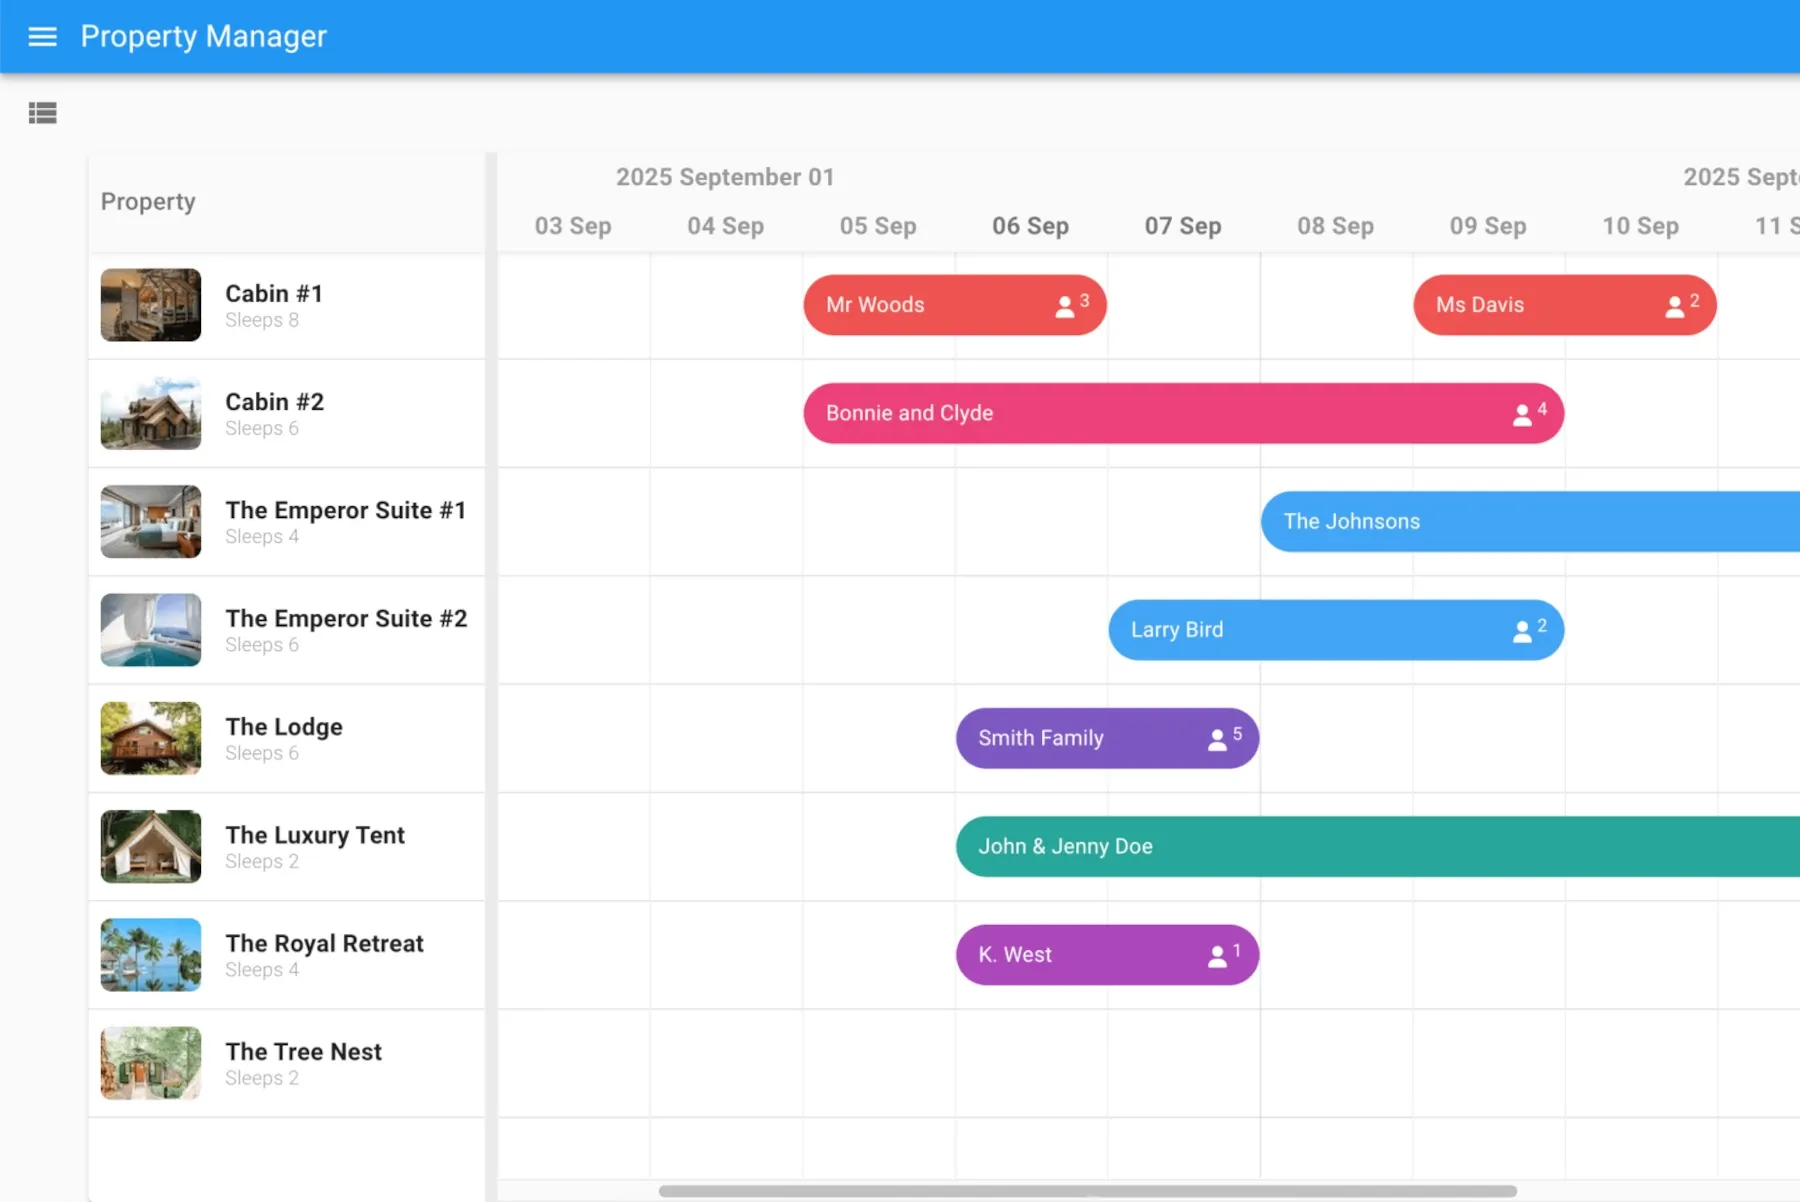
If you’ve ever tried to build a staff scheduling system, manage equipment bookings, coordinate service appointments, plan production runs, or visualize project timelines with drag-and-drop functionality, you know how quickly it becomes a development nightmare - handling conflicts, dependencies, recurring events, and keeping everything performant with thousands of entries.
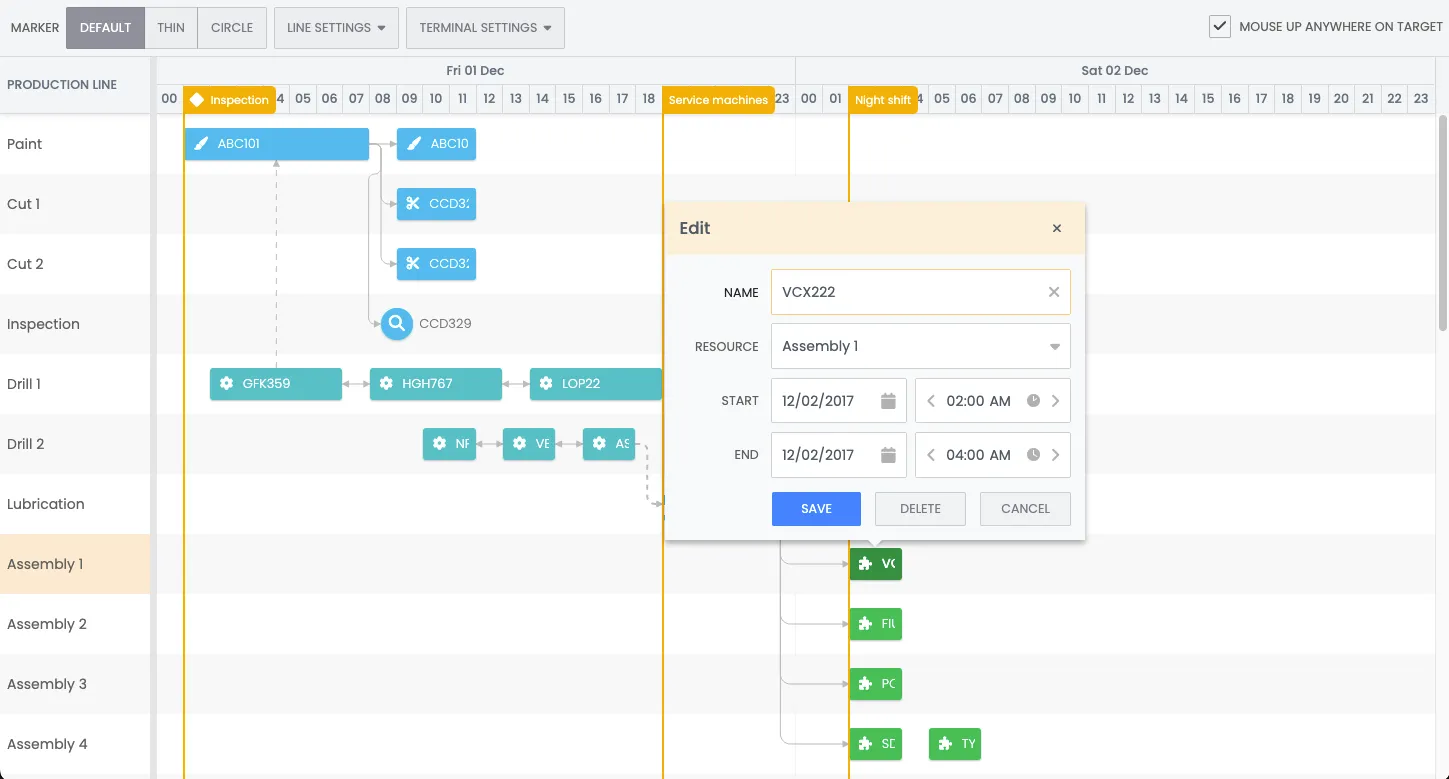
A specialized scheduler tool like Bryntum Scheduler solves this out-of-the-box, providing battle-tested components for all these scenarios. Instead of maintaining thousands of lines of custom timeline code, you integrate a proven solution that handles all the edge cases that make resource scheduling so difficult.
But how do you integrate such a complex component into an existing React application?
We’ve partnered with Bryntum to provide a seamless integration of their powerful Scheduler component into a new react-admin Enterprise module: @react-admin/ra-scheduler.
It supports drag and drop, infinite scroll, zoom, custom layout and styling, collapsible columns, localization, grouping and filtering and export to pdf, all with a simple API that fits naturally into React Admin.
To illustrate how to use it, we’ll build a simple scheduling application for some enterprise events.
Setting Up
Let’s start by creating a new React Admin application using create-react-admin:
npx create-react-admin@latest ra-scheduler-democd ra-scheduler-demoThen, we install the @react-admin/ra-scheduler package and its Bryntum dependencies.
We’ll also install ra-data-fakerest to simulate a backend API.
npm install @react-admin/ra-scheduler @bryntum/core-thin @bryntum/grid-thin @bryntum/scheduler-thin ra-data-fakerestNext, we need to set up the data provider. In case you’re not familiar with React Admin, the Data Provider is the interface between react-admin and your API. It’s where you write the API calls to fetch and save data. For the purpose of this tutorial, we’ll use a data provider that simulates a REST API with some fake data.
// in src/dataProvider.tsimport fakeDataProvider from 'ra-data-fakerest';
export const dataProvider = fakeDataProvider({    events: [        { id: 1, name: 'Event 1', startDate: '2025-09-10T10:00:00', endDate: '2025-09-10T12:00:00', resourceId: 1 },        { id: 2, name: 'Event 2', startDate: '2025-09-10T13:00:00', endDate: '2025-09-10T15:00:00', resourceId: 2 },    ],    resources: [        { id: 1, name: 'Room A' },        { id: 2, name: 'Room B' },    ],});
Here, you can see that events have a specific structure, with name, startDate, endDate and resourceId fields, while resources have id and name fields.
This the format expected by Bryntum Scheduler. Moreover, we use the default resource names: events for the events and resources for the resources.
We’ll see later how to customize those if needed.
Now, let’s setup our view for the events. The <Scheduler> component from @react-admin/ra-scheduler is meant to be used as the list view of a resource.
// in src/events.tsximport { Scheduler } from '@react-admin/ra-scheduler';// Import the required Bryntum stylesimport '@bryntum/core-thin/core.material.css';import '@bryntum/grid-thin/grid.material.css';import '@bryntum/scheduler-thin/scheduler.material.css';import { endOfDay, startOfDay } from 'date-fns';
export const EventList = () => (    <Scheduler        columns={[{ text: 'Name', field: 'name', width: 130 }]}        viewPreset="hourAndDay"        startDate={startOfDay(new Date())}        endDate={endOfDay(new Date())}    />);
Finally, let’s setup the application:
// in src/App.tsximport { Admin, Resource } from "react-admin";import { dataProvider } from "./dataProvider";import { Layout } from "./Layout";import { EventList } from "./events";
export const App = () => (  <Admin dataProvider={dataProvider} layout={Layout}>    <Resource name="events" list={EventList} />  </Admin>);
We’re ready to go! Let’s run the application:
npm run dev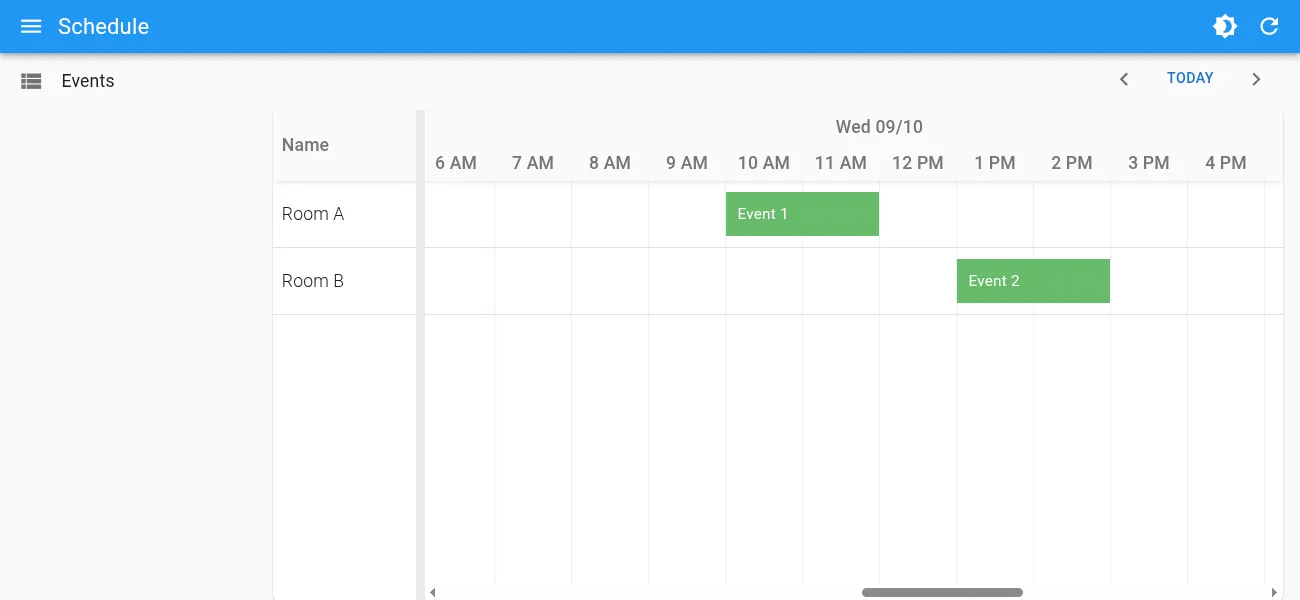
Go ahead and try to drag and drop events, resize them, scroll the timeline, zoom in and out, and see how it works! You can also double click on an event to edit it and right click an empty space to create a new one.
Converting Existing Data
More often than not, your existing data won’t match the format expected by Bryntum Scheduler.
For example, your events might have title instead of name, or start_date instead of startDate. You might also have additional fields, like a description property.
@react-admin/ra-scheduler <Scheduler> provides a way to convert your data to the expected format using the converters prop.
Besides, maybe your API uses different names for the resources and events. For instance, you might have rooms instead of resources. We can use the resources prop to customize them.
Given the following data provider:
// in src/dataProvider.tsimport fakeDataProvider from 'ra-data-fakerest';
export const dataProvider = fakeDataProvider({    events: [        { id: 1, title: 'Event 1', start_date: '2025-09-10T10:00:00', end_date: '2025-09-10T12:00:00', room_id: 1, description: 'This is event 1' },        { id: 2, title: 'Event 2', start_date: '2025-09-10T13:00:00', end_date: '2025-09-10T15:00:00', room_id: 2, description: 'This is event 2' },    ],    rooms: [        { id: 1, name: 'Room A' },        { id: 2, name: 'Room B' },    ],});
Let’s convert our data using the converters prop:
// in src/events.tsx// ... imports omitted for brevityconst converters = {  toBryntumEvent: (record) => ({      id: record.id,      name: record.title,      resourceId: record.room_id,      startDate: new Date(record.start_date),      endDate: new Date(record.end_date),      description: record.description,  }),  toEvent: (model) => ({      id: model.id,      title: model.name,      room_id: model.resourceId,      start_date: model.startDate,      end_date: model.endDate,      description: model.description,  }),};
export const EventList = () => (    <Scheduler        columns={[{ text: 'Name', field: 'name', width: 130 }]}        viewPreset="hourAndDay"        startDate={startOfDay(new Date())}        endDate={endOfDay(new Date())}        converters={converters}        resources={{ resources: 'rooms' }}    />);
Customizing Events Edition
Our custom events are converted and everything works fine, but the default edition dialog does not show our fields correctly.
That’s because it uses the original record fields, not those converted for Bryntum Scheduler.
Besides it’s not showing the description field at all.
Let’s customize the event form using the eventEdit and eventCreate props:
// in src/events.tsximport { AutocompleteInput, DateTimeInput, RaRecord, ReferenceInput, SimpleForm, TextInput } from 'react-admin';
// ... imports omitted for brevity// ... converters omitted for brevityexport const EventList = () => (    <Scheduler        columns={[{ text: 'Name', field: 'name', width: 130 }]}        viewPreset="hourAndDay"        startDate={startOfDay(new Date())}        endDate={endOfDay(new Date())}        converters={converters}        eventCreate={<CustomEventForm />}        eventEdit={<CustomEventForm />}    />);
const CustomEventForm = () => (    <SimpleForm>        <TextInput source="title" validate={required()} />        <ReferenceInput source="room_id" reference="rooms">            <AutocompleteInput validate={required()} />        </ReferenceInput>        <DateTimeInput source="start_date" validate={required()} />        <DateTimeInput source="end_date" validate={required()} />        <TextInput source="description" multiline />    </SimpleForm>);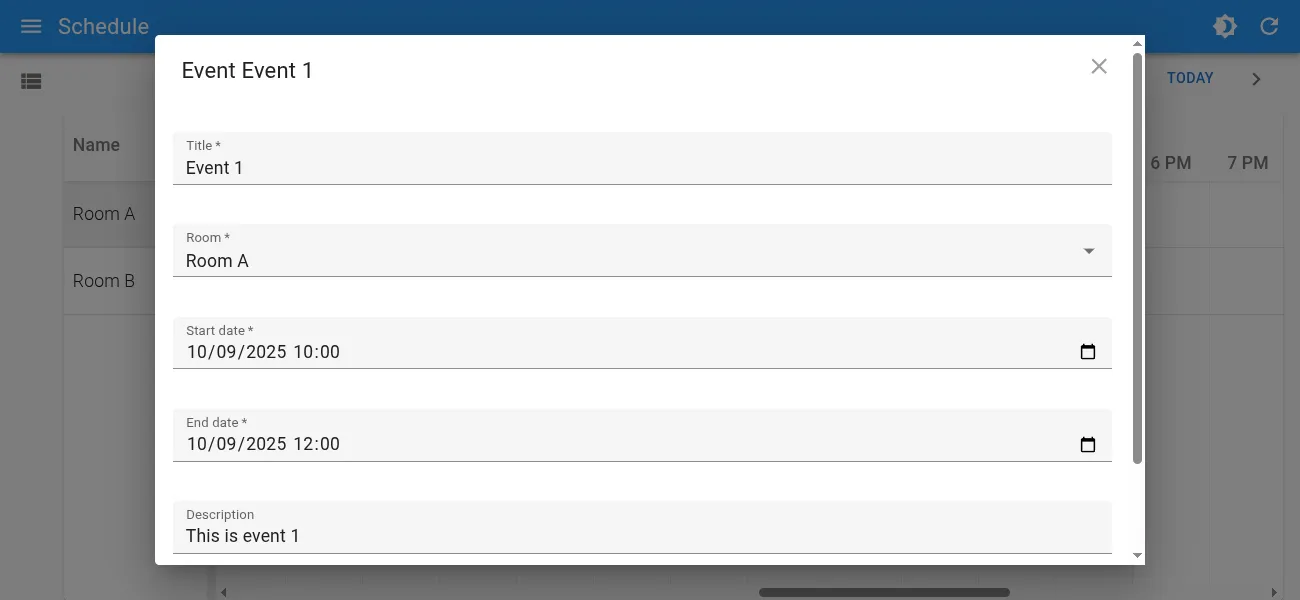
Now you can add custom fields, validations, and even use any input component from react-admin.
Conclusion
In this article, we just scratched the surface of what @react-admin/ra-scheduler can do. You can find the full documentation on React Admin Enterprise website.
Besides, you could further customize the scheduler using all the props of Bryntum Scheduler itself.
We’re only getting started with @react-admin/ra-scheduler, and we have many more features planned with tighter integration both with React Admin features and Bryntum Scheduler capabilities.
Stay tuned!

Authors
Full-stack web developer at marmelab, Gildas has a strong appetite for emerging technologies. If you want an informed opinion on a new library, ask him, he's probably used it on a real project already.
Marmelab founder and CEO, passionate about web technologies, agile, sustainability, leadership, and open-source. Lead developer of react-admin, founder of GreenFrame.io, and regular speaker at tech conferences.