Theming
Whether you need to adjust a CSS rule for a single component, or change the color of the labels in the entire app, you’re covered!
Overriding A Component Style
Most admin-on-rest components support two style props to set inline styles:
style: A style object to customize the look and feel of the component container (e.g. the<td>in a datagrid). Most of the time, that’s where you’ll want to put your custom styles.elStyle: A style object to customize the look and feel of the component element itself, usually a material ui component. Use this prop when you want to fine tune the display of a material ui component, according to their styling documentation.
These props accept a style object:
import { EmailField } from 'admin-on-rest/mui';

<EmailField source="email" style={{ backgroundColor: 'lightgrey' }} elStyle={{ textDecoration: 'none' }} />
// renders in the datagrid as
<td style="background-color:lightgrey">
    <a style="text-decoration:none" href="mailto:foo@example.com">
        foo@example.com
    </a>
</td>
Some components support additional props to style their own elements. For instance, when using a <Datagrid>, you can specify how a <Field> renders headers with the headerStyle prop. Here is how to make a column right aligned:
export const ProductList = (props) => (
    <List {...props}>
        <Datagrid>
            <TextField source="sku" />
            <TextField
                source="price"
                style={{ textAlign: 'right' }}
                headerStyle={{ textAlign: 'right' }}
            />
            <EditButton />
        </Datagrid>
    </List>
);
Refer to each component documentation for a list of supported style props.
If you need more control over the HTML code, you can also create your own Field and Input components.
Conditional Formatting
Sometimes you want the format to depend on the value. Admin-on-rest doesn’t provide any special way to do it, because React already has all that’s necessary - in particular, Higher-Order Components (HOCs).
For instance, if you want to highlight a <TextField> in red if the value is higher than 100, just wrap the field into a HOC:
const colored = WrappedComponent => props => props.record[props.source] > 100 ?
    <span style={{ color: 'red' }}><WrappedComponent {...props} /></span> :
    <WrappedComponent {...props} />;

const ColoredTextField = colored(TextField);

export const PostList = (props) => (
    <List {...props}>
        <Datagrid>
            <TextField source="id" />
            ...
            <ColoredTextField source="nb_views" />
            <EditButton />
        </Datagrid>
    </List>
);
If you want to read more about higher-order components, check out this SitePoint tutorial: Higher Order Components: A React Application Design Pattern
Responsive Utility
To provide an optimized experience on mobile, tablet, and desktop devices, you often need to display different components depending on the screen size. That’s the purpose of the <Responsive> component, which offers a declarative approach to responsive web design.
It expects element props named small, medium, and large. It displays the element that matches the screen size (with breakpoints at 768 and 992 pixels):
// in src/posts.js
import React from 'react';
import { List, Responsive, SimpleList, Datagrid, TextField, ReferenceField, EditButton } from 'admin-on-rest';

export const PostList = (props) => (
    <List {...props}>
        <Responsive
            small={
                <SimpleList
                    primaryText={record => record.title}
                    secondaryText={record => `${record.views} views`}
                    tertiaryText={record => new Date(record.published_at).toLocaleDateString()}
                />
            }
            medium={
                <Datagrid>
                    <TextField source="id" />
                    <ReferenceField label="User" source="userId" reference="users">
                        <TextField source="name" />
                    </ReferenceField>
                    <TextField source="title" />
                    <TextField source="body" />
                    <EditButton />
                </Datagrid>
            }
        />
    </List>
);
Tip: If you only provide small and medium, the medium element will also be used on large screens. The same kind of smart default exists for when you omit small or medium.
Tip: You can also use material-ui’s withWidth() higher order component to have the with prop injected in your own components.
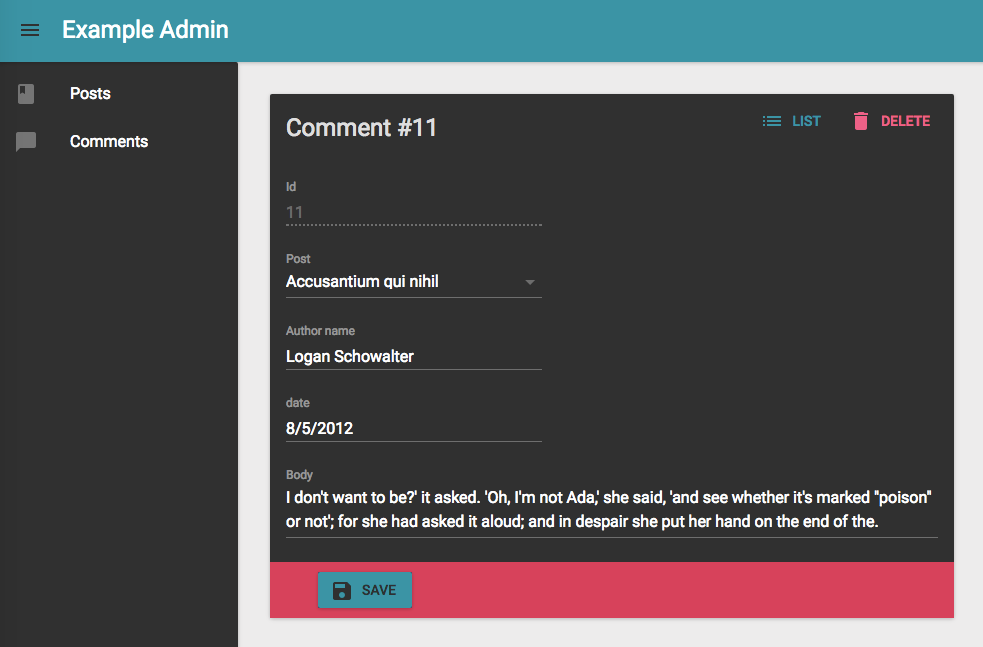
Using a Predefined Theme
Material UI also supports complete theming out of the box. Material UI ships two base themes: light and dark. Admin-on-rest uses the light one by default. To use the dark one, pass it to the <Admin> component, in the theme prop (along with getMuiTheme()).
import darkBaseTheme from 'material-ui/styles/baseThemes/darkBaseTheme';
import getMuiTheme from 'material-ui/styles/getMuiTheme';

const App = () => (
    <Admin theme={getMuiTheme(darkBaseTheme)} restClient={simpleRestClient('http://path.to.my.api')}>
        // ...
    </Admin>
);
Writing a Custom Theme
If you need more fine tuning, you’ll need to write your own theme object, following Material UI themes documentation. Material UI merges custom theme objects with the light theme.
import {
  cyan500, cyan700,
  pinkA200,
  grey100, grey300, grey400, grey500,
  white, darkBlack, fullBlack,
} from 'material-ui/styles/colors';
import { fade } from 'material-ui/utils/colorManipulator';
import spacing from 'material-ui/styles/spacing';

const myTheme = {
    spacing: spacing,
    fontFamily: 'Roboto, sans-serif',
    palette: {
      primary1Color: cyan500,
      primary2Color: cyan700,
      primary3Color: grey400,
      accent1Color: pinkA200,
      accent2Color: grey100,
      accent3Color: grey500,
      textColor: darkBlack,
      alternateTextColor: white,
      canvasColor: white,
      borderColor: grey300,
      disabledColor: fade(darkBlack, 0.3),
      pickerHeaderColor: cyan500,
      clockCircleColor: fade(darkBlack, 0.07),
      shadowColor: fullBlack,
    },
};
The muiTheme object contains the following keys:
spacingcan be used to change the spacing of components.fontFamilycan be used to change the default font family.palettecan be used to change the color of components.zIndexcan be used to change the level of each component.isRtlcan be used to enable the right to left mode.- There is also one key for each component so you can use to customize them individually:
appBaravatar- …
Tip: Check Material UI custom colors documentation to see pre-defined colors available for customizing your theme.
Once your theme is defined, pass it to the <Admin> component, in the theme prop (along with getMuiTheme()).
const App = () => (
    <Admin theme={getMuiTheme(myTheme)} restClient={simpleRestClient('http://path.to.my.api')}>
        // ...
    </Admin>
);
Using a Custom Layout
Instead of the default layout, you can use your own component as the admin layout. Just use the appLayout prop of the <Admin> component:
// in src/App.js
import MyLayout from './MyLayout';

const App = () => (
    <Admin appLayout={MyLayout} restClient={simpleRestClient('http://path.to.my.api')}>
        // ...
    </Admin>
);
Use the default layout as a starting point for your custom layout. Here is a simplified version (with no responsive support):
// in src/MyLayout.js
import React, { createElement, Component } from 'react';
import PropTypes from 'prop-types';
import { connect } from 'react-redux';
import MuiThemeProvider from 'material-ui/styles/MuiThemeProvider';
import CircularProgress from 'material-ui/CircularProgress';
import {
    AdminRoutes,
    AppBar,
    Menu,
    Notification,
    Sidebar,
    setSidebarVisibility,
} from 'admin-on-rest';

const styles = {
    wrapper: {
        // Avoid IE bug with Flexbox, see #467
        display: 'flex',
        flexDirection: 'column',
    },
    main: {
        display: 'flex',
        flexDirection: 'column',
        minHeight: '100vh',
    },
    body: {
        backgroundColor: '#edecec',
        display: 'flex',
        flex: 1,
        overflowY: 'hidden',
        overflowX: 'scroll',
    },
    content: {
        flex: 1,
        padding: '2em',
    },
    loader: {
        position: 'absolute',
        top: 0,
        right: 0,
        margin: 16,
        zIndex: 1200,
    },
};

class MyLayout extends Component {
    componentWillMount() {
        this.props.setSidebarVisibility(true);
    }

    render() {
        const {
            children,
            customRoutes,
            dashboard,
            isLoading,
            logout,
            menu,
            title,
        } = this.props;
        return (
            <MuiThemeProvider>
                <div style={styles.wrapper}>
                    <div style={styles.main}>
                        <AppBar title={title} />
                        <div className="body" style={styles.body}>
                            <div style={styles.content}>
                                {children}
                            </div>
                            <Sidebar>
                                {createElement(menu || Menu, {
                                    logout,
                                    hasDashboard: !!dashboard,
                                })}
                            </Sidebar>
                        </div>
                        <Notification />
                        {isLoading && (
                            <CircularProgress
                                color="#fff"
                                size={30}
                                thickness={2}
                                style={styles.loader}
                            />
                        )}
                    </div>
                </div>
            </MuiThemeProvider>
        );
    }
}

MyLayout.propTypes = {
    authClient: PropTypes.func,
    customRoutes: PropTypes.array,
    dashboard: PropTypes.oneOfType([PropTypes.func, PropTypes.string]),
    isLoading: PropTypes.bool.isRequired,
    menu: PropTypes.element,
    resources: PropTypes.array,
    setSidebarVisibility: PropTypes.func.isRequired,
    title: PropTypes.string.isRequired,
};

const mapStateToProps = state => ({ isLoading: state.admin.loading > 0 });
export default connect(mapStateToProps, { setSidebarVisibility })(MyLayout);