Auth Providers

React-admin lets you secure your admin app with the authentication strategy of your choice. Since there are many possible strategies (Basic Auth, JWT, OAuth, etc.), react-admin delegates authentication logic to an authProvider.
Enabling Auth Features
By default, react-admin apps don’t require authentication. To restrict access to the admin, pass an authProvider to the <Admin> component.
// in src/App.js
import authProvider from './authProvider';

const App = () => (
    <Admin authProvider={authProvider}>
        ...
    </Admin>
);
React-admin delegates the Authentication and Authorization logic to an object that you must write, the authProvider.
- “Authentication” logic allows to restrict an app to identified users only, and reject anonymous users
- “Authorization” logic allows to tweak the features based on user permissions
Anatomy Of An authProvider
What’s an authProvider? Just like a dataProvider, an authProvider is an object that handles authentication and authorization logic. It exposes methods that react-admin calls when needed, and that you can call manually through specialized hooks. The authProvider methods must return a Promise. The simplest authProvider is:
const authProvider = {
    // authentication
    login: params => Promise.resolve(),
    checkError: error => Promise.resolve(),
    checkAuth: params => Promise.resolve(),
    logout: () => Promise.resolve(),
    getIdentity: () => Promise.resolve(),
    // authorization
    getPermissions: params => Promise.resolve(),
};
You can get more details about input params, response and error formats in the Building Your Own Auth Provider section below.
Tip: In react-admin version 2.0, the authProvider used to be a function instead of an object. React-admin 3.0 accepts both object and (legacy) function authProviders.
Available Providers
It’s very common that your auth logic is so specific that you’ll need to write your own authProvider. However, the community has built a few open-source Auth Providers that may fit your need:
- AWS Amplify: MrHertal/react-admin-amplify
- AWS Cognito: thedistance/ra-cognito
- Firebase Auth (Google, Facebook, Github etc): benwinding/react-admin-firebase
- Supabase: marmelab/ra-supabase.
Beyond ready-to-use providers, you may find help in these third-party tutorials about integrating more authentication backends:
- Auth0: spintech-software/react-admin-auth0-example
- Azure Active Directory: victorp13/react-admin-msal
- Loopback: appsmith dev.to tutorial
- OpenID Connect (OIDC): marmelab/ra-example-oauth
If you have released a reusable authProvider, or a tutorial for another auth backend, please open a PR to add it to this list!
Authentication
Let’s see when react-admin calls the authProvider, and how customize it depending on your authentication strategy and backend.
Login Configuration
Once an admin has an authProvider, react-admin enables a new page on the /login route, which displays a login form asking for a username and password.
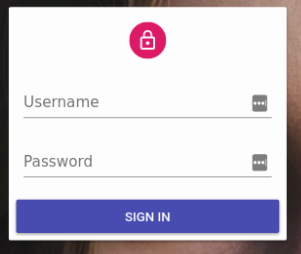
Upon submission, this form calls the authProvider.login({ username, password }) method. React-admin expects this method to return a resolved Promise if the credentials are correct, and a rejected Promise if they’re not.
For instance, to query an authentication route via HTTPS and store the credentials (a token) in local storage, configure the authProvider as follows:
// in src/authProvider.js
const authProvider = {
    login: ({ username, password }) =>  {
        const request = new Request('https://mydomain.com/authenticate', {
            method: 'POST',
            body: JSON.stringify({ username, password }),
            headers: new Headers({ 'Content-Type': 'application/json' }),
        });
        return fetch(request)
            .then(response => {
                if (response.status < 200 || response.status >= 300) {
                    throw new Error(response.statusText);
                }
                return response.json();
            })
            .then(auth => {
                localStorage.setItem('auth', JSON.stringify(auth));
            })
            .catch(() => {
                throw new Error('Network error')
            });
    },
    checkAuth: () => {
        // Required for the authentication to work
        return Promise.resolve();
    },
    getPermissions: () => {
        // Required for the authentication to work
        return Promise.resolve();
    },
    // ...
};

export default authProvider;
Once the promise resolves, the login form redirects to the previous page, or to the admin index if the user just arrived.
Tip: It’s a good idea to store credentials in localStorage, as in this example, to avoid reconnection when opening a new browser tab. But this makes your application open to XSS attacks, so you’d better double down on security, and add an httpOnly cookie on the server side, too.
If the login fails, authProvider.login() should return a rejected Promise with an Error object. React-admin displays the Error message to the user in a notification.
Sending Credentials To The API
Now the user has logged in, you can use their credentials in the dataProvider to communicate with the data API. As explained in the Data providers documentation, simpleRestProvider and jsonServerProvider take an httpClient as second parameter. That’s the place where you can change request headers, cookies, etc.
For instance, to pass the token obtained during login as an Authorization header, configure the Data Provider as follows:
import { fetchUtils, Admin, Resource } from 'react-admin';
import simpleRestProvider from 'ra-data-simple-rest';

const httpClient = (url, options = {}) => {
    if (!options.headers) {
        options.headers = new Headers({ Accept: 'application/json' });
    }
    const { token } = JSON.parse(localStorage.getItem('auth'));
    options.headers.set('Authorization', `Bearer ${token}`);
    return fetchUtils.fetchJson(url, options);
};
const dataProvider = simpleRestProvider('http://localhost:3000', httpClient);

const App = () => (
    <Admin dataProvider={dataProvider} authProvider={authProvider}>
        ...
    </Admin>
);
Now the admin is secured: The user can be authenticated and use their credentials to communicate with a secure API.
If you have a custom REST client, don’t forget to add credentials yourself.
Catching Authentication Errors On The API
When the user credentials are missing or become invalid, a secure API usually answers to the dataProvider with an HTTP error code 401 or 403.
Fortunately, each time the dataProvider returns an error, react-admin calls the authProvider.checkError() method. If it returns a rejected promise, react-admin calls the authProvider.logout() method immediately, and asks the user to log in again.
So it’s up to you to decide which HTTP status codes should let the user continue (by returning a resolved promise) or log them out (by returning a rejected promise).
For instance, to log the user out for both 401 and 403 codes:
// in src/authProvider.js
export default {
    login: ({ username, password }) => { /* ... */ },
    checkError: (error) => {
        const status = error.status;
        if (status === 401 || status === 403) {
            localStorage.removeItem('auth');
            return Promise.reject();
        }
        // other error code (404, 500, etc): no need to log out
        return Promise.resolve();
    },
    // ...
};
When authProvider.checkError() returns a rejected Promise, react-admin redirects to the /login page, or to the error.redirectTo url. That means you can override the default redirection as follows:
// in src/authProvider.js
export default {
    login: ({ username, password }) => { /* ... */ },
    checkError: (error) => {
        const status = error.status;
        if (status === 401 || status === 403) {
            localStorage.removeItem('auth');
            return Promise.reject({ redirectTo: '/credentials-required' });
        }
        // other error code (404, 500, etc): no need to log out
        return Promise.resolve();
    },
    // ...
};
It’s possible to not log the user out, and to instead redirect them. You can do this by passing error.logoutUser = false to the Promise.reject along with an error.redirectTo url.
// in src/authProvider.js
export default {
    login: ({ username, password }) => { /* ... */ },
    checkError: (error) => {
        const status = error.status;
        if (status === 401 || status === 403) {
            return Promise.reject({ redirectTo: '/unauthorized', logoutUser: false });
        }
        // other error code (404, 500, etc): no need to log out
        return Promise.resolve();
    },
    // ...
};
When authProvider.checkError() returns a rejected Promise, react-admin displays a notification to the end user, unless the error.message is false. That means you can disable the notification on error as follows:
// in src/authProvider.js
export default {
    login: ({ username, password }) => { /* ... */ },
    checkError: (error) => {
        const status = error.status;
        if (status === 401 || status === 403) {
            localStorage.removeItem('auth');
            return Promise.reject({ message: false });
        }
        // other error code (404, 500, etc): no need to log out
        return Promise.resolve();
    },
    // ...
};
Checking Credentials During Navigation
Redirecting to the login page whenever a REST response uses a 401 status code is usually not enough. React-admin keeps data on the client side, and could briefly display stale data while contacting the server - even after the credentials are no longer valid.
Fortunately, each time the user navigates to a list, edit, create or show page, react-admin calls the authProvider.checkAuth() method. If this method returns a rejected Promise, react-admin calls authProvider.logout() and redirects the user to the login page. So it’s the ideal place to make sure the credentials are still valid.
For instance, to check for the existence of the authentication data in local storage:
// in src/authProvider.js
export default {
    login: ({ username, password }) => { /* ... */ },
    checkError: (error) => { /* ... */ },
    checkAuth: () => localStorage.getItem('auth')
        ? Promise.resolve()
        : Promise.reject(),
    // ...
};
If the promise is rejected, react-admin redirects by default to the /login page. You can override where to redirect the user in checkAuth(), by rejecting an object with a redirectTo property:
// in src/authProvider.js
export default {
    login: ({ username, password }) => { /* ... */ },
    checkError: (error) => { /* ... */ },
    checkAuth: () => localStorage.getItem('auth')
        ? Promise.resolve()
        : Promise.reject({ redirectTo: '/no-access' }),
    // ...
}
Tip: If both authProvider.checkAuth() and authProvider.logout() return a redirect URL, the one from authProvider.checkAuth() takes precedence.
If the promise is rejected, react-admin displays a notification to the end user. You can customize this message by rejecting an error with a message property:
// in src/authProvider.js
export default {
    login: ({ username, password }) => { /* ... */ },
    checkError: (error) => { /* ... */ },
    checkAuth: () => localStorage.getItem('auth')
        ? Promise.resolve()
        : Promise.reject({ message: 'login.required' }), // react-admin passes the error message to the translation layer
    // ...
}
You can also disable this notification completely by rejecting an error with a message with a false value:
// in src/authProvider.js
export default {
    login: ({ username, password }) => { /* ... */ },
    checkError: (error) => { /* ... */ },
    checkAuth: () => localStorage.getItem('auth')
        ? Promise.resolve()
        : Promise.reject({ message: false }),
    // ...
}
Logout Configuration
If you enable authentication, react-admin adds a logout button in the user menu in the top bar (or in the sliding menu on mobile). When the user clicks on the logout button, this calls the authProvider.logout() method, and removes potentially sensitive data from the Redux store. Then the user gets redirected to the login page. The two previous sections also illustrated that react-admin can call authProvider.logout() itself, when the API returns a 403 error or when the local credentials expire.
It’s the responsibility of the authProvider.logout() method to clean up the current authentication data. For instance, if the authentication was a token stored in local storage, here is the code to remove it:
// in src/authProvider.js
export default {
    login: ({ username, password }) => { /* ... */ },
    checkError: (error) => { /* ... */ },
    checkAuth: () => { /* ... */ },
    logout: () => {
        localStorage.removeItem('auth');
        return Promise.resolve();
    },
    // ...
};
The authProvider.logout() method is also a good place to notify the authentication backend that the user credentials are no longer valid after logout.
After logout, react-admin redirects the user to the string returned by authProvider.logout() - or to the /login url if the method returns nothing. You can customize the redirection url by returning a route string, or false to disable redirection after logout.
// in src/authProvider.js
export default {
    login: ({ username, password }) => { /* ... */ },
    checkError: (error) => { /* ... */ },
    checkAuth: () => { /* ... */ },
    logout: () => {
        localStorage.removeItem('auth');
        return Promise.resolve('/my-custom-login');
    },
    // ...
};
User Identity
React-admin can display the current user name and avatar on the top right side of the screen. To enable this feature, implement the authProvider.getIdentity() method:
// in src/authProvider.js
const authProvider = {
    login: ({ username, password }) => { /* ... */ },
    checkError: (error) => { /* ... */ },
    checkAuth: () => { /* ... */ },
    logout: () => { /* ... */ },
    getIdentity: () => {
        try {
            const { id, fullName, avatar } = JSON.parse(localStorage.getItem('auth'));
            return Promise.resolve({ id, fullName, avatar });
        } catch (error) {
            return Promise.reject(error);
        }
    }
    // ...
};

export default authProvider;
React-admin uses the fullName and the avatar (an image source, or a data-uri) in the App Bar:

Tip: You can use the id field to identify the current user in your code, by calling the useGetIdentity hook:
import { useGetIdentity, useGetOne } from 'react-admin';

const PostDetail = ({ id }) => {
    const { data: post, loading: postLoading } = useGetOne('posts', id);
    const { identity, loading: identityLoading } = useGetIdentity();
    if (postLoading || identityLoading) return <>Loading...</>;
    if (!post.lockedBy || post.lockedBy === identity.id) {
        // post isn't locked, or is locked by me
        return <PostEdit post={post} />
    } else {
        // post is locked by someone else and cannot be edited
        return <PostShow post={post} />
    }
}
Authorization
Some applications may require fine-grained permissions to enable or disable access to certain features depending on user permissions. Since there are many possible strategies (single role, multiple roles or rights, ACLs, etc.), react-admin delegates the permission logic to authProvider.getPermissions().
By default, a react-admin app doesn’t require any special permission on list, create, edit, and show pages. However, react-admin calls the authProvider.getPermissions() method before navigating to these pages, and passes the result to the main page component (<List>, <Edit>, etc.). You can then tweak the content of these pages based on permissions.
Additionally, in custom pages, you can call the usePermissions() hook to grab the user permissions.
User Permissions
React-admin calls the authProvider.getPermissions() whenever it needs the user permissions. These permissions can take the shape you want:
- a string (e.g.
'admin'), - an array of roles (e.g.
['post_editor', 'comment_moderator', 'super_admin']) - an object with fine-grained permissions (e.g.
{ postList: { read: true, write: false, delete: false } }) - or even a function
The format of permissions is free because react-admin never actually uses the permissions itself. It’s up to you to use them in your code to hide or display content, redirect the user to another page, or display warnings.
Following is an example where the authProvider stores the user’s permissions in localStorage upon authentication, and returns these permissions when called with getPermissions:
// in src/authProvider.js
import decodeJwt from 'jwt-decode';

export default {
    login: ({ username, password }) => {
        const request = new Request('https://mydomain.com/authenticate', {
            method: 'POST',
            body: JSON.stringify({ username, password }),
            headers: new Headers({ 'Content-Type': 'application/json' }),
        });
        return fetch(request)
            .then(response => {
                if (response.status < 200 || response.status >= 300) {
                    throw new Error(response.statusText);
                }
                return response.json();
            })
            .then(({ token }) => {
                const decodedToken = decodeJwt(token);
                localStorage.setItem('token', token);
                localStorage.setItem('permissions', decodedToken.permissions);
            });
    },
    checkError: (error) => { /* ... */ },
    checkAuth: () => {
        return localStorage.getItem('token') ? Promise.resolve() : Promise.reject();
    },
    logout: () => {
        localStorage.removeItem('token');
        localStorage.removeItem('permissions');
        return Promise.resolve();
    },
    getIdentity: () => { /* ... */ },
    getPermissions: () => {
        const role = localStorage.getItem('permissions');
        return role ? Promise.resolve(role) : Promise.reject();
    }
};
Getting User Permissions In CRUD Pages
By default, react-admin calls authProvider.getPermissions() for each resource route, and passes the permissions to the list, edit, create, and show view components. So the <List>, <Edit>, <Create> and <Show> components all receive a permissions prop containing what authProvider.getPermissions() returned.
Here is an example of a Create view with a conditional Input based on permissions:
export const UserCreate = ({ permissions, ...props }) =>
    <Create {...props}>
        <SimpleForm
            defaultValue={{ role: 'user' }}
        >
            <TextInput source="name" validate={[required()]} />
            {permissions === 'admin' &&
                <TextInput source="role" validate={[required()]} />}
        </SimpleForm>
    </Create>;
Getting User Permissions In Custom Pages
In custom pages, react-admin doesn’t call authProvider.getPermissions(). It’s up to you to call it yourself, using the usePermissions() hook:
// in src/MyPage.js
import * as React from "react";
import Card from '@material-ui/core/Card';
import CardContent from '@material-ui/core/CardContent';
import { usePermissions } from 'react-admin';

const MyPage = () => {
    const { permissions } = usePermissions();
    return (
        <Card>
            <CardContent>Lorem ipsum sic dolor amet...</CardContent>
            {permissions === 'admin' &&
                <CardContent>Sensitive data</CardContent>
            }
        </Card>
    );
}
Role-Based Access Control (RBAC)
React-admin Enterprise Edition contains the ra-rbac module , which adds fine-grained permissions to your admin.
You can define permissions for pages, fields, buttons, etc. in the authProvider. This means this RBAC system can use any data source you want (even an ActiveDirectory).
For instance, the above demo uses the following set of permissions:
const roles = {
    accountant: [
        { action: ['list', 'show'], resource: 'products' },
        { action: 'read', resource: 'products.*' },
        { type: 'deny', action: 'read', resource: 'products.description' },
        { action: 'list', resource: 'categories' },
        { action: 'read', resource: 'categories.*' },
        { action: ['list', 'show'], resource: 'customers' },
        { action: 'read', resource: 'customers.*' },
        { action: '*', resource: 'invoices' },
    ],
    contentEditor: [
        {
            action: ['list', 'create', 'edit', 'delete', 'export'],
            resource: 'products',
        },
        { action: 'read', resource: 'products.*' },
        { type: 'deny', action: 'read', resource: 'products.stock' },
        { type: 'deny', action: 'read', resource: 'products.sales' },
        { action: 'write', resource: 'products.*' },
        { type: 'deny', action: 'write', resource: 'products.stock' },
        { type: 'deny', action: 'write', resource: 'products.sales' },
        { action: 'list', resource: 'categories' },
        { action: ['list', 'edit'], resource: 'customers' },
        { action: ['list', 'edit'], resource: 'reviews' },
    ],
    stockManager: [
        { action: ['list', 'edit', 'export'], resource: 'products' },
        { action: 'read', resource: 'products.*' },
        {
            type: 'deny',
            action: 'read',
            resource: 'products.description',
        },
        { action: 'write', resource: 'products.stock' },
        { action: 'write', resource: 'products.sales' },
        { action: 'list', resource: 'categories' },
    ],
    administrator: [{ action: '*', resource: '*' }],
};
Ra-rbac lets you add fine-grained permissions (almost) without touching your application code (you don’t need to add if blocks everywhere).
Check the module documentation to learn more.
Building Your Own Auth Provider
Here is the interface react-admin expect authProvider objects to implement.
Tip: If you’re a TypeScript user, you can check that your authProvider is correct at compile-time using the AuthProvider type:
import { AuthProvider } from 'react-admin';

const authProvider = {
    // authentication
    login: ({ username, password }) => { /* ... */ },
    checkError: (error) => { /* ... */ },
    checkAuth: () => { /* ... */ },
    logout: () => { /* ... */ },
    getIdentity: () => { /* ... */ },
    // authorization
    getPermissions: (params) => { /* ... */ },
}
Request Format
React-admin calls the authProvider methods with the following params:
| Method | Usage | Parameters format |
|---|---|---|
login |
Log a user in | Object whatever fields the login form contains |
checkError |
Check if a dataProvider error is an authentication error | { message: string, status: number, body: Object } the error returned by the dataProvider |
checkAuth |
Check credentials before moving to a new route | Object whatever params passed to useCheckAuth() - empty for react-admin default routes |
logout |
Log a user out | |
getIdentity |
Get the current user identity | |
getPermissions |
Get the current user credentials | Object whatever params passed to usePermissions() - empty for react-admin default routes |
Response Format
authProvider methods must return a Promise. In case of success, the Promise should resolve to the following value:
| Method | Resolve if | Response format |
|---|---|---|
login |
Login credentials were accepted | void |
checkError |
Error is not an auth error | void |
checkAuth |
User is authenticated | void |
logout |
Auth backend acknowledged logout | string | false | void route to redirect to after logout, defaults to /login |
getIdentity |
Auth backend returned identity | { id: string | number, fullName?: string, avatar?: string } |
getPermissions |
Auth backend returned permissions | Object | Array free format - the response will be returned when usePermissions() is called |
Error Format
When the auth backend returns an error, the Auth Provider should return a rejected Promise, with the following value:
| Method | Reject if | Error format |
|---|---|---|
login |
Login credentials weren’t accepted | string | { message?: string } error message to display |
checkError |
Error is an auth error | void | { redirectTo?: string, message?: boolean } route to redirect to after logout, and whether to disable error notification |
checkAuth |
User is not authenticated | void | { redirectTo?: string, message?: string } route to redirect to after logout, message to notify the user |
logout |
Auth backend failed to log the user out | void |
getIdentity |
Auth backend failed to return identity | Object free format - returned as error when useGetIdentity() is called |
getPermissions |
Auth backend failed to return permissions | Object free format - returned as error when usePermissions() is called |
Hooks
useLogin() Hook
This hook returns a callback allowing to call authProvider.login(), so it’s used in Login forms.
For instance, here is how to build a custom Login page based on email rather than login for authentication:
// in src/MyLoginPage.js
import * as React from 'react';
import { useState } from 'react';
import { useLogin, useNotify, Notification, defaultTheme } from 'react-admin';
import { ThemeProvider } from '@material-ui/styles';
import { createTheme } from '@material-ui/core/styles';

const MyLoginPage = ({ theme }) => {
    const [email, setEmail] = useState('');
    const [password, setPassword] = useState('');
    const login = useLogin();
    const notify = useNotify();
    const submit = e => {
        e.preventDefault();
        // will call authProvider.login({ email, password })
        login({ email, password }).catch(() =>
            notify('Invalid email or password')
        );
    };

    return (
        <ThemeProvider theme={createTheme(defaultTheme)}>
            <form onSubmit={submit}>
                <input
                    name="email"
                    type="email"
                    value={email}
                    onChange={e => setEmail(e.target.value)}
                />
                <input
                    name="password"
                    type="password"
                    value={password}
                    onChange={e => setPassword(e.target.value)}
                />
            </form>
            <Notification />
        </ThemeProvider>
    );
};

export default MyLoginPage;
Then pass the custom Login form to <Admin>, as follows:
// in src/App.js
import * as React from "react";
import { Admin } from 'react-admin';

import MyLoginPage from './MyLoginPage';

const App = () => (
    <Admin loginPage={MyLoginPage} authProvider={authProvider}>
    ...
    </Admin>
);
useAuthenticated() Hook
If you add custom pages, or if you create an admin app from scratch, you may need to secure access to pages manually. That’s the purpose of the useAuthenticated() hook, which calls the authProvider.checkAuth() method on mount, and redirects to login if it returns a rejected Promise.
// in src/MyPage.js
import { useAuthenticated } from 'react-admin';

const MyPage = () => {
    useAuthenticated(); // redirects to login if not authenticated
    return (
        <div>
            ...
        </div>
    )
};

export default MyPage;
If you call useAuthenticated() with a parameter, this parameter is passed to the authProvider call as second parameter. that allows you to add authentication logic depending on the context of the call:
const MyPage = () => {
    useAuthenticated({ foo: 'bar' }); // calls authProvider.checkAuth({ foo: 'bar' })
    return (
        <div>
            ...
        </div>
    )
};
The useAuthenticated hook is optimistic: it doesn’t block rendering during the authProvider call. In the above example, the MyPage component renders even before getting the response from the authProvider. If the call returns a rejected promise, the hook redirects to the login page, but the user may have seen the content of the MyPage component for a brief moment.
useAuthState() Hook
To avoid rendering a component, and to force waiting for the authProvider response, use useAuthState() instead of useAuthenticated(). It calls authProvider.checkAuth() on mount and returns an object with 3 properties:
loading:truejust after mount, while theauthProvideris being called.falseonce theauthProviderhas answered.loaded: the opposite ofloading.authenticated:truewhile loading. thentrueorfalsedepending on theauthProviderresponse.
You can render different content depending on the authenticated status.
import { useAuthState, Loading } from 'react-admin';

const MyPage = () => {
    const { loading, authenticated } = useAuthState();
    if (loading) {
        return <Loading />;
    }
    if (authenticated) {
        return <AuthenticatedContent />;
    }
    return <AnonymousContent />;
};
useLogout() Hook
Just like useLogin(), useLogout() returns a callback that you can use to call authProvider.logout(). Use it to build a custom Logout button, like the following:
// in src/MyLogoutButton.js
import * as React from 'react';
import { forwardRef } from 'react';
import { useLogout } from 'react-admin';
import MenuItem from '@material-ui/core/MenuItem';
import ExitIcon from '@material-ui/icons/PowerSettingsNew';

const MyLogoutButton = forwardRef((props, ref) => {
    const logout = useLogout();
    const handleClick = () => logout();
    return (
        <MenuItem
            onClick={handleClick}
            ref={ref}
        >
            <ExitIcon /> Logout
        </MenuItem>
    );
});

export default MyLogoutButton;
Then pass the Logout button to the <Admin> component, as follows:
// in src/App.js
import * as React from "react";
import { Admin } from 'react-admin';

import MyLogoutButton from './MyLogoutButton';

const App = () => (
    <Admin logoutButton={MyLogoutButton} authProvider={authProvider}>
    ...
    </Admin>
);
useGetIdentity() Hook
You may want to use the current user name, avatar, or id in your code. for that purpose, call the useGetIdentity() hook, which calls authProvider.getIdentity() on mount.
Here is an example Edit component, which falls back to a Show component is the record is locked for edition by another user:
import { useGetIdentity, useGetOne } from 'react-admin';

const PostDetail = ({ id }) => {
    const { data: post, loading: postLoading } = useGetOne('posts', id);
    const { identity, loading: identityLoading } = useGetIdentity();
    if (postLoading || identityLoading) return <>Loading...</>;
    if (!post.lockedBy || post.lockedBy === identity.id) {
        // post isn't locked, or is locked by me
        return <PostEdit post={post} />
    } else {
        // post is locked by someone else and cannot be edited
        return <PostShow post={post} />
    }
}
usePermissions() Hook
You might want to check user permissions inside a custom page. That’s the purpose of the usePermissions() hook, which calls the authProvider.getPermissions() method on mount, and returns the result when available:
// in src/MyPage.js
import * as React from "react";
import Card from '@material-ui/core/Card';
import CardContent from '@material-ui/core/CardContent';
import { usePermissions } from 'react-admin';

const MyPage = () => {
    const { loading, permissions } = usePermissions();
    return loading
        ? (<div>Waiting for permissions...</div>)
        : (
            <Card>
                <CardContent>Lorem ipsum sic dolor amet...</CardContent>
                {permissions === 'admin' &&
                    <CardContent>Sensitive data</CardContent>
                }
            </Card>
        );
}

export default MyPage;

// in src/customRoutes.js
import * as React from "react";
import { Route } from 'react-router-dom';
import MyPage from './MyPage';

export default [
    <Route exact path="/baz" component={MyPage} />,
];
The usePermissions hook is optimistic: it doesn’t block rendering during the authProvider call. In the above example, the MyPage component renders even before getting the response from the authProvider. To avoid a blink in the interface while the authProvider is answering, use the loaded return value of usePermissions():
const MyPage = () => {
    const { loaded, permissions } = usePermissions();
    return loaded ? (
        <Card>
            <CardContent>Lorem ipsum sic dolor amet...</CardContent>
            {permissions === 'admin' &&
                <CardContent>Sensitive data</CardContent>
            }
        </Card>
    ) : null;
}
useGetPermissions() Hook
React-admin also exposes a useGetPermissions() hook, returning a callback to call authProvider.getPermissions() on demand. In practice, you seldom need this hook - usePermissions covers most authorization needs, and manages the loading state for you.
Here is an example usage:
 import { useGetPermissions } from 'react-admin';

 const Roles = () => {
     const [permissions, setPermissions] = useState([]);
     const getPermissions = useGetPermissions();
     useEffect(() => {
         getPermissions().then(permissions => setPermissions(permissions))
     }, [])
     return (
         <ul>
             {permissions.map((permission, key) => (
                 <li key={key}>{permission}</li>
             ))}
         </ul>
     );
 }
Components
<Authenticated> Component
The <Authenticated> component calls the useAuthenticated() hook, and renders its child component - unless the authentication check fails. Use it as an alternative to the useAuthenticated() hook when you can’t use a hook, e.g. inside a Route render function:
import { Authenticated } from 'react-admin';

const CustomRoutes = [
    <Route path="/foo" render={() =>
        <Authenticated>
            <Foo />
        </Authenticated>
    } />
];
const App = () => (
    <Admin customRoutes={customRoutes}>
        ...
    </Admin>
);
Recipes
Customizing The Login and Logout Components
Using authProvider is enough to implement a full-featured authorization system if the authentication relies on a username and password.
But what if you want to use an email instead of a username? What if you want to use a Single-Sign-On (SSO) with a third-party authentication service? What if you want to use two-factor authentication?
For all these cases, it’s up to you to implement your own LoginPage component, which will be displayed under the /login route instead of the default username/password form, and your own LogoutButton component, which will be displayed in the sidebar. Pass both these components to the <Admin> component:
// in src/App.js
import * as React from "react";
import { Admin } from 'react-admin';

import MyLoginPage from './MyLoginPage';
import MyLogoutButton from './MyLogoutButton';

const App = () => (
    <Admin loginPage={MyLoginPage} logoutButton={MyLogoutButton} authProvider={authProvider}>
    ...
    </Admin>
);
Use the useLogin and useLogout hooks in your custom LoginPage and LogoutButton components.
// in src/MyLoginPage.js
import * as React from 'react';
import { useState } from 'react';
import { useLogin, useNotify, Notification, defaultTheme } from 'react-admin';
import { ThemeProvider } from '@material-ui/styles';
import { createTheme } from '@material-ui/core/styles';

const MyLoginPage = ({ theme }) => {
    const [email, setEmail] = useState('');
    const [password, setPassword] = useState('');
    const login = useLogin();
    const notify = useNotify();
    const submit = e => {
        e.preventDefault();
        login({ email, password }).catch(() =>
            notify('Invalid email or password')
        );
    };

    return (
        <ThemeProvider theme={createTheme(defaultTheme)}>
            <form onSubmit={submit}>
                <input
                    name="email"
                    type="email"
                    value={email}
                    onChange={e => setEmail(e.target.value)}
                />
                <input
                    name="password"
                    type="password"
                    value={password}
                    onChange={e => setPassword(e.target.value)}
                />
            </form>
            <Notification />
        </ThemeProvider>
    );
};

export default MyLoginPage;

// in src/MyLogoutButton.js
import * as React from 'react';
import { forwardRef } from 'react';
import { useLogout } from 'react-admin';
import MenuItem from '@material-ui/core/MenuItem';
import ExitIcon from '@material-ui/icons/PowerSettingsNew';

const MyLogoutButton = forwardRef((props, ref) => {
    const logout = useLogout();
    const handleClick = () => logout();
    return (
        <MenuItem
            onClick={handleClick}
            ref={ref}
        >
            <ExitIcon /> Logout
        </MenuItem>
    );
});

export default MyLogoutButton;
Tip: By default, react-admin redirects the user to ‘/login’ after they log out. This can be changed by passing the url to redirect to as parameter to the logout() function:
// in src/MyLogoutButton.js
// ...
-   const handleClick = () => logout();
+   const handleClick = () => logout('/custom-login');
Restricting Access to Resources or Views
Permissions can be useful to restrict access to resources or their views. To do so, you must use a function as the <Admin> only child. React-admin will call this function with the permissions returned by the authProvider.
<Admin
    dataProvider={dataProvider}
    authProvider={authProvider}
>
    {permissions => [
        // Restrict access to the edit and remove views to admin only
        <Resource
            name="customers"
            list={VisitorList}
            edit={permissions === 'admin' ? VisitorEdit : null}
            icon={VisitorIcon}
        />,
        // Only include the categories resource for admin users
        permissions === 'admin'
            ? <Resource name="categories" list={CategoryList} edit={CategoryEdit} icon={CategoryIcon} />
            : null,
    ]}
</Admin>
Note that the function returns an array of React elements. This is required to avoid having to wrap them in a container element which would prevent the Admin from working.
Tip: Even if that’s possible, be careful when completely excluding a resource (like with the categories resource in this example) as it will prevent you to reference this resource in the other resource views, too.
Restricting Access to Fields and Inputs
You might want to display some fields or inputs only to users with specific permissions. By default, react-admin calls the authProvider for permissions for each resource routes, and passes them to the list, edit, create, and show components.
Here is an example of a Create view with a conditional Input based on permissions:
export const UserCreate = ({ permissions, ...props }) =>
    <Create {...props}>
        <SimpleForm
            defaultValue={{ role: 'user' }}
        >
            <TextInput source="name" validate={[required()]} />
            {permissions === 'admin' &&
                <TextInput source="role" validate={[required()]} />}
        </SimpleForm>
    </Create>;
This also works inside an Edit view with a TabbedForm, and you can even hide a FormTab completely:
export const UserEdit = ({ permissions, ...props }) =>
    <Edit title={<UserTitle />} {...props}>
        <TabbedForm defaultValue={{ role: 'user' }}>
            <FormTab label="user.form.summary">
                {permissions === 'admin' && <TextInput disabled source="id" />}
                <TextInput source="name" validate={required()} />
            </FormTab>
            {permissions === 'admin' &&
                <FormTab label="user.form.security">
                    <TextInput source="role" validate={required()} />
                </FormTab>}
        </TabbedForm>
    </Edit>;
What about the List view, the Datagrid, SimpleList? It works there, too. And in the next example, the permissions prop is passed down to a custom filters selector.
import * as React from 'react';
import { List, Datagrid, ShowButton, TextField, TextInput }  from 'react-admin';

const getUserFilters = (permissions) => ([
    <TextInput label="user.list.search" source="q" alwaysOn />,
    <TextInput source="name" />,
    permissions === 'admin' ? <TextInput source="role" /> : null,
].filter(filter => filter !== null));

export const UserList = ({ permissions, ...props }) =>
    <List {...props} filters={getUserFilters(permissions)}>
        <Datagrid>
            <TextField source="id" />
            <TextField source="name" />
            {permissions === 'admin' && <TextField source="role" />}
            {permissions === 'admin' && <EditButton />}
            <ShowButton />
        </Datagrid>
    </List>;
Restricting Access to the Dashboard
React-admin injects the permissions into the component provided as a dashboard, too:
// in src/Dashboard.js
import * as React from 'react';
import Card from '@material-ui/core/Card';
import CardContent from '@material-ui/core/CardContent';
import { Title } from 'react-admin';

export default ({ permissions }) => (
    <Card>
        <Title title="Dashboard" />
        <CardContent>Lorem ipsum sic dolor amet...</CardContent>
        {permissions === 'admin'
            ? <CardContent>Sensitive data</CardContent>
            : null
        }
    </Card>
);
Restricting Access to a Menu
What if you want to check the permissions inside a custom menu? Much like getting permissions inside a custom page, you’ll have to use the usePermissions hook:
// in src/myMenu.js
import * as React from "react";
import { MenuItemLink, usePermissions } from 'react-admin';

const Menu = ({ onMenuClick, logout }) => {
    const { permissions } = usePermissions();
    return (
        <div>
            <MenuItemLink to="/posts" primaryText="Posts" onClick={onMenuClick} />
            <MenuItemLink to="/comments" primaryText="Comments" onClick={onMenuClick} />
            {permissions === 'admin' &&
                <MenuItemLink to="/custom-route" primaryText="Miscellaneous" onClick={onMenuClick} />
            }
            {logout}
        </div>
    );
}