
Authorization
Once a user is authenticated, your application may need to check if the user has the right to access a specific resource or perform a particular action. React-admin provides two ways to do so:
- Access control relies on
authProvider.canAccess({ resource, action }), which returns whether the user can access the given resource and action. - Permissions rely on
authProvider.getPermissions(), which returns a list of permissions that your components can inspect.
Depending on your needs, you can implement one or the other or both. We recommend Access Control because it allows you to put the authorization logic in the authProvider rather than in the code.
Access Control
With Access Control, the authProvideris responsible for checking if the user can access a specific resource or perform a particular action. This flexibility allows you to implement various authorization strategies, such as:
- Role-Based Access Control (RBAC)
- Attribute-Based Access Control (ABAC)
- Access Control List (ACL).
Use the authProvider to integrate react-admin with popular authorization solutions like Okta, Casbin, Cerbos, and more.
authProvider.canAccess()
To use Access Control, the authProvider must implement a canAccess method with the following signature:
type CanAccessParams = {
    action: string;
    resource: string;
    record?: any;
};

async function canAccess(params: CanAccessParams): Promise<boolean>;
React components will use this method to determine if the current user can perform an action (e.g., “read”, “update”, “delete”) on a particular resource (e.g., “posts”, “posts.title”, etc.) and optionally on a specific record (to implement record-level permissions).
For example, let’s assume that the application receives a list of authorized resources on login. The authProvider would look like this:
const authProvider = {
    async login({ username, password }) {
        // ...
        const permissions = await fetchPermissions();
        // permissions look like
        // ['posts', 'comments', 'users']
        localStorage.setItem('permissions', JSON.stringify(permissions));
    },
    async logout() {
        // ...
        localStorage.removeItem('permissions');
    },
    async canAccess({ resource }) {
        const permissions = JSON.parse(localStorage.getItem('permissions'));
        return permissions.some(p => p.resource === resource);
    },
};
canAccess can be asynchronous, so if the authProvider needs to fetch the permissions from a server or refresh a token, it can return a promise.
Tip: React-admin calls dataProvider.canAccess() before rendering all page components, so if the call is slow, user navigation may be delayed. If you can, fetch user permissions on login and store them locally to keep access control fast.
Access Control Strategies
It’s your responsibility to implement the canAccess method in the authProvider. You can implement any access control strategy you want.
For example, if the auth backend returns a role at login (‘admin’, ‘user’, reader’), you can implement a simple access control strategy as follows:
const accessControlStrategies = {
    admin: ({ resource, action }) => {
        return true;
    },
    user: ({ resource, action }) => {
        return resource !== 'users';
    },
    reader: ({ resource, action }) => {
        return resource !== 'users' && action === 'read';
    },
}

const authProvider = {
    async login({ username, password }) {
        // ...
        const user = await authBackend.login({ username, password });
        // role looks like 'admin', 'user', or reader'
        localStorage.setItem('role', user.role);
    },
    async logout() {
        // ...
        localStorage.removeItem('role');
    },
    async canAccess({ resource, action }) {
        const role = JSON.parse(localStorage.getItem('role'));
        return accessControlStrategies[role]({ resource, action });
    },
};
If the auth backend returns a list of permissions at login, you can implement a more granular access control strategy.
const authProvider= {
    async login({ username, password }) {
        // ...
        const user = await authBackend.login({ username, password });
        // permissions look like
        // [
        //     { action: "list", resource: "companies" },
        //     { action: "create", resource: "companies" },
        //     { action: "edit", resource: "companies" },
        //     { action: "show", resource: "companies" },
        //     { action: "delete", resource: "companies" },
        //     { action: "list", resource: "users" },
        //     { action: "create", resource: "users" },
        //     { action: "edit", resource: "users" },
        //     { action: "show", resource: "users" },
        //     { action: "delete", resource: "users" },
        // ];
        localStorage.setItem('permissions', JSON.stringify(user.permissions));
    },
    async logout() {
        // ...
        localStorage.removeItem('permissions');
    },
    async canAccess({ resource, action, record }) {
        const permissions = JSON.parse(localStorage.getItem('permissions'));
        return permissions.some(p =>
            p.resource === resource && p.action === action
        );
    },
};

const { canAccess } = useCanAccess({ action: 'list', resource: 'companies' }); // true
Tip: Building granular access control manually can be tedious. The RBAC module provides built-in primitives for advanced access control with roles, groups, wildcard permissions, and explicit deny.
Built-In Access Control
The page components (<List>, <Create>, <Edit>, and <Show>) have built-in access control. Before rendering them, react-admin calls authProvider.canAccess() with the appropriate action and resource parameters.
<Resource
    name="posts"
    // available if canAccess({ action: 'list', resource: 'posts' }) returns true
    list={PostList}
    // available if canAccess({ action: 'create', resource: 'posts' }) returns true
    create={PostCreate}
    // available if canAccess({ action: 'edit', resource: 'posts' }) returns true
    edit={PostEdit}
    // available if canAccess({ action: 'show', resource: 'posts' }) returns true
    show={PostShow}
/>
If the authProvider doesn’t implement the canAccess method, react-admin assumes the user can access all pages.
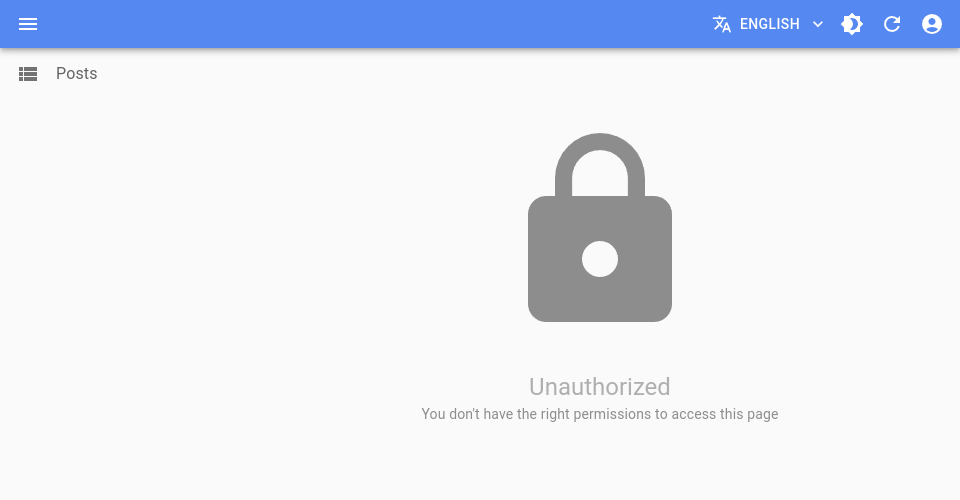
If the current user tries to access a page they don’t have access to, they are redirected to an “Access Denied” page. You can customize this page by adding a custom route on the /accessDenied path.
If the authProvider.canAccess() method returns an error, the user is redirected to an “Access Control Error” page. You can customize this page by adding a custom route on the /accessControlError path.
The action buttons (<EditButton>, <CreateButton>, <DeleteButton>, <ShowButton>, and <ListButton>) also have built-in access control. They are only displayed if the user can access the corresponding action on the resource.
const MyToolbar = () => (
    <Toolbar>
        {/* only displayed if canAccess({ action: 'edit', resource: 'posts' }) returns true */}
        <EditButton />
        {/* only displayed if canAccess({ action: 'create', resource: 'posts' }) returns true */}
        <CreateButton />
        {/* only displayed if canAccess({ action: 'delete', resource: 'posts' }) returns true */}
        <DeleteButton />
        {/* only displayed if canAccess({ action: 'show', resource: 'posts' }) returns true */}
        <ShowButton />
        {/* only displayed if canAccess({ action: 'list', resource: 'posts' }) returns true */}
        <ListButton />
    </Toolbar>
);
The list components (<Datagrid>), show components (<SimpleShowLayout>, <TabbedShowLayout>), and edit components (<SimpleForm>, <Tabbedform>) also support access control provided you use the version from the @react-admin/ra-rbac Enterprise package. Check the RBAC documentation for more information.
useCanAccess
If you need to control access on mount in your own components, use the useCanAccess() hook. Since authProvider.canAccess() is asynchronous, the hook returns an object with an isPending property set to true until the promise resolves. Make sure you don’t use the result until isPending is false.
import { useCanAccess, DeleteButton } from 'react-admin';

const DeleteCommentButton = ({ record }) => {
    const { isPending, error, canAccess } = useCanAccess({
        action: 'delete',
        resource: 'comments',
    });
    if (isPending || error || !canAccess) return null;
    return <DeleteButton resource="comments" record={record} />;
};
Tip: If you need to control access for several resources, use the useCanAccessResources hook, which performs several checks simultaneously.
import { useCanAccessResources, SimpleList } from 'react-admin';

const UserList = () => {
    const { isPending, canAccess } = useCanAccessResources({
        action: 'read',
        resources: ['users.id', 'users.name', 'users.email'],
    });
    if (isPending) {
        return null;
    }
    return (
        <SimpleList
             primaryText={canAccess['users.name'] ? '%{name}' : ''}
             secondaryText={canAccess['users.email'] ? '%{email}' : ''}
             tertiaryText={canAccess['users.id'] ? '%{id}' : ''}
         />
    );
};
<CanAccess>
As an alternative to the useCanAccess() hook, you can use the <CanAccess> component. It calls dataProvider.canAccess() on mount and renders its children only if the user can access the resource and action.
import Stack from '@mui/material/Stack';
import { CanAccess } from 'react-admin';

const CommentsToolbar = ({ record }) => (
    <Stack direction="row" spacing={2}>
        <CanAccess action="approve" resource="comments" record={record}>
            <ApproveCommentButton record={record} />
        </CanAccess>
        <CanAccess action="reject" resource="comments" record={record}>
            <RejectCommentButton record={record} />
        </CanAccess>
        <CanAccess action="delete" resource="comments" record={record}>
            <DeleteCommentButton record={record} />
        </CanAccess>
    </Stack>
);
Custom Routes
By default, there is no authentication or authorization control on custom routes. If you need to restrict access to a custom route, you can use the <CanAccess> component. Remember to check the authentication status before with <Authenticated>:
import { Authenticated, CanAccess, AccessDenied } from 'react-admin';

export const LogsPage = () => (
    <Authenticated>
        <CanAccess resource="logs" action="read" accessDenied={<AccessDenied />}>
            ...
        </CanAccess>
    </Authenticated>
);
Use the <CustomRoutes> component to add custom routes to your admin.
import { Admin, CustomRoutes, Authenticated, CanAccess, AccessDenied, Layout } from 'react-admin';
import { Route } from 'react-router-dom';

import { LogsPage } from './LogsPage';
import { MyMenu } from './MyMenu';

const MyLayout = (props) => <Layout {...props} menu={MyMenu} />;

const App = () => (
    <Admin authProvider={authProvider} layout={MyLayout}>
        <CustomRoutes>
            <Route path="/logs" element={<LogsPage />} />
        </CustomRoutes>
    </Admin>
);
Remember to also wrap your custom menu items with <CanAccess> to hide the menu items if the user doesn’t have access to the resource.
import { Menu, CanAccess } from "react-admin";
import SsidChartIcon from "@mui/icons-material/SsidChart";

export const MyMenu = () => (
    <Menu>
        <Menu.ResourceItems />
        <CanAccess resource="logs" action="read">
            <Menu.Item primaryText="Logs" to="/logs" leftIcon={<SsidChartIcon />} />
        </CanAccess>
    </Menu>
);
Note: You don’t need to use <CanAccess> on the core react-admin page components (<List>, <Create>, <Edit>, <Show>) because they already have built-in access control.
Note: You don’t need to use <Authenticated> on custom pages if your admin uses requireAuth.
Permissions
With permissions, the authProvider stores a list of roles (e.g., admin, editor, user). The React components are responsible for checking the permissions and displaying or hiding content accordingly.
authProvider.getPermissions()
To use permissions, the authProvider must implement a getPermissions method with the following signature:
async function getPermissions(): Promise<any>;
Permissions can be stored in various formats:
- a string (e.g.
'admin'), - an array of roles (e.g.
['post_editor', 'comment_moderator', 'super_admin']) - an object with fine-grained permissions (e.g.
{ postList: { read: true, write: false, delete: false } }) - or even a function
The permissions format is free because react-admin never actually uses the permissions itself. You can use them in your code to hide or display content, redirect the user to another page, or display warnings.
Following is an example where the authProvider stores the user’s permissions in localStorage upon authentication, and returns these permissions when called with getPermissions:
// in src/authProvider.js
import decodeJwt from 'jwt-decode';

const authProvider = {
    async login({ username, password }) {
        const request = new Request('https://mydomain.com/authenticate', {
            method: 'POST',
            body: JSON.stringify({ username, password }),
            headers: new Headers({ 'Content-Type': 'application/json' }),
        });
        let response;
        try {
            response = await fetch(request);
        } catch (_error) {
            throw new Error('Network error');
        }
        if (response.status < 200 || response.status >= 300) {
            throw new Error(response.statusText);
        }
        const { token } = await response.json();
        const decodedToken = decodeJwt(token);
        localStorage.setItem('token', token);
        localStorage.setItem('permissions', decodedToken.permissions);
    },
    async checkError(error) { /* ... */ },
    async checkAuth() {
        if (!localStorage.getItem('token')) {
            throw new Error();
        }
    },
    async logout() {
        localStorage.removeItem('token');
        localStorage.removeItem('permissions');
    },
    async getIdentity() { /* ... */ },
    async getPermissions() {
        const role = localStorage.getItem('permissions');
        if (!role) {
            throw new Error('Permissions not found');
        }
        return role;
    }
};
usePermissions
If you need to check the permissions in any of the default react-admin views or on a custom page, you can use the usePermissions() hook. It calls the authProvider.getPermissions() method on mount and returns the permissions.
Here is an example of a Create view with a conditional Input based on permissions:
export const UserCreate = () => {
    const { isPending, permissions } = usePermissions();
    return (
        <Create>
            <SimpleForm>
                <TextInput source="username" />
                <EmailInput source="email" />
                {permissions === 'admin' && (
                    <SelectInput source="role" choices={roles} />
                )}
            </SimpleForm>
        </Create>
    )
}
Restricting Access to Resources or Views
If you pass a function as a child of the <Admin> component, react-admin will call this function with the permissions returned by authProvider.getPermissions(). This lets you conditionally include resources or views based on the user’s permissions.
export const App = () => (
    <Admin dataProvider={dataProvider} authProvider={authProvider}>
        {permissions => (
            <>
                {/* Restrict access to the edit view to admin only */}
                <Resource
                    name="customers"
                    list={VisitorList}
                    edit={permissions === 'admin' ? VisitorEdit : null}
                    icon={VisitorIcon}
                />
                {/* Only include the categories resource for admin users */}
                {permissions === 'admin'
                    ? <Resource name="categories" list={CategoryList} edit={CategoryEdit} icon={CategoryIcon} />
                    : null}
            </>
        )}
    </Admin>
);
Note that you can only provide one of such function child.
Restricting Access to Form Inputs
You might want to display some inputs conditionally, only to users with specific permissions. For that, you can use the useCanAccess and usePermissions hooks.
Here is an example of a comment edition form with access control on the comment moderation status:
export const CommentEdit = () => {
    const { isPending, error, canAccess } = useCanAccess({
        action: 'moderate',
        resource: 'comments',
    });
    const statuses = ['pending', 'accepted', 'rejected']
    return (
        <Edit>
            <SimpleForm>
                <TextInput source="author" />
                <TextInput source="body" multiline />
                {canAccess &&
                    <SelectInput source="status" choices={statuses} />
                }
            </SimpleForm>
        </Edit>
    );
}
Note: authProvider.canAccess() is asynchronous, so canAccess may be undefined on mount. The component will re-render when the authProvider resolves the promise. This may cause surprises when using canAccess in props that are not reactive, e.g. defaultValue:
export const CommentCreate = () => {
    const { isPending, error, canAccess } = useCanAccess({
        action: 'moderate',
        resource: 'comments',
    });
    const statuses = ['pending', 'accepted', 'rejected']
    return (
        <Create>
            <SimpleForm>
                <TextInput source="author" />
                <TextInput source="body" multiline />
                <SelectInput
                    source="status"
                    choices={statuses}
                    // This will not work as expected
                    defaultValue={canAccess ? 'accepted' : 'pending'}
                />
            </SimpleForm>
        </Create>
    );
}
The solution is to delay the rendering of the input until the authProvider call resolves:
export const CommentCreate = () => {
    const { isPending, error, canAccess } = useCanAccess({
        action: 'moderate',
        resource: 'comments',
    });
    const statuses = ['pending', 'accepted', 'rejected']
    return (
        <Create>
            <SimpleForm>
                <TextInput source="author" />
                <TextInput source="body" multiline />
                {!isPending && (
                    <SelectInput
                        source="status"
                        choices={statuses}
                        defaultValue={canAccess ? 'accepted' : 'pending'}
                    />
                )}
            </SimpleForm>
        </Create>
    );
}
Role-Based Access Control
If you need more complex permissions with roles and groups, the principle of least privilege, record-level permissions, explicit deny, and more, check the next section for the Role-Based Access Control.