
Security
Web applications often need to limit access to specific pages or resources to authenticated users (“authentication”) and ensure that users can only perform permitted actions (“authorization”).
React-admin supports both authentication and authorization, allowing you to secure your admin app with your preferred authentication strategy. Since there are many strategies (e.g., OAuth, MFA, passwordless, magic link), react-admin delegates this logic to an authProvider.
The Auth Provider
Authentication and authorization features rely on an authentication backend (e.g., OAuth server, API server, or SAML server). The authProvider acts as a bridge between react-admin and this authentication backend.
For example, when the user accesses a page component (<List>, <Edit>, <Create>, <Show>), react-admin checks if the user is authenticated by calling the authProvider.checkAuth() method. If the user is not authenticated, they are redirected to the login page:
try {
    await authProvider.checkAuth();
} catch (error) {
    // The user is not authenticated
    return <Redirect to="/login" />;
}
If you use JWT tokens, this method checks if the user token is valid and refreshes it if necessary.
An Auth Provider must implement the following methods:
const authProvider = {
    // Send username and password to the auth server and get back credentials
    async login(params) {/** ... **/},
    // Check if an error from the dataProvider indicates an authentication issue
    async checkError(error) {/** ... **/},
    // Verify that the user's credentials are still valid during navigation
    async checkAuth(params) {/** ... **/},
    // Remove local credentials and notify the auth server of the logout
    async logout() {/** ... **/},
    // Retrieve the user's profile
    async getIdentity() {/** ... **/},
    // (Optional) Check if the user has permission for a specific action on a resource
    async canAccess() {/** ... **/},
};
You can use an existing Auth Provider from the List of Available Auth Providers or create your own following the Building Your Own Auth Provider guide.
Authentication
Once you set an <Admin authProvider>, react-admin enables authentication automatically.
const App = () => (
    <Admin authProvider={authProvider}>
        ...
    </Admin>
);
For page components (<List>, <Edit>, <Create>, <Show>) and the dashboard, anonymous users are redirected to the login screen. To allow anonymous access on a page, use the disableAuthentication prop. For example, in a list view:
import { List } from 'react-admin';

const PostList = () => (
    <List disableAuthentication>
        ...
    </List>
);
For custom routes, anonymous users have access by default. To require authentication on a custom route, wrap the page component in an <Authenticated> component:
import { Admin, Resource, CustomRoutes, Authenticated } from 'react-admin';
import { Route } from "react-router-dom";
import { MyCustomPage } from './MyCustomPage';

const App = () => (
    <Admin authProvider={authProvider}>
        ...
        <CustomRoutes>
            <Route path="/my-custom-page" element={
                <Authenticated>
                    <MyCustomPage />
                </Authenticated>
            } />
        </CustomRoutes>
    </Admin>
);
If all your custom routes require authentication, use the <Admin requireAuth> prop instead of wrapping each route in <Authenticated>:
const App = () => (
    <Admin
        dataProvider={dataProvider}
        authProvider={authProvider}
        requireAuth
    >
        ...
    </Admin>
);
Check the Auth Provider Setup Guide for more details.
Authorization
After a user is authenticated, your application may need to check if the user has the right to access a specific resource or perform an action.
The authProvider.canAccess() method determines if the user can access a resource or perform an action. This flexibility allows you to implement various authorization strategies, such as:
- Role-Based Access Control (RBAC)
- Attribute-Based Access Control (ABAC)
- Access Control List (ACL).
Since the auth logic is abstracted by the Auth Provider, you can integrate react-admin with popular authorization solutions like Okta, Casbin, Cerbos, and others.
Page components (<List>, <Create>, <Edit>, <Show>) have built-in access control. Before rendering them, react-admin calls authProvider.canAccess() with the relevant action and resource parameters.
<Resource
    name="posts"
    // Available if canAccess({ action: 'list', resource: 'posts' }) returns true
    list={PostList}
    // Available if canAccess({ action: 'create', resource: 'posts' }) returns true
    create={PostCreate}
    // Available if canAccess({ action: 'edit', resource: 'posts' }) returns true
    edit={PostEdit}
    // Available if canAccess({ action: 'show', resource: 'posts' }) returns true
    show={PostShow}
/>;
To control access in your own components, use the useCanAccess() hook or the <CanAccess> component.
In the following example, only users who can access the delete action on the comments resource can see the DeleteCommentButton:
import Stack from '@mui/material/Stack';
import { CanAccess } from 'react-admin';

const CommentsToolbar = ({ record }) => (
    <Stack direction="row" spacing={2}>
        <ApproveCommentButton record={record} />
        <RejectCommentButton record={record} />
        <CanAccess action="delete" resource="comments" record={record}>
            <DeleteCommentButton record={record} />
        </CanAccess>
    </Stack>
);
Check the Authorization Guide for more details.
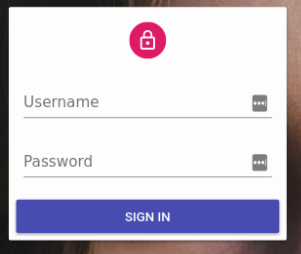
Login Page
React-admin displays a login page when the user is not authenticated. The login page is a simple form with username and password fields.
You can customize the login page by setting the <Admin loginPage> prop.
For example, to use an email field instead of a username field, use the LoginWithEmail component:
import { Admin, LoginWithEmail } from 'react-admin';
import authProvider from './authProvider';

const App = () => (
    <Admin loginPage={LoginWithEmail} authProvider={authProvider}>
        ...
    </Admin>
);
If you need other login options (magic link, Email OTP, OAuth provider, etc), you can pass a custom login component, leveraging the useLogin hook to call authProvider.login()::
// in src/MyLoginPage.js
import { useState } from 'react';
import { useLogin, useNotify, Notification } from 'react-admin';

const MyLoginPage = ({ theme }) => {
    const [email, setEmail] = useState('');
    const [password, setPassword] = useState('');
    const login = useLogin();
    const notify = useNotify();

    const handleSubmit = e => {
        e.preventDefault();
        login({ email, password }).catch(() =>
            notify('Invalid email or password')
        );
    };

    return (
        <form onSubmit={handleSubmit}>
            <input
                name="email"
                type="email"
                value={email}
                onChange={e => setEmail(e.target.value)}
            />
            <input
                name="password"
                type="password"
                value={password}
                onChange={e => setPassword(e.target.value)}
            />
        </form>
    );
};

export default MyLoginPage;

// in src/App.js
import { Admin } from "react-admin";
import { dataProvider } from "./dataProvider";
import { authProvider } from "./authProvider";
import MyLoginPage from "./MyLoginPage";

const App = () => (
    <Admin loginPage={MyLoginPage} authProvider={authProvider} dataProvider={dataProvider}>
        ...
    </Admin>
);
You can also entirely turn off the /login route by passing false to this prop. In this case, the authProvider must handle redirecting unauthenticated users to a custom login page by returning a redirectTo field in response to checkAuth (see authProvider.checkAuth() for details). If you fail to customize the redirection, the app may end up in an infinite loop.
const authProvider = {
    // ...
    async checkAuth() {
        // ...
        if (!authenticated) {
            throw { redirectTo: '/no-access' };
        }
    },
};

const App = () => (
    <Admin authProvider={authProvider} loginPage={false}>
        ...
    </Admin>
);
Calling The Auth Provider
React-admin provides several ways to call authentication provider methods in your components:
useLogin: Calls theauthProvider.login()method. Use it in custom login screens.useLogout: Calls theauthProvider.logout()method. Use it in custom logout buttons.<Authenticated>: Redirects to the login page if the user is not authenticated. Use it to protect custom routes.useAuthState: Calls theauthProvider.checkAuth()method. Use it to display different UI elements based on the user’s authentication state.useAuthenticated: Calls theauthProvider.checkAuth()method and redirect to the login page if the user is not authenticated. Use it to protect custom routes.useGetIdentity: Calls theauthProvider.getIdentity()method. Use it to display the user’s profile information.useCanAccess: Calls theauthProvider.canAccess()method. Use it to display different UI elements based on the user’s permissions.<CanAccess>: Renders its children only ofauthProvider.canAccess()method returns true.useAuthProvider: Returns theauthProviderinstance. Use it to call other methods of theauthProvider.