
Remix Integration
Remix is a Node.js framework for server-side-rendered React apps. But even if react-admin is designed to build Single-Page Applications, Remix and react-admin integrate seamlessly.
These instructions are targeting Remix v2. For Remix v3 check out the React Router Framework Integration guide.
Setting Up Remix
Let’s start by creating a new Remix project. Run the following command:
npx create-remix@latest
This script will ask you for more details about your project. You can use the following options:
- The name you want to give to your project, e.g.
remix-admin - Initialize a new git repository? Choose Yes
- Install dependencies with npm? Choose Yes
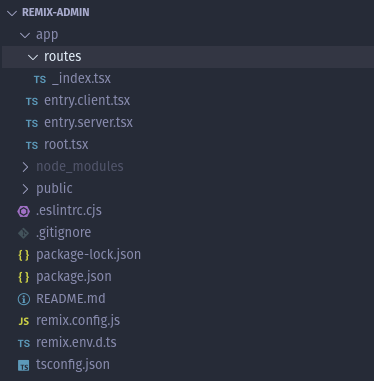
The project structure should look like this:
Setting Up React-Admin In Remix
Add the react-admin npm package, as well as a data provider package. In this example, we’ll use ra-data-json-server to connect to a test API provided by JSONPlaceholder.
cd remix-admin
npm add react-admin ra-data-json-server
Edit the vite.config.ts file to prevent Remix from executing the data provider package server-side:
import { vitePlugin as remix } from "@remix-run/dev";
import { defineConfig } from "vite";
import tsconfigPaths from "vite-tsconfig-paths";

export default defineConfig({
 plugins: [
  remix({
   future: {
    v3_fetcherPersist: true,
    v3_relativeSplatPath: true,
    v3_throwAbortReason: true,
   },
  }),
  tsconfigPaths(),
 ],
+ ssr: {
+  noExternal: ['ra-data-json-server'] // or the dataProvider you are using
+ },
});
Tip: If you’re using yarn, Remix and react-admin both install react-router, and due to the way each library handles its dependencies, this results in duplicate packages. To avoid this, use yarn resolutions to force React Admin to use the same version of react-router as Remix. So add the following to the package.json file:
{
  // ...
  "resolutions": {
    "react-router": "6.26.1",
    "react-router-dom": "6.26.1"
  }
}
And call yarn again to install the dependencies:
yarn
Adding React-Admin In A Sub Route
In many cases, the admin is only a part of the application. For instance, you may want to render the admin in a subpath like /admin.
To do so, add a splat route, i.e. a route that matches all URLs inside a sub path. A splat route is named $.tsx. Create a file called app/routes/admin.$.tsx file with the following content:
// in app/routes/admin.$.tsx
import { Admin, Resource, ListGuesser } from "react-admin";
import jsonServerProvider from "ra-data-json-server";

const dataProvider = jsonServerProvider("https://jsonplaceholder.typicode.com");

export default function App() {
  return (
    <Admin basename="/admin" dataProvider={dataProvider}>
      <Resource name="posts" list={ListGuesser} />
      <Resource name="comments" list={ListGuesser} />
    </Admin>
  );
}
Tip Don’t forget to set the <Admin basename> prop, so that react-admin generates links relative to the “/admin/” subpath:
You can now start the app in development mode with npm run dev. The admin should render at http://localhost:5173/admin/, and you can use the Remix routing system to add more pages.
Adding an API
Remix allows to serve an API from the same server. You could use this to build a CRUD API by hand. However, we consider that building a CRUD API on top of a relational database is a solved problem and that developers shouldn’t spend time reimplementing it.
For instance, if you store your data in a PostgreSQL database, you can use PostgREST to expose the data as a REST API with zero configuration. Even better, you can use a Software-as-a-Service like Supabase to do that for you.
In such cases, the Remix API can only serve as a Proxy to authenticate client queries and pass them down to Supabase.
Let’s see an example in practice.
First, create a Supabase REST API and its associated PostgreSQL database directly on the Supabase website (it’s free for tests and low usage). Once the setup is finished, use the Supabase manager to add the following tables:
postswith fields:id,title, andbodycommentswith fields:id,name,body, andpostId(a foreign key to theposts.idfield)
You can populate these tables via the Supabse UI if you want. Supabase exposes a REST API at https://YOUR_INSTANCE.supabase.co/rest/v1.
Next, create a configuration to let the Remix app connect to Supabase. As Remix supports dotenv by default in development mode, you just need to create a .env file:
# In `.env`
SUPABASE_URL="https://MY_INSTANCE.supabase.co"
SUPABASE_SERVICE_ROLE="MY_SERVICE_ROLE_KEY"
Tip: This example uses the service role key here and not the anonymous role. This allows mutations without dealing with authorization. You shouldn’t do this in production, but use the Supabase authorization feature instead.
Time to bootstrap the API Proxy. Create a new Remix route at app/routes/admin.api.$.tsx. Inside this file, a loader function should convert the GET requests into Supabase API calls, and an action function should do the same for POST, PUT, and DELETE requests.
// in /app/routes/admin.api.$.tsx
import { type ActionFunctionArgs, type LoaderFunctionArgs } from "@remix-run/node";

// handle read requests (getOne, getList, getMany, getManyReference)
export const loader = ({ request }: LoaderFunctionArgs) => {
  const apiUrl = getSupabaseUrlFromRequestUrl(request.url);

  return fetch(apiUrl, {
    headers: {
      prefer: request.headers.get("prefer") ?? "",
      accept: request.headers.get("accept") ?? "application/json",
      "Accept-Encoding": "",
      apiKey: `${process.env.SUPABASE_SERVICE_ROLE}`,
      Authorization: `Bearer ${process.env.SUPABASE_SERVICE_ROLE}`,
    },
  });
};

// handle write requests (create, update, delete, updateMany, deleteMany)
export const action = ({ request }: ActionFunctionArgs) => {
  const apiUrl = getSupabaseUrlFromRequestUrl(request.url);

  return fetch(apiUrl, {
    method: request.method,
    body: request.body,
    headers: {
      prefer: request.headers.get("prefer") ?? "",
      accept: request.headers.get("accept") ?? "application/json",
      "Accept-Encoding": "",
      apiKey: `${process.env.SUPABASE_SERVICE_ROLE}`,
      Authorization: `Bearer ${process.env.SUPABASE_SERVICE_ROLE}`,
    },
  });
};

const ADMIN_PREFIX = "/admin/api";

const getSupabaseUrlFromRequestUrl = (url: string) => {
  const startOfRequest = url.indexOf(ADMIN_PREFIX);
  const query = url.substring(startOfRequest + ADMIN_PREFIX.length);
  return `${process.env.SUPABASE_URL}/rest/v1${query}`;
};
Tip: Some of this code is really PostgREST-specific. The prefer header is required to let PostgREST return one record instead of an array containing one record in response to getOne requests. A proxy for another CRUD API will require different parameters.
Update the react-admin data provider to use the Supabase adapter instead of the JSON Server one. As Supabase provides a PostgREST endpoint, we’ll use ra-data-postgrest:
npm add @raphiniert/ra-data-postgrest
Update your vite.config.ts to add @raphiniert/ra-data-postgrest to the noExternal array:
import { vitePlugin as remix } from "@remix-run/dev";
import { defineConfig } from "vite";
import tsconfigPaths from "vite-tsconfig-paths";

export default defineConfig({
 plugins: [
  remix({
   future: {
    v3_fetcherPersist: true,
    v3_relativeSplatPath: true,
    v3_throwAbortReason: true,
   },
  }),
  tsconfigPaths(),
 ],
+ ssr: {
+  noExternal: ['@raphiniert/ra-data-postgrest']
+ },
});
Finally, update your Admin dataProvider:
// in app/routes/admin.$.tsx
import { Admin, Resource, ListGuesser, fetchUtils } from "react-admin";
import postgrestRestProvider, { defaultPrimaryKeys, defaultSchema } from '@raphiniert/ra-data-postgrest';
import styles from "~/styles/admin.css";

export function links() {
  return [{ rel: "stylesheet", href: styles }];
}

const dataProvider = postgrestRestProvider({
    apiUrl: '/admin/api',
    httpClient: fetchUtils.fetchJson,
    defaultListOp: 'eq',
    primaryKeys: defaultPrimaryKeys,
    schema: defaultSchema
});

export default function App() {
  return (
    <Admin basename="/admin" dataProvider={dataProvider}>
      <Resource name="posts" list={ListGuesser} />
      <Resource name="comments" list={ListGuesser} />
    </Admin>
  );
}
That’s it! Now Remix both renders the admin app and serves as a proxy to the Supabase API. You can test the app by visiting http://localhost:5173/admin/, and the API Proxy by visiting http://localhost:5173/admin/api/posts.
Note that the Supabase credentials never leave the server. It’s up to you to add your own authentication to the API proxy.
Sourcemaps in production
By default, Vite won’t include the TypeScript sourcemaps in production builds. This means you’ll only have the react-admin ESM builds for debugging. Should you prefer to have the TypeScript sources, you’ll have to configure some Vite aliases:
// in vite.config.ts
import { defineConfig } from "vite";
import path from "path";
import react from "@vitejs/plugin-react";

const alias = [
  { find: 'react-admin', replacement: path.resolve(__dirname, './node_modules/react-admin/src') },
  { find: 'ra-core', replacement: path.resolve(__dirname, './node_modules/ra-core/src') },
  { find: 'ra-ui-materialui', replacement: path.resolve(__dirname, './node_modules/ra-ui-materialui/src') },
  // add any other react-admin packages you have
]

export default defineConfig({
  plugins: [react()],
  build: { sourcemap: true },
  resolve: { alias },
});